Speech Analyzer


Operating System:

Terminal:


Shell:


Editor:


Package Manager:


Programming Language:


Utility:


Extension:


Operating System:
Terminal:
Shell:
Editor:
Package Manager:


Programming Language:
Utility:

Extension:
Speech Analyzer is an application built on top of Label Studio, specifically optimized for dialogue analysis. It enables users to label, edit, and annotate transcriptions generated using Transcriber.
For general information on the Label Studio app, refer to the corresponding documentation. This includes Account information and Database Setup.
Dialogue Analysis Workflow
A comprehensive dialogue analysis on UCloud involves transcribing audio files using Transcriber, followed by transcription analysis with Speech Analyzer.
Speech Analyzer streamlines and automates the configuration of Label Studio by providing pre-defined settings, including:
Project name.
Source Storage for audio files and tasks list.
Labeling Interface template.
App Parameters
Mandatory parameters
The application requires three input directories:
Base Data Directory: used to store the task list, metadata, and local settings.
Audio Files: directory containing the input audio files.
Transcription Files: directory containing the corresponding transcription files (JSON file format is required).
The Speech Analyzer workflow is designed to integrate seamlessly with the app Transcriber. Specifically, the Audio Files and Transcription Files directories correspond to the input and output directories of Transcriber, respectively.
A typical directory structure might look like this:
$ tree Audio-dir
Tip
Audio-dir/
├── DIALOGUE1.mp4
└── DIALOGUE2.mp4
$ tree Transcription-dir
Tip
Transcription-dir/
├── DIALOGUE1_large-v3-turbo_en.csv
├── DIALOGUE1_large-v3-turbo_en.json
├── DIALOGUE1_large-v3-turbo_en.srt
├── DIALOGUE2_large-v3-turbo_en.csv
├── DIALOGUE2_large-v3-turbo_en.json
└── DIALOGUE2_large-v3-turbo_en.srt
The names of the transcription files reflect the model used during transcription, here for example large-v3-turbo.
Important
The Transcription Files directory may contain various file formats, but it must include files in the JSON format, which is required for processing.
Initialization
For information on how to use the Initialization parameter, please refer to the Initialization - Bash script and Initialization - pip packages section of the documentation.
Annotated files
This optional parameter allows to select the directory where edited transcription files will be saved. If not specified the Annotation directory is /work/annotations.
Edited transcriptions are exported in three formats: JSON, SRT, and DOCX. The SRT format allows to review and further edit the files through the app terminal, via a text editor, or by using an integrated development environment such as Coder.
Note
The input files present in the Transcription Files directory are not modified during the editing process in the Speech Analyzer interface.
Whisper model
This optional parameter specifies the Whisper model used to generate the transcriptions. By default, the model is set to large-v3.
Speaker mapping
This optional parameter allows to customize speaker labels in the transcriptions.
To remap a speaker name, use the following format: SPEAKER_00>NEW_SPEAKER_00.
As a consequence, at startup, all the occurrences of SPEAKER_00 will be automatically replaced with NEW_SPEAKER_00.
Multiple speakers can be renamed simultaneously: SPEAKER_00>NEW_SPEAKER_00,SPEAKER_01>NEW_SPEAKER_01,....
Minimum segment duration
The optional parameter allows to remove segments that are shorter than the specified duration.
Access the Interface
When the application starts, the Label Studio web interface will prompt the user to sign up. By default, the username is ucloud@email.dk and the password is ucloud.
Login credentials can be specified before submitting the job, via the User Email and User Password optional parameters.
The logged-in user will be assigned as the project administrator.
Invite People
The Label Studio project administrator can invite other users to collaborate by sharing an invitation link.
To generate this link:
Click on Organization in the dropdown menu at the top-left corner of the page (next to Label Studio).
Select Add People.
Once the invite link is shared and the user signs up, they will be automatically added to the project. The administrator can then manage user permissions via the admin page.
Important
To invite users to the project, the app must be deployed with a public link.
Project General Settings
Once logged in, a Project along with the Audio Files and Task List storage is automatically created. By default, the project is named Speech Analyzer.
It is possible to access the Project tasks by clicking on the project card located on the left side of the page. The synchronized tasks, based on the transcriptions in the Transcription Files directory, are displayed as numbered entries.
Several project settings can be changed, including the project name, by clicking on the Settings button in the top-right of the page.

Important
While collaborating with other users and assigning tasks to them, it is important that the administrator is the only one accessing the Settings page.
Sync new tasks
New tasks are automatically created whenever new audio files and their corresponding transcriptions are added to the input directories. The application synchronizes the Task List and Audio Files Storage every 10 seconds.
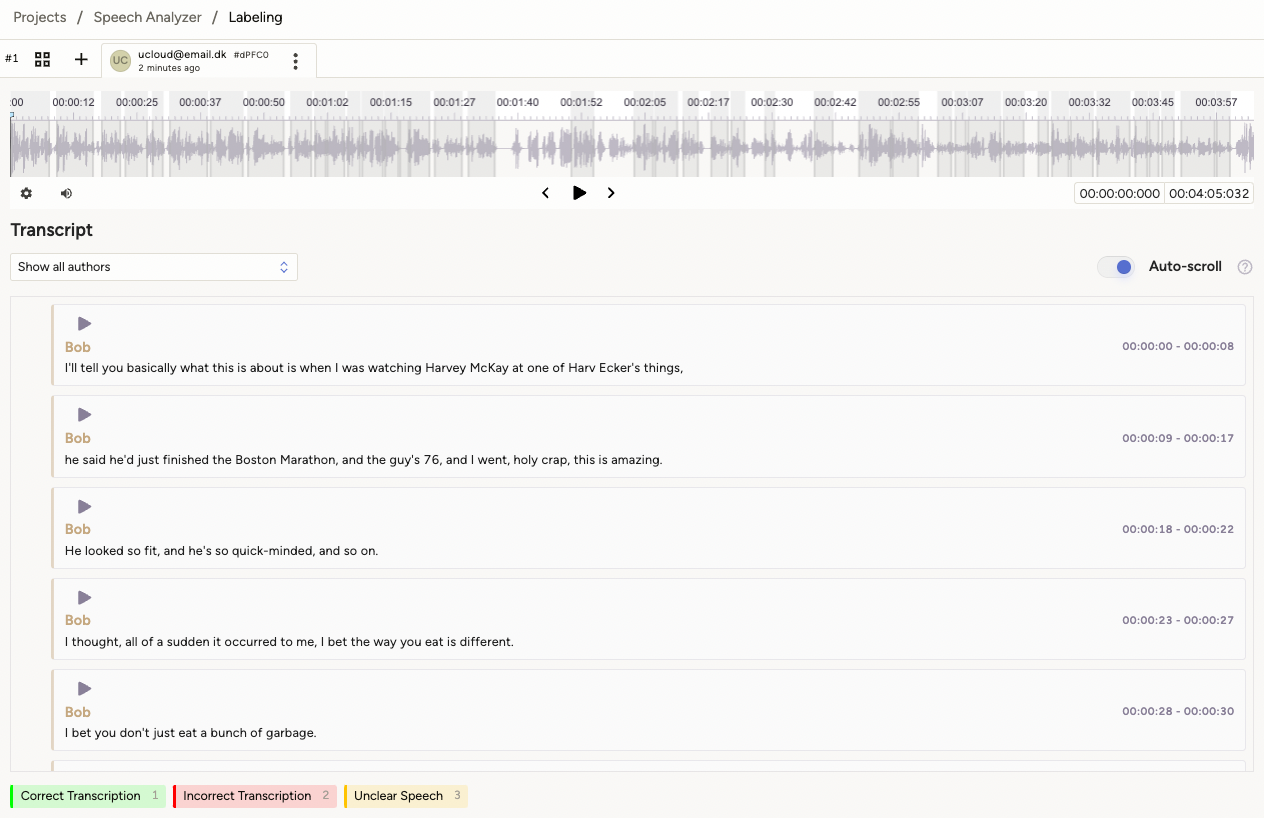
Editing Transcription Tasks
A task can be clicked to open the Labeling page. At the top of the page, audio segments can be selected with the mouse and played back. Specific frames can be focused on for detailed review.
Below, the corresponding transcriptions are displayed, with speakers clearly indicated. Transcriptions can be filtered by author or speaker.
Audio segments can be edited to correct either the text or speaker labels. Default tags are provided and can be used to highlight necessary changes.
Edit text
Editing can be done for whole segments or for a part of a segment. To edit a whole segment, the user should first click a tag (for example Incorrect transcription) and then click the square button located the right of the timestamp of the given segment.
To edit only a part of a segment, the user should first select a tag and then select the part of the segment they want to correct by highlighting it with the mouse.
Note
It's only possible to select one sub-part per segment. Therefore, when selecting a part of a segment, make sure that it encompasses everything that needs to be edited.
For each tag, it is possible to correct the text and/or the speaker name.
When the segment has been labeled it can be edited:
The transcription line should be selected by double-clicking with the mouse.
The line can be copied using Ctrl+C (or Cmd+C).
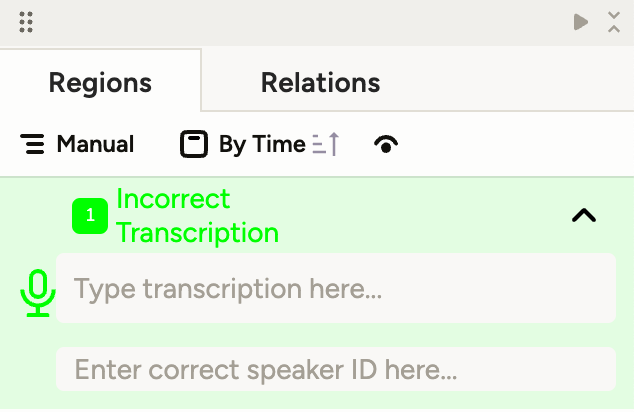
The copied text should be pasted into the Type transcription here... field using Ctrl+V (or Cmd+V). The text should be edited from there.
Alternatively:
A whitespace can be inserted in the Type transcription here... field to delete the entire line.
Edit speaker name
The speaker name can be changed through the interface by clicking on the task name, selecting the relevant audio fragment and tag, and entering: OLD_SPEAKER_NAME>NEW_SPEAKER_NAME in the Enter correct speaker ID here... field.
Speaker name replacement can also be performed by specifying the corresponding parameters during job submission.
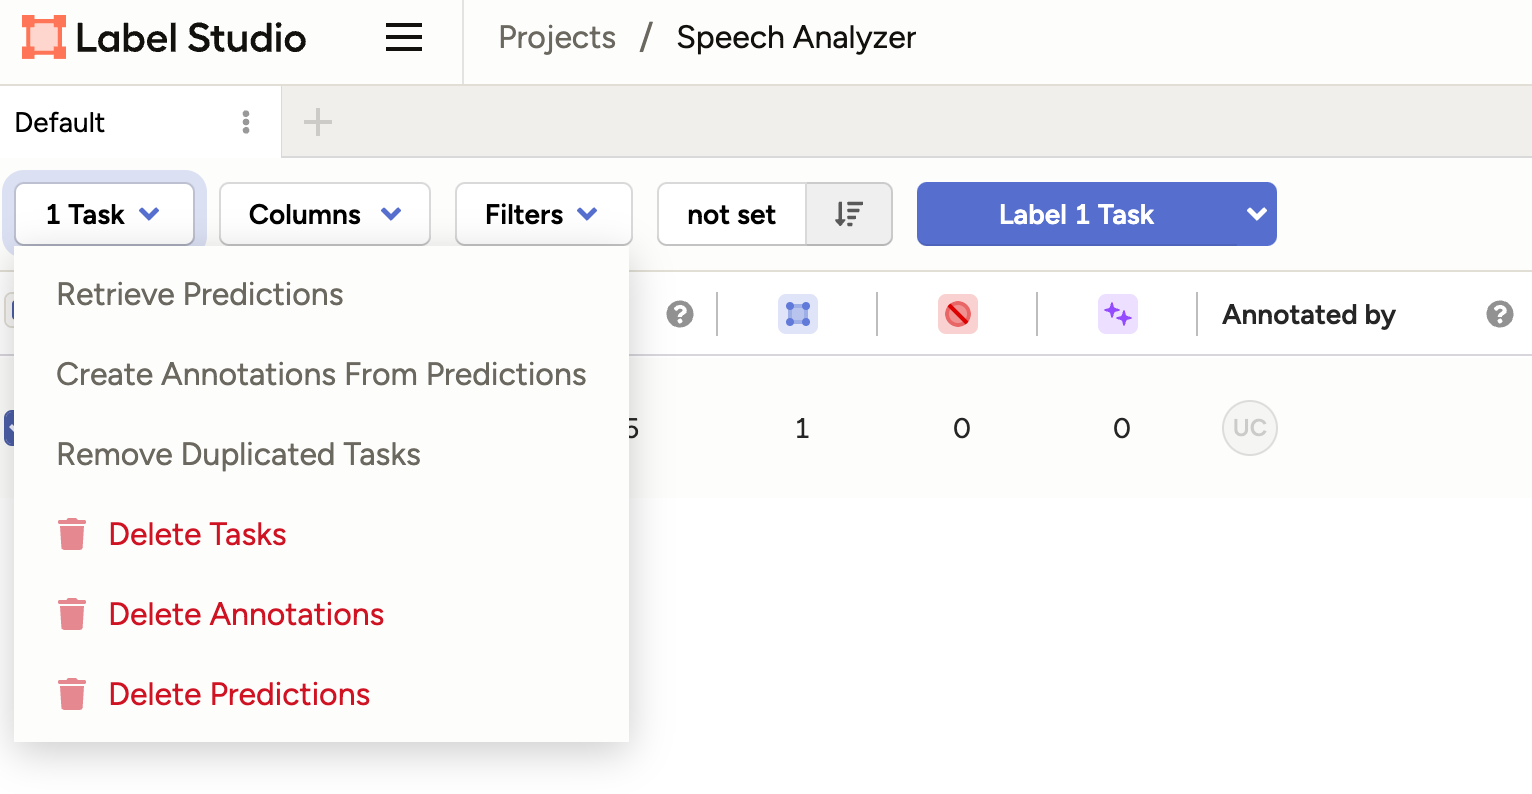
Delete Tasks
Tasks can be deleted by accessing the project, selecting them by checking the box to the left of the task number, and choosing Delete from the Task dropdown menu.
Administrator Access
To access the Django administration page, /projects/1/… should be removed from the URL and replaced with admin. The URL will look something like this: https://app-5106579-0.cloud.sdu.dk/admin.
Users with administrator credentials will be granted access to the Django administration interface.
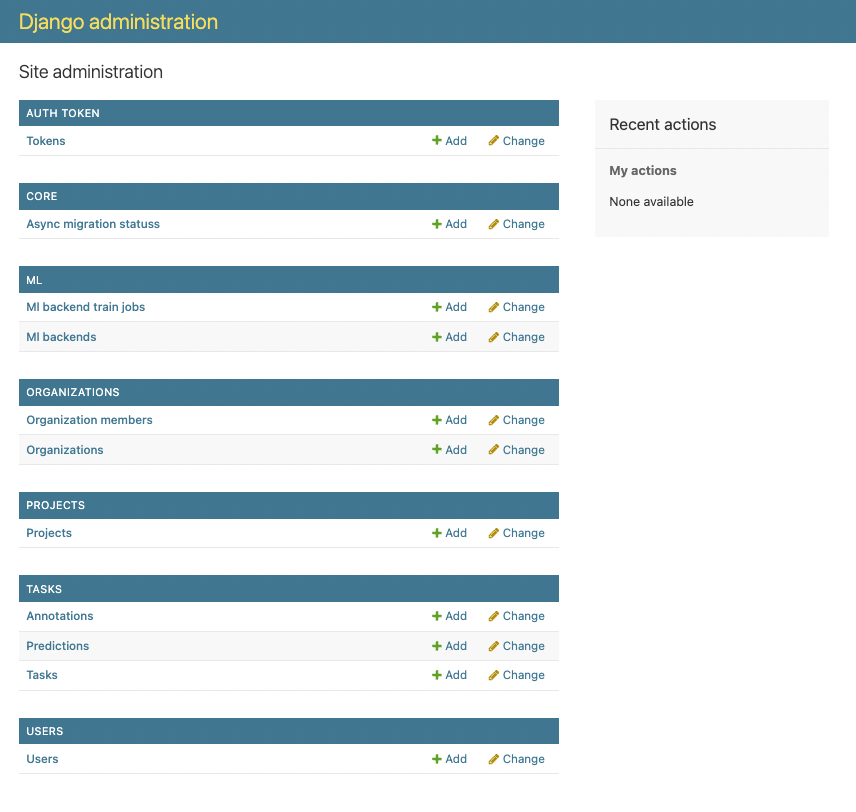
From this page, various administrative operations can be performed, including the addition of new users.
To return to the project page, admin should be removed from the URL, and the page reloaded by pressing Enter.
Add a new user
From the Django administration page, Users should be selected at the bottom of the page, followed by Add user on the right side.
Enter the new username and password and then click on Save and continue editing. The user status (Active, Staff, or Superuser) can then be selected. Access permissions will vary depending on the chosen status.
Before the user becomes active within the project, they must be added to the project Organization. This can be done by selecting Organization Members from the left-side menu and clicking Add.
Important
To collaborate with other created users and assign tasks, the app must be deployed with a public link.
Contents