Submit a Job
To initiate a job submission on UCloud, users need to select the application card and configure the required job parameters.
By clicking on the app card, users will be redirected to the job submission page. Here, they will find a brief description of the application along with several panels for job configuration and identification, including Job information, Storage, Connectivity, Parameters and E-mail notification settings. An example is shown below.
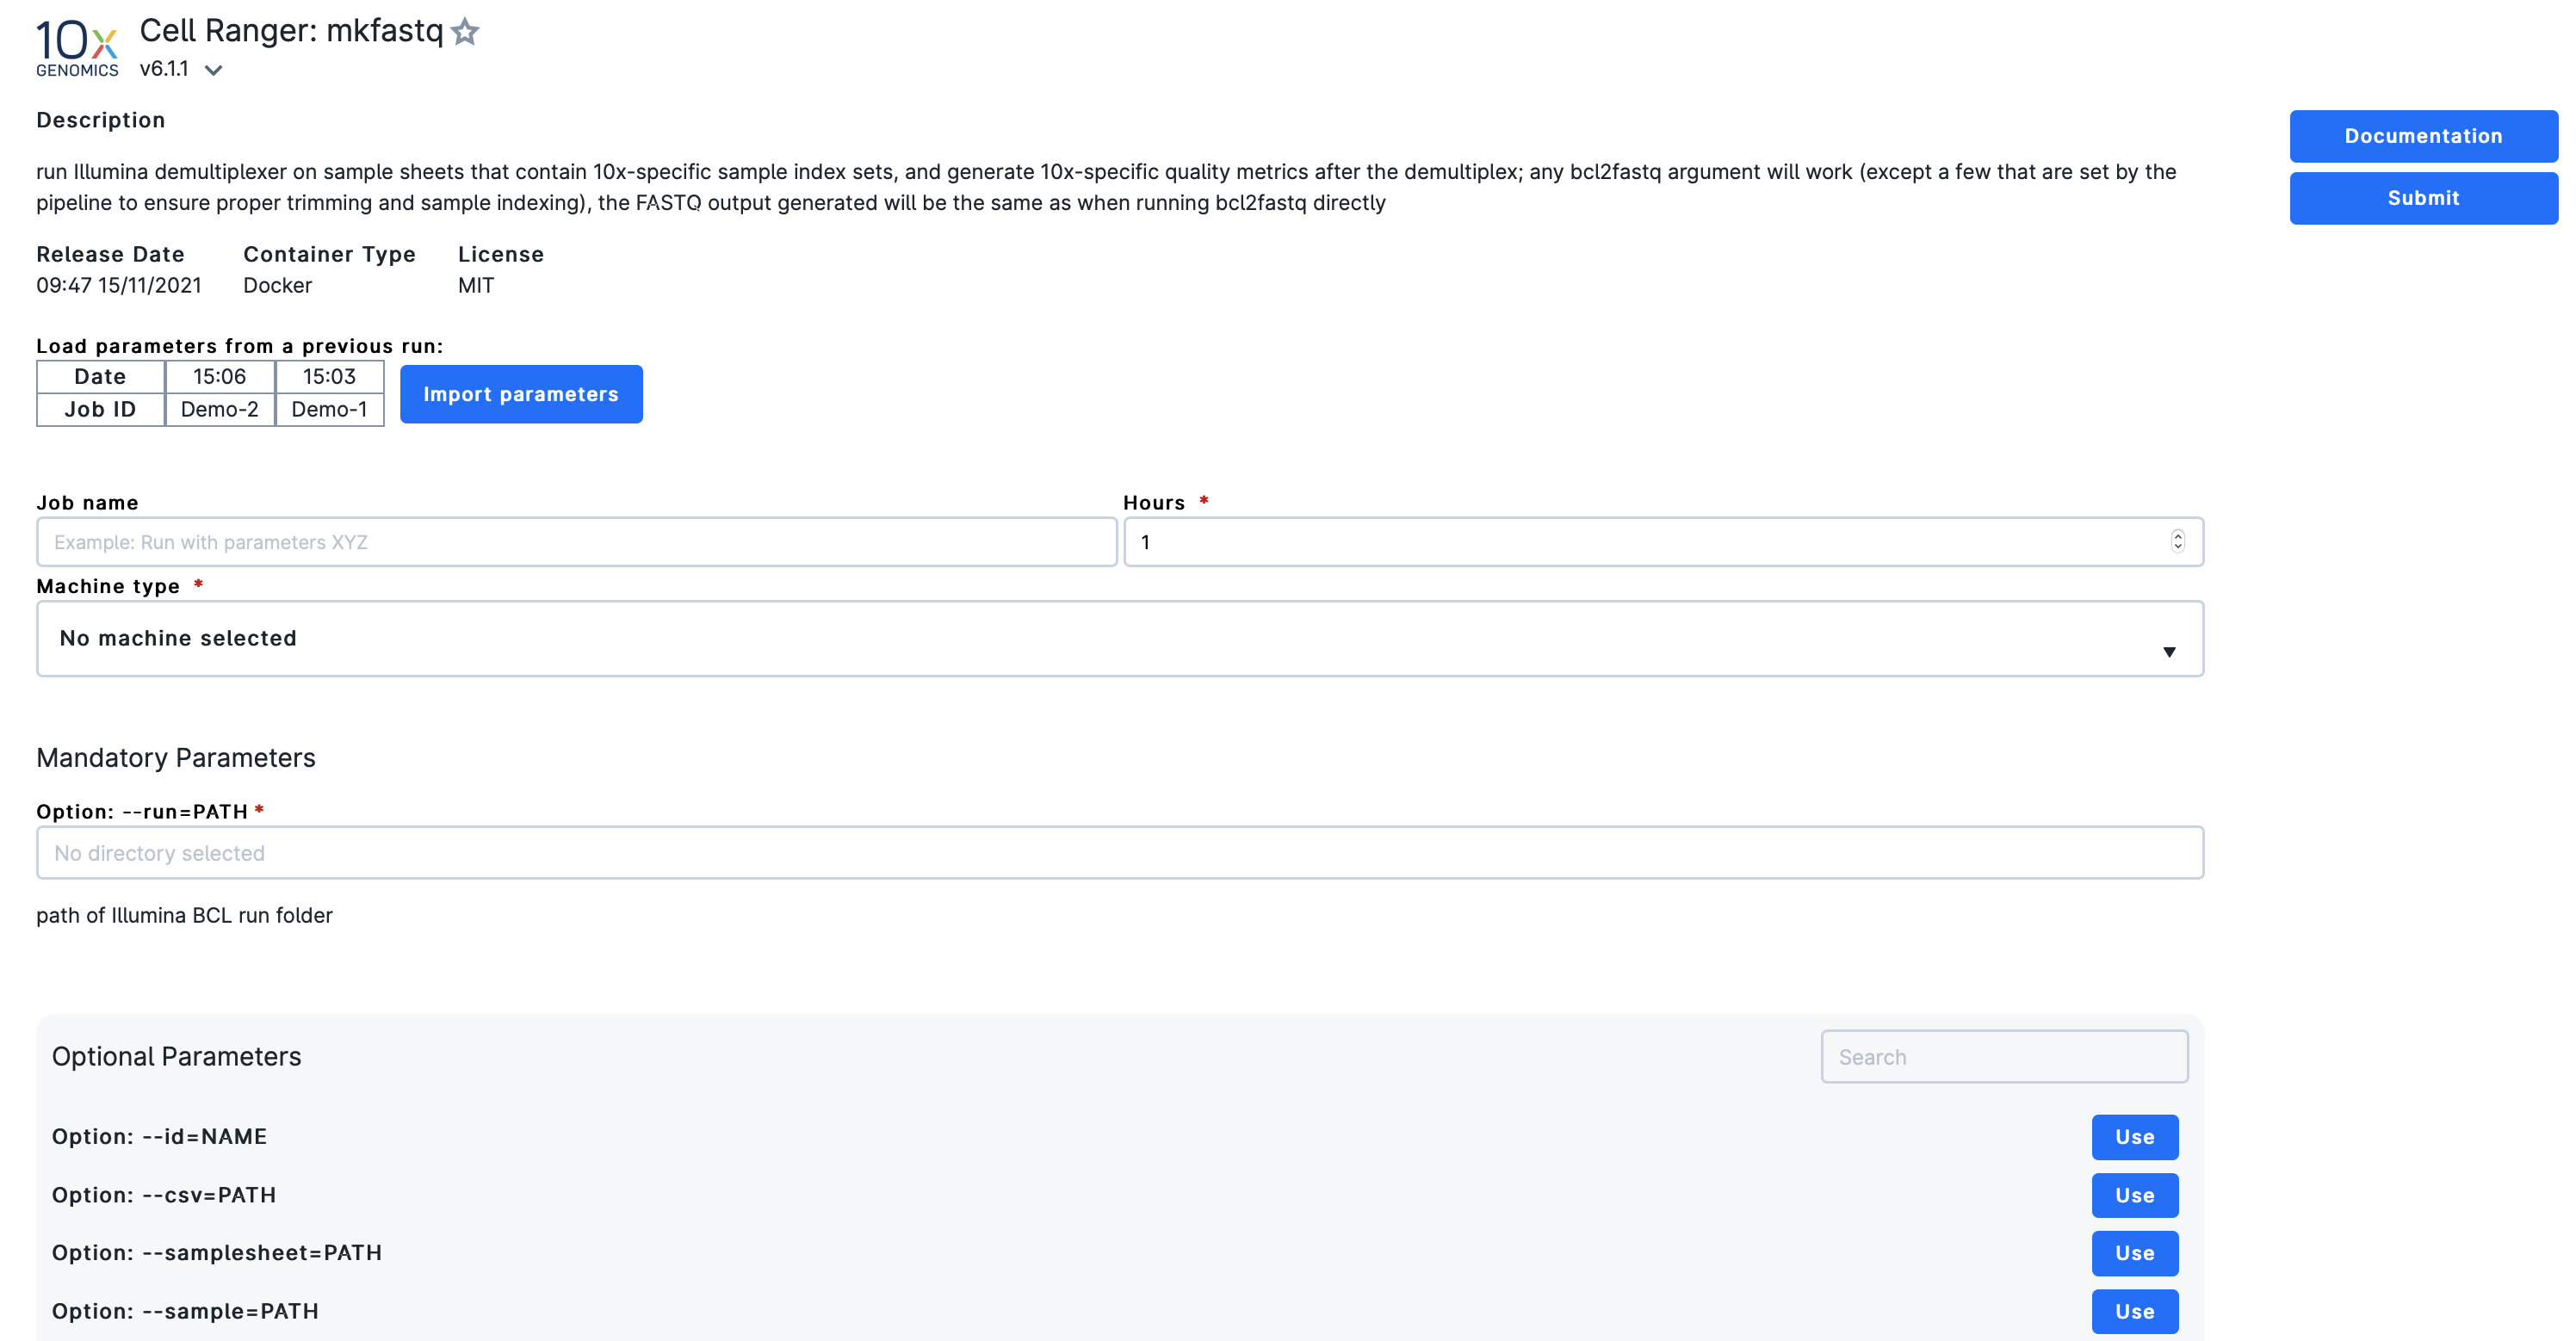
From this page users can also:
Bookmark a particular app by clicking on the star icon on the right side of its name. Starred applications can be accessed under Applications in the navigation menu.
Access the application documentation page, by clicking on the button:
After filling in the mandatory fields, users can initiate the job by clicking on the button:
Job Information
On the Job information panel, users can assign a name to the job, choose the flavor and the version, set a time limit, and choose the machine type.
Load parameter values
From this panel, it is possible to load parameter values from previous jobs.
Clicking on
will display a window, similar to the one below.
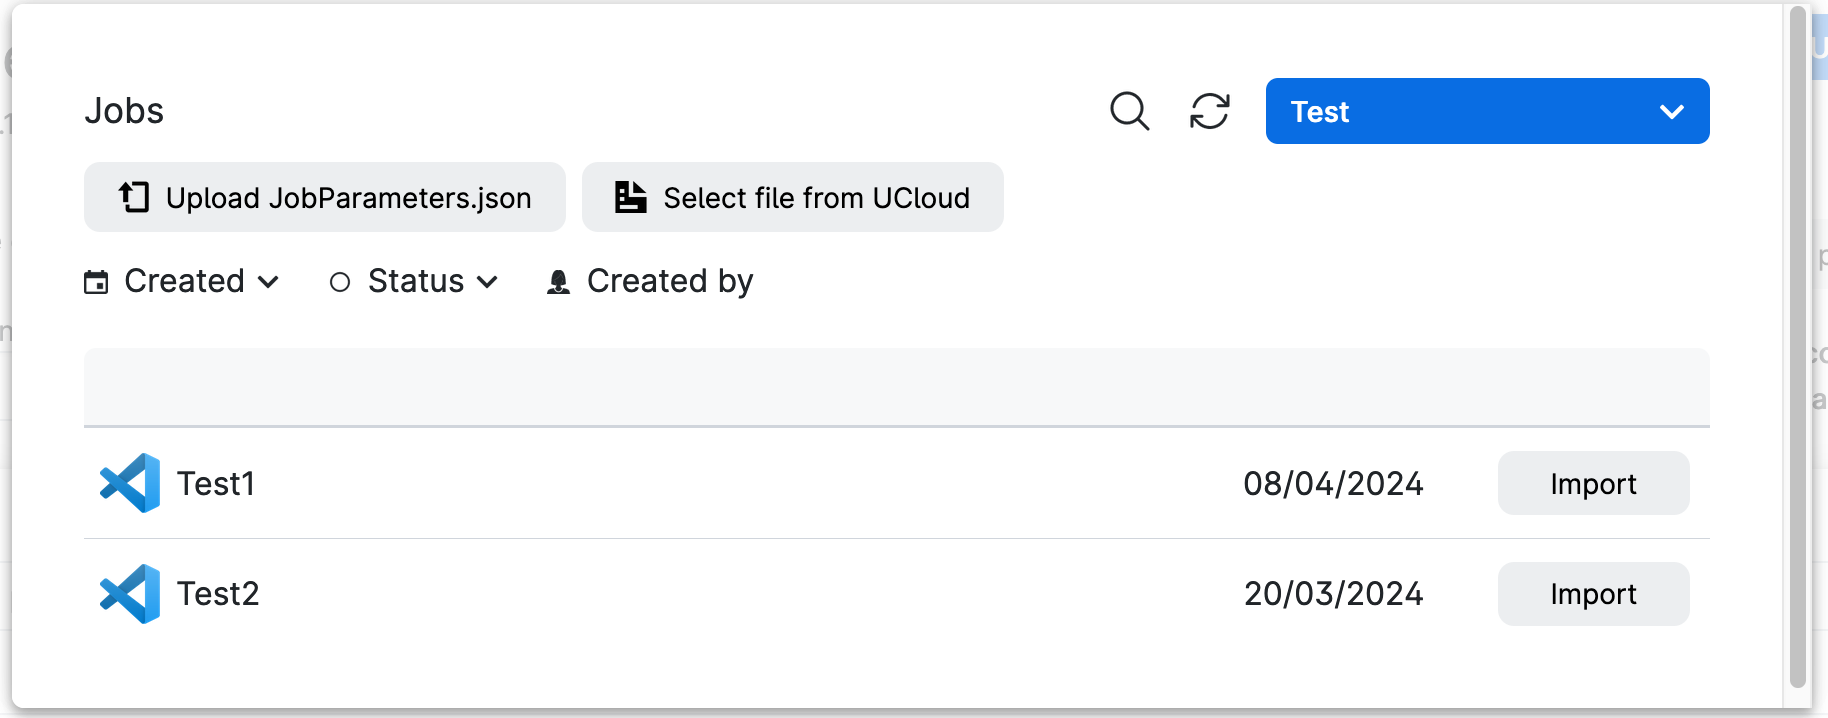
The parameters from the selected run can be imported by clicking on
In addition, users can set the job's parameter values either by uploading a JobParameters.json file from their computer or selecting such a file from among their UCloud files.
From this window users can also search for a specific run name by using the search button:
By clicking on a previous run, a Properties button appears, which will redirect the user to the run's progress view page, which summarizes information about the job status, allocated resources etc. The progress view page is also accessible from the Compute section of the navigation menu by clicking on the job name.
Flavor and version
From this panel users can select the application flavor from the menu in the Job information panel. This selection might pertain to variations such as different implementations for various providers, optimizations for various programming languages, or the inclusion of different tools.
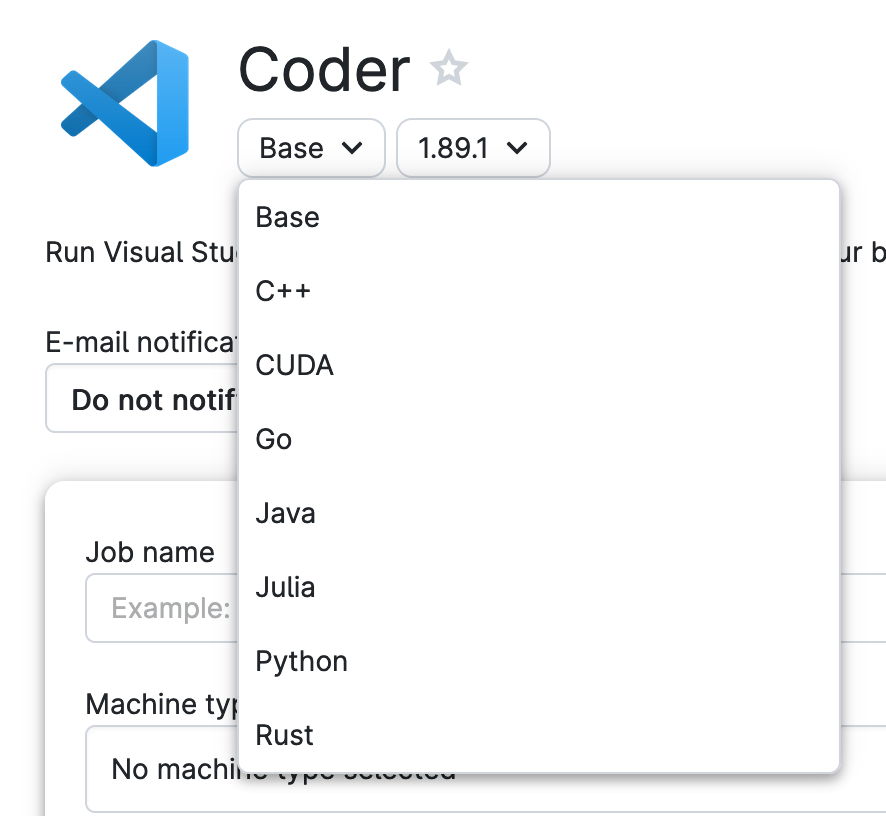
In addition, users can choose the version from the drop-down menu located on the right side of the app flavor selector. By default, the latest available version of the application is automatically selected, if applicable.
Job lifetime
On the right side of the Job information panel, users should indicate the expected time required to complete the run in hours. Providing an accurate estimate of the program execution time is crucial for efficient job scheduling and timely completion.
Note
The time allocation can be extended while the job is in progress.
Machine type
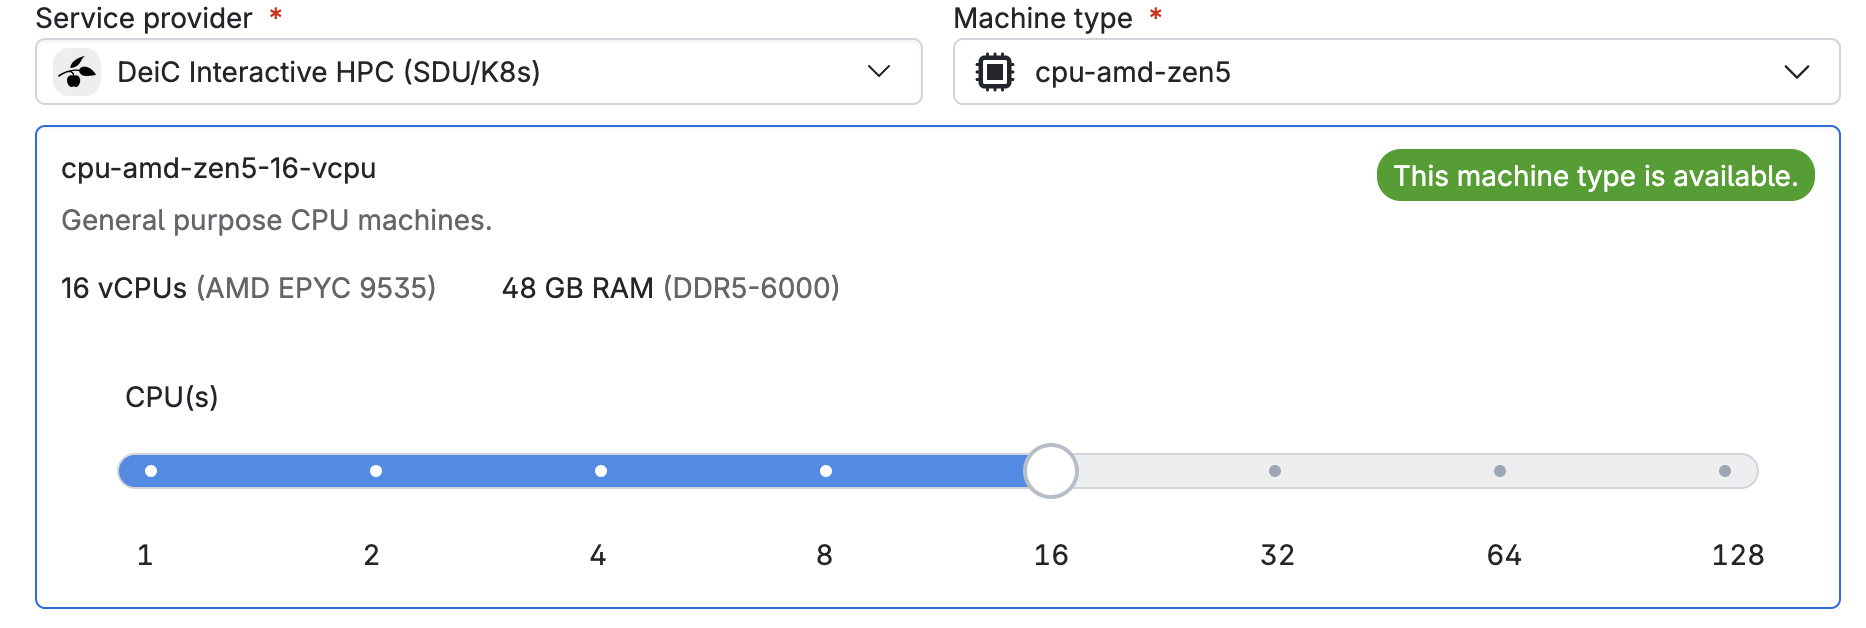
Before submitting a job, users must select the provider and the machine type, which corresponds to resources on a single node. The machine selection is made from the available products within the active project and on the chosen provider.
Distributed computing across multiple cluster nodes is only enabled for a few supported applications running on the DeiC Interactive HPC (SDU/K8s) provider. For practical use cases, refer to the Spark Cluster and the Terminal Ubuntu apps. In such cases, users must also specify the number of nodes.
After selecting the machine type, both the estimated cost of the run and the current balance are displayed on the right side of the page. If the current balance in the active project is enough to cover the estimated cost of the run, users can proceed with the job submission. However, if the available funds are insufficient, a warning message is displayed along with a button to apply for additional resources.
Note
Choosing a machine with a high number of resources may lead to longer job scheduling times.
When selecting a machine type from the drop-down menu, the machine's current availability is indicated on the right-hand side.
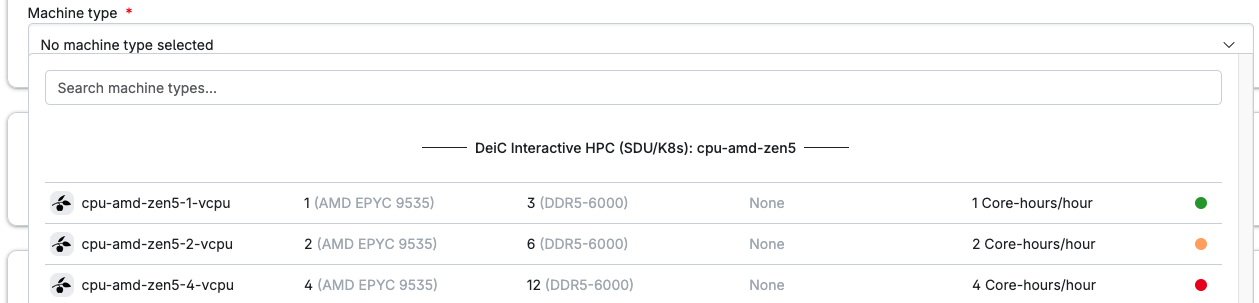
The current machine type availability is indicated using three colors:
 indicates that the machine type is available for use.
 indicates that the machine type is available for use but the cluster is busy.
 indicates that the machine type is not currently available, so the job will have to wait in the queue.
After choosing a machine type, the machine size is selected using a slider:
Storage Panel
From this panel, users can attach folders as data volume inside the application container.
A dialog box like the one shown below enables users to search through their drives and project spaces.
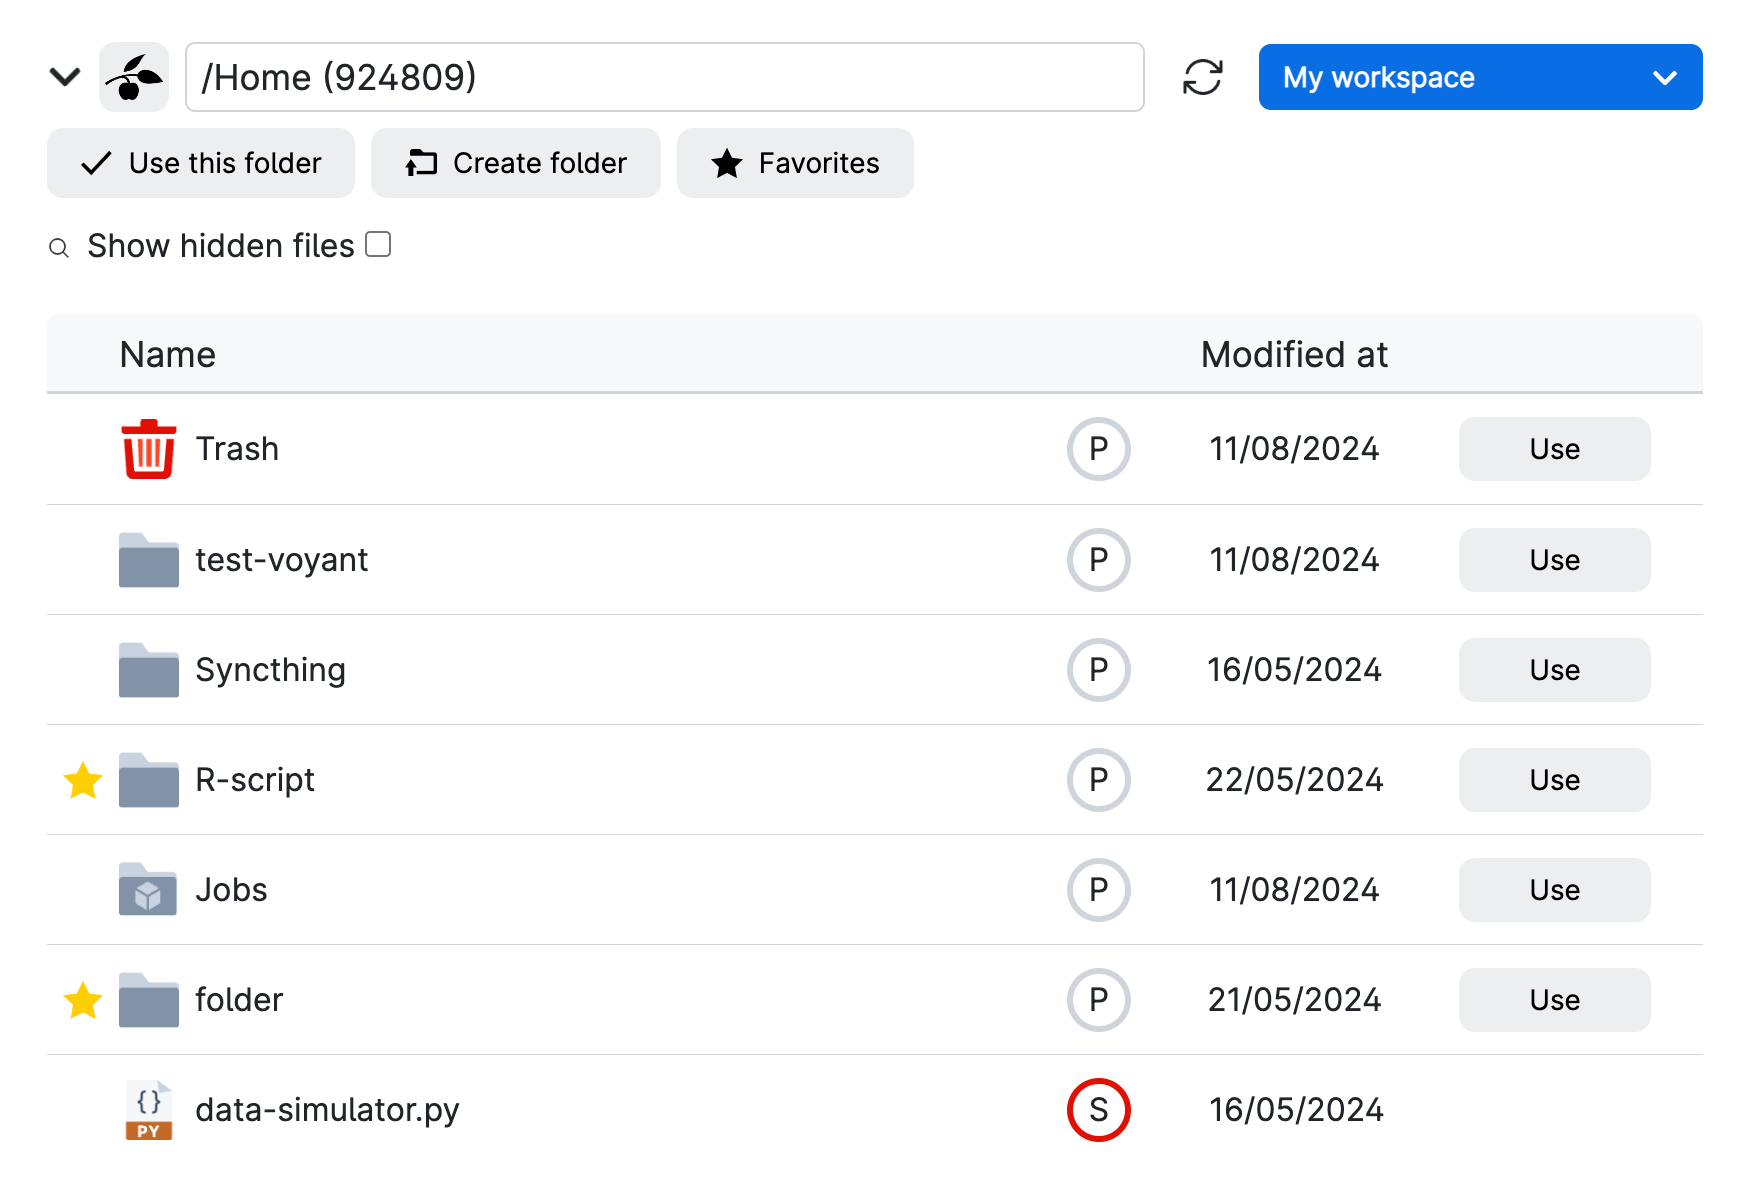
In addition, several options are available at the top of the box, including the ability to create a new folder or file, or filter by Favorites.
The data volumes are mounted within the /work directory inside the application container, which also serves as the default working tree on UCloud.
Additionally, the same data volumes can be mounted across multiple apps running simultaneously.
Important
Only files and folders located in the default working tree are saved after job completion.
Connectivity
In addition to mandatory and optional parameters, users can customize the app configuration to automatically control access to other apps/services.
Configure SSH access
Some applications initiate an SSH server to encrypt and secure data transfer from a remote host, provided that a valid SSH public key is imported on UCloud. The SSH key can be configured using the corresponding panel under the Resources section of the navigation menu.
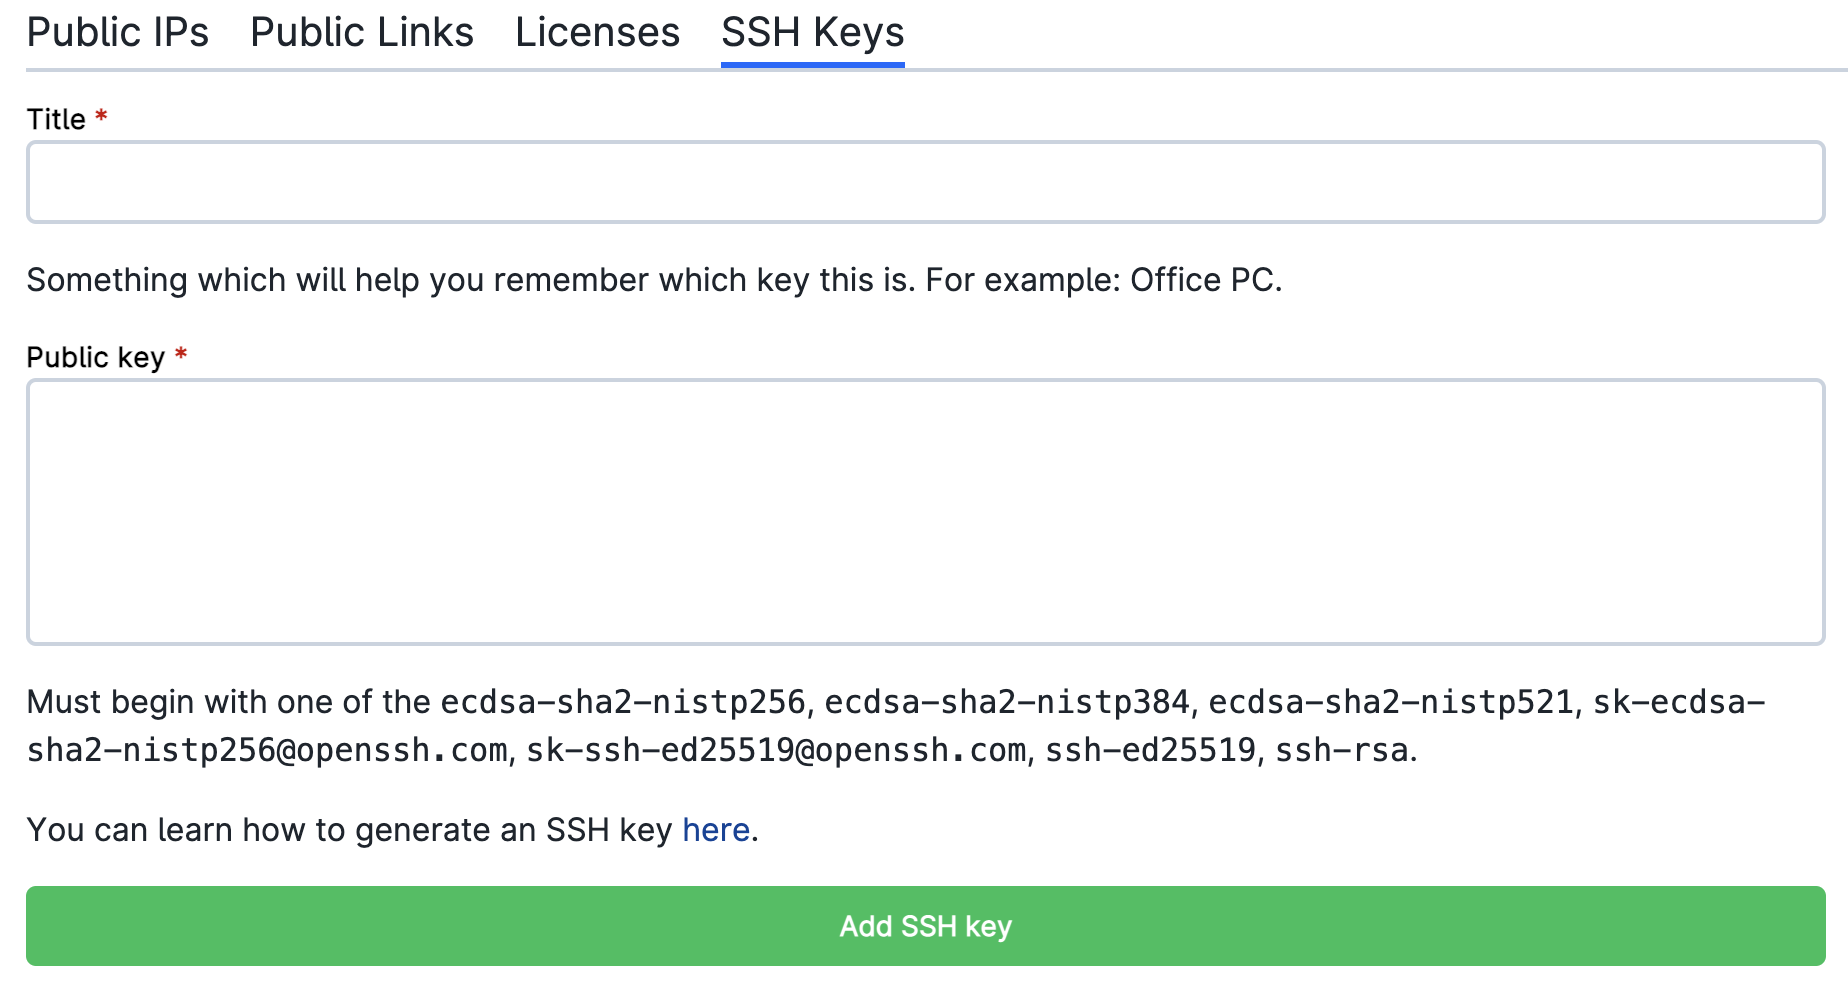
After the application is launched, a new panel appears in the job progress view displaying the SSH login command.
Configure custom links
This feature enables the creation of public URLs to provide external access to applications through a web interface. It is exclusively available for interactive apps and virtual machines. This functionality can be utilized, for instance, to share dashboard apps hosted on UCloud. Multiple public URLs can be established within the same job session.
To create a new (or select an existing) public link, click on the corresponding line in the Connectivity panel.
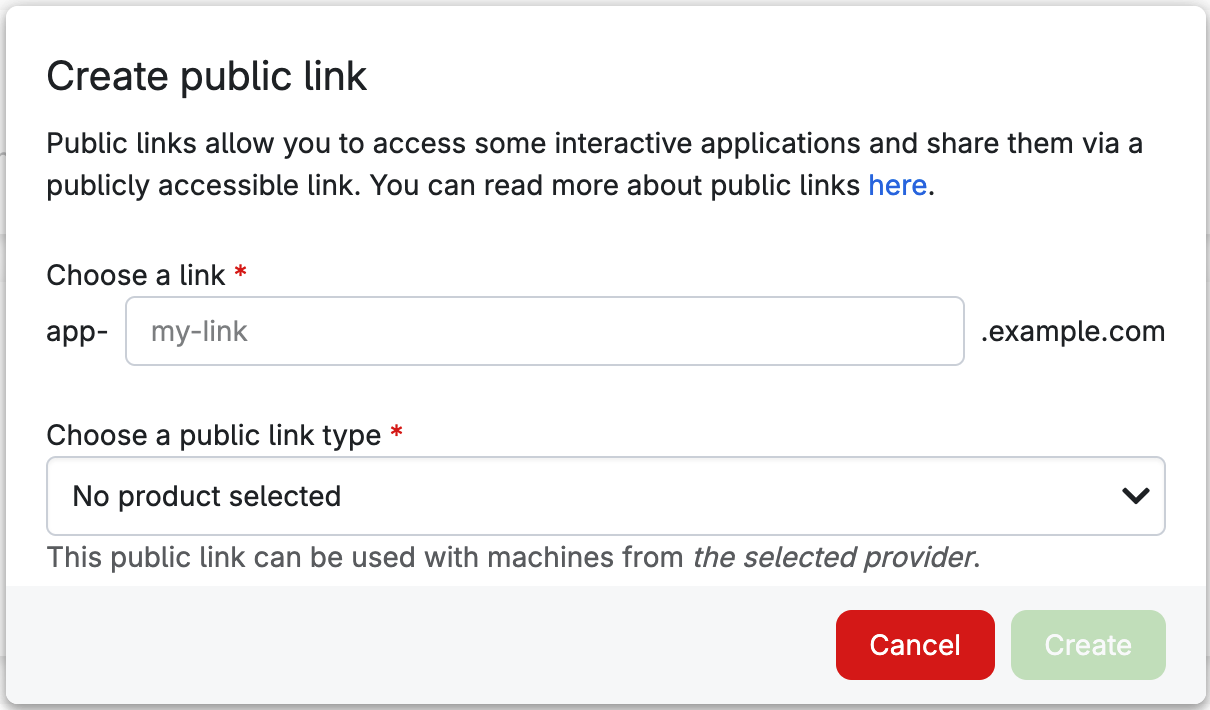
This opens a dialog box:
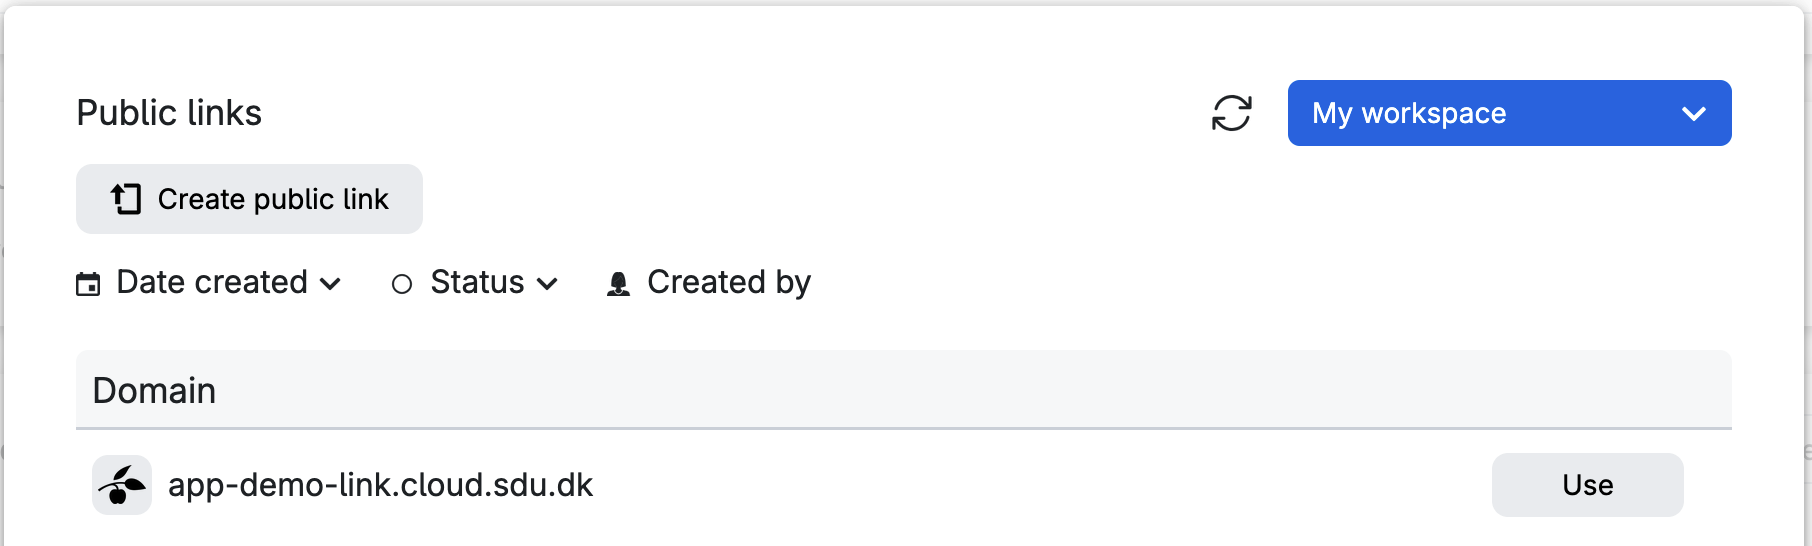
To create a new public link, click on
and add the desired link name (the full URL will be app-<my-link>.cloud.sdu.dk) and the public link type.
Note
In a project (other than My workspace), the PI and administrators can already set the permissions when creating the public link.
Important
Exposing a virtual machine via a public link requires specifying a port number.
Once the required information has been entered, click on
to create the link.
Finally, to attach the newly created link to the job, find it from the list and click on
The creation and management of public links can also be done from Links under the Resources section of the navigation menu. On this page, the status of the link and the associated job number are highlighted on the right side of the link name.

Note
The public URL will remain accessible as long as the job is running.
Attach public IP addresses
This option is used to attach a static IP address to an app deployed on UCloud, enabling access to the app via an external client. Public IPs may be used to deploy server applications.
The IP address is unique, so it is not possible to select the same IP for multiple jobs running at the same time.
To register a new IP address, users should click on the corresponding line in the Connectivity panel. This opens a dialog box where the user can either select an existing public IP address or create a new one.
To create a new public IP address click on
This will open the following dialog box:
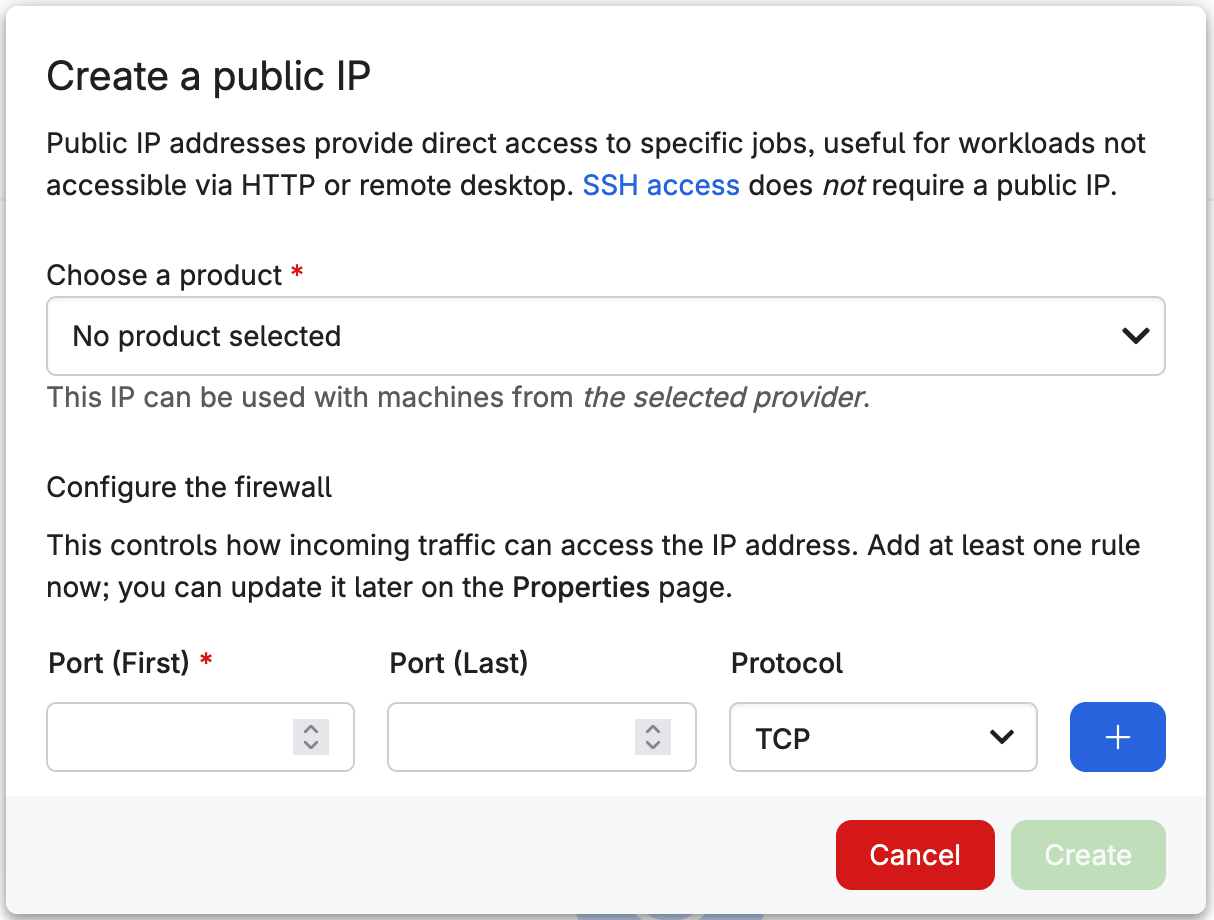
Here, the user must first select the desired product from the drop-down menu. Second, the user must specify which ports can be used to access the IP address as well as the transport layer protocol (TCP or UDP).
Once the required information has been entered, click on
to create the IP address.
Finally, to attach the newly created IP address to the job, find it from the list and click on
The creation and management of public IP addresses can also be done from IP addresses under the Resources section of the navigation menu. On this page, the status of the IP address and the associated job number are highlighted on the right side of the IP address. Furthermore, it is possible to update the port ranges and protocols of existing public IP addresses.
This functionality is only available on the DeiC Interactive HPC (SDU/K8s) provider.
Note
In a project (other than My workspace), the PI and administrators can set the permissions already when creating the public IP address.
Important
Enabling this feature allows anyone with the IP to access the application. Measures must be implemented to ensure that the application is adequately protected.
Connect to other jobs
This feature allows users to connect jobs inside isolated private networks, which enables the utilization of services such as shared application file systems etc., from other jobs within the same private network.
To create a new (or select an existing) private network, click the
button.
First, users must choose a Hostname for the job within the private network.
Second, by clicking the second line, a pop-up window will open. From here, the user can either choose an existing private network or create a new private network.
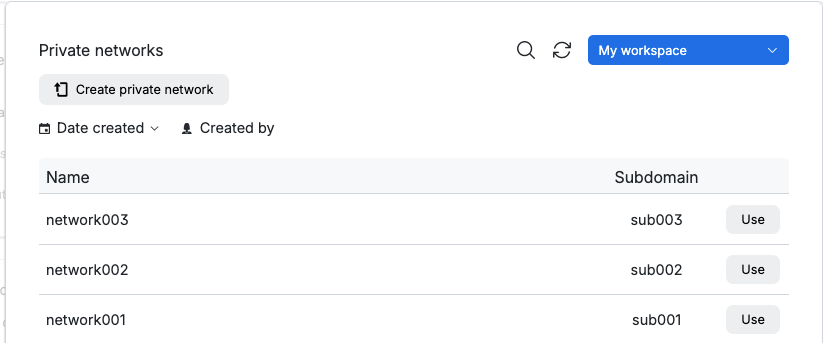
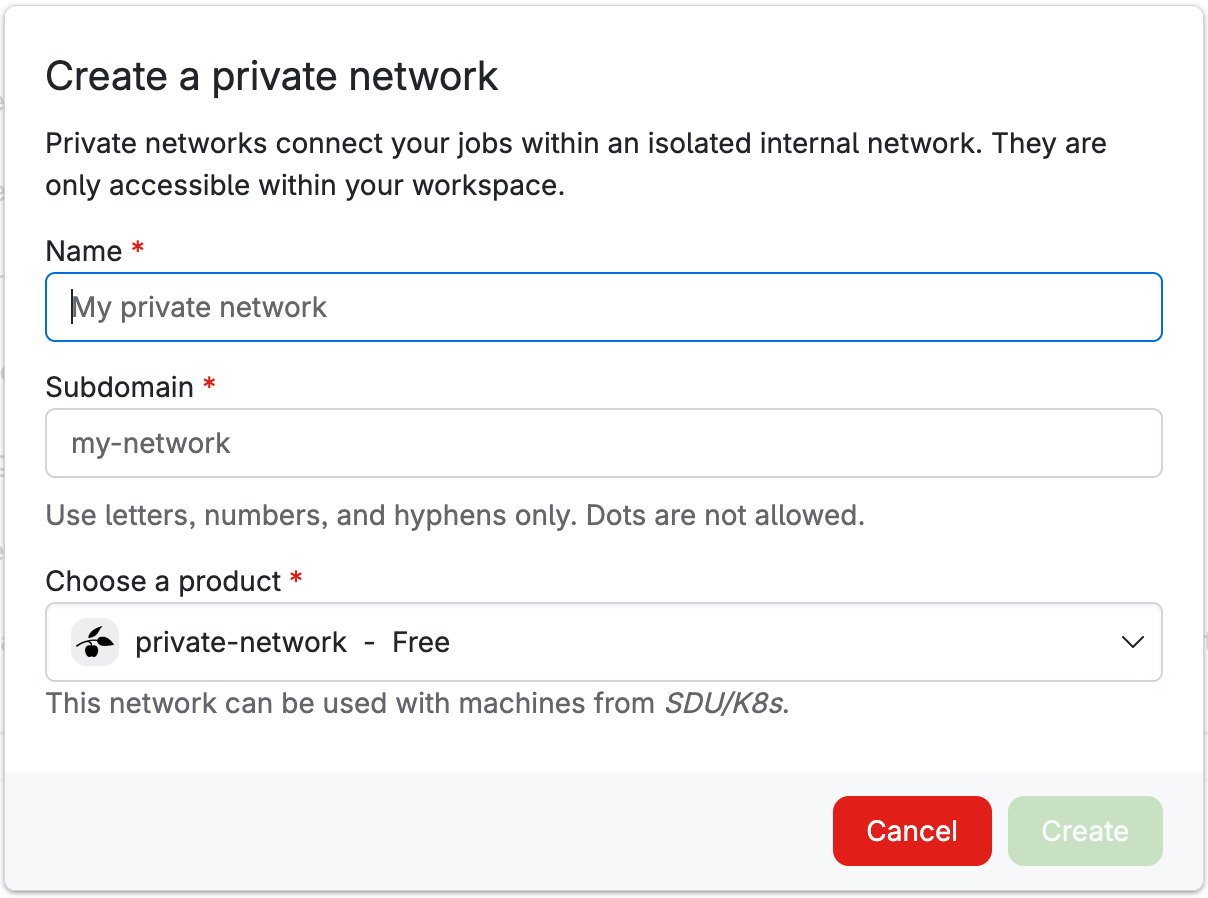
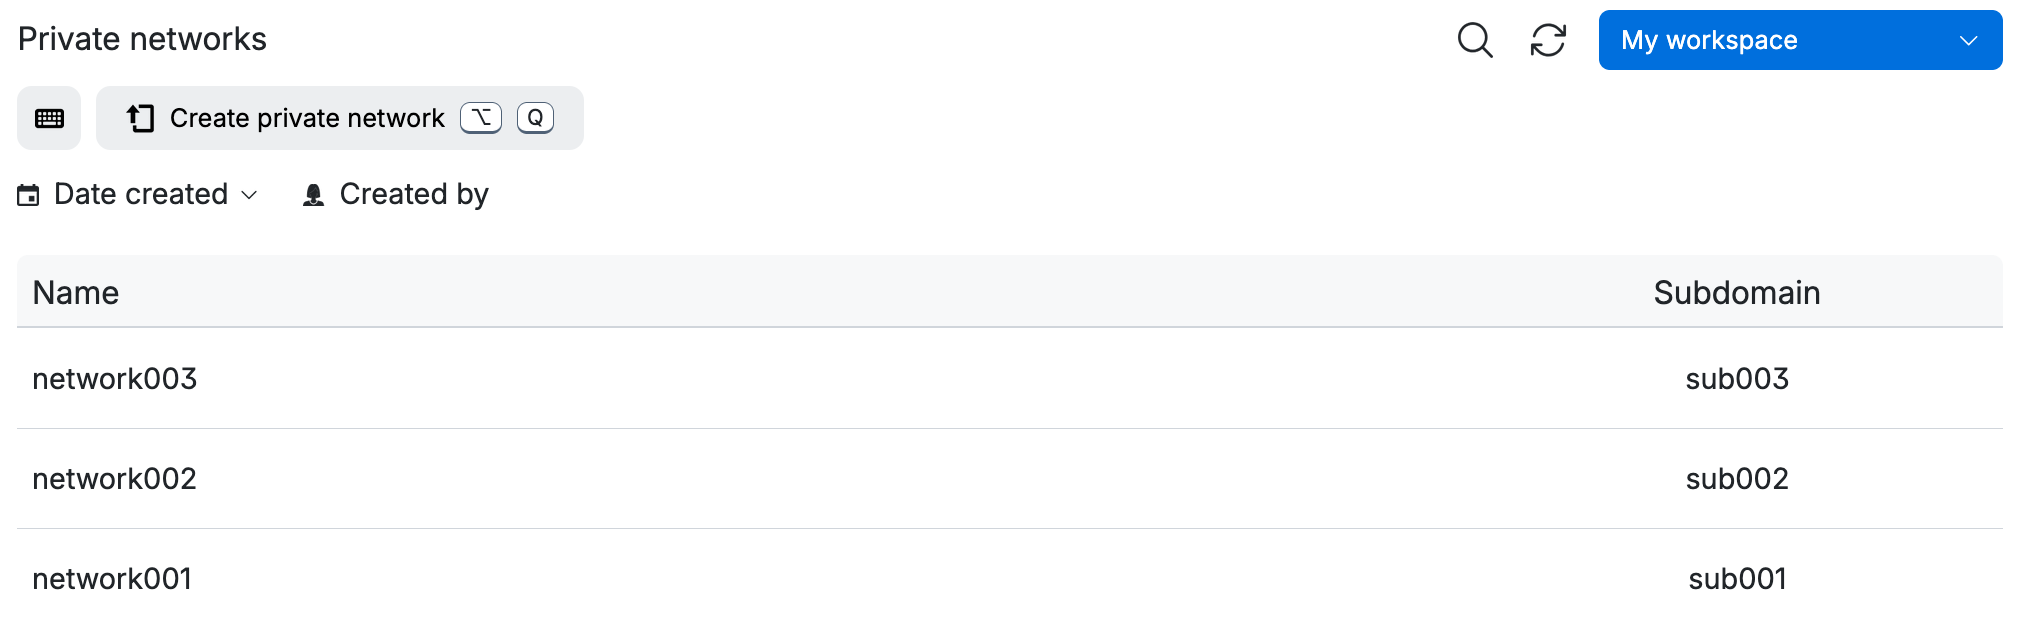
To create a new private network, click on the corresponding field in the Connectivity panel and add the desired private network name and sub-domain:
Note
In a project (other than My workspace), the PI and administrators can set the permissions already when creating the private network.
Once the required information has been entered, click on
to create the private network.
Finally, to attach the newly created private network to the job, find it from the list and click on
The creation and management of private networks can also be done from Private networks under the Resources section of the navigation menu.
Parameters
Mandatory parameters
Every app is typically configured to run with a given set of options. Mandatory parameters, which are always marked with a *, must be provided before initiating the job.
Optional parameters
The available optional parameters depend on the specific app. Some common ones are:
Job report sample rate: Sets the sample rate for the job's resource (CPU/GPU, memory, and network) utilization for the job report. The user can choose not to sample or sample in intervals from 250 ms (default rate) up to 2 minutes. The job report, called
job-report.csv, can be found in the job's output folder. Users can also enable this parameter with a fixed sample rate globally (i.e., for all jobs) from the account settings page.Initialization: Enables users to include a script (
.sh,.yml, or.txtfile) that runs during the job startup. The initialization can be utilized, for example, to install additional libraries or load conda environments.Batch mode: Allows for batch processing instead of interactive processing. Users must select a script to be executed in batch mode. The script will run automatically when the job starts, without any further interaction required from the user, and will cease execution upon completion of the script.
Modules path: Facilitates automatic loading of environment modules, enabling dynamic modification of the computing environment within the job. Environment modules stored in the selected
Modules pathwill automatically be loaded when the job starts.Select a license server: Required for apps that necessitate a software license. To utilize the license, users need to apply for the corresponding resource; see here. Active licenses can be viewed by selecting Licenses under the Resources section of the navigation menu.
E-mail Notification Settings
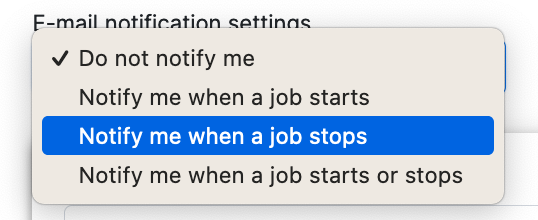
On the right side of the job submission* page, users can set preferences for email notifications regarding the status of the run.
Contents