JupyterLab


Operating System:

Terminal:


Shell:


Editor:


Package Manager:


Programming Language:


Database:

Utility:

Extension:


Operating System:
Terminal:
Shell:
Editor:
Package Manager:


Programming Language:


Database:
Utility:
Extension:


Operating System:
Terminal:
Shell:
Editor:
Package Manager:


Programming Language:


Database:
Utility:
Extension:


Operating System:
Terminal:
Shell:
Editor:
Package Manager:


Programming Language:


Database:
Extension:


Operating System:
Terminal:
Shell:
Editor:
Package Manager:


Programming Language:


Database:
Extension:


Operating System:

Terminal:

Shell:


Editor:


Package Manager:


Programming Language:


Database:

Extension:


Operating System:

Terminal:

Shell:


Editor:


Package Manager:


Programming Language:


Database:

Extension:


Operating System:
Terminal:
Shell:
Editor:
Package Manager:


Programming Language:


Database:
Extension:


Operating System:
Terminal:
Shell:
Editor:
Package Manager:


Programming Language:


Database:
Extension:


Operating System:
Terminal:
Shell:
Editor:
Package Manager:


Programming Language:


Database:

Extension:


Operating System:

Terminal:

Shell:

Editor:


Package Manager:


Programming Language:


Database:

Extension:


Operating System:
Terminal:
Shell:
Editor:
Package Manager:


Programming Language:


Database:

Extension:


Operating System:
Terminal:
Shell:
Editor:
Package Manager:


Programming Language:
Database:
Extension:

Operating System:
Terminal:
Shell:

Editor:
Package Manager:


Programming Language:


Database:

Extension:


Operating System:

Terminal:
Shell:

Editor:


Package Manager:


Programming Language:


Database:


Extension:

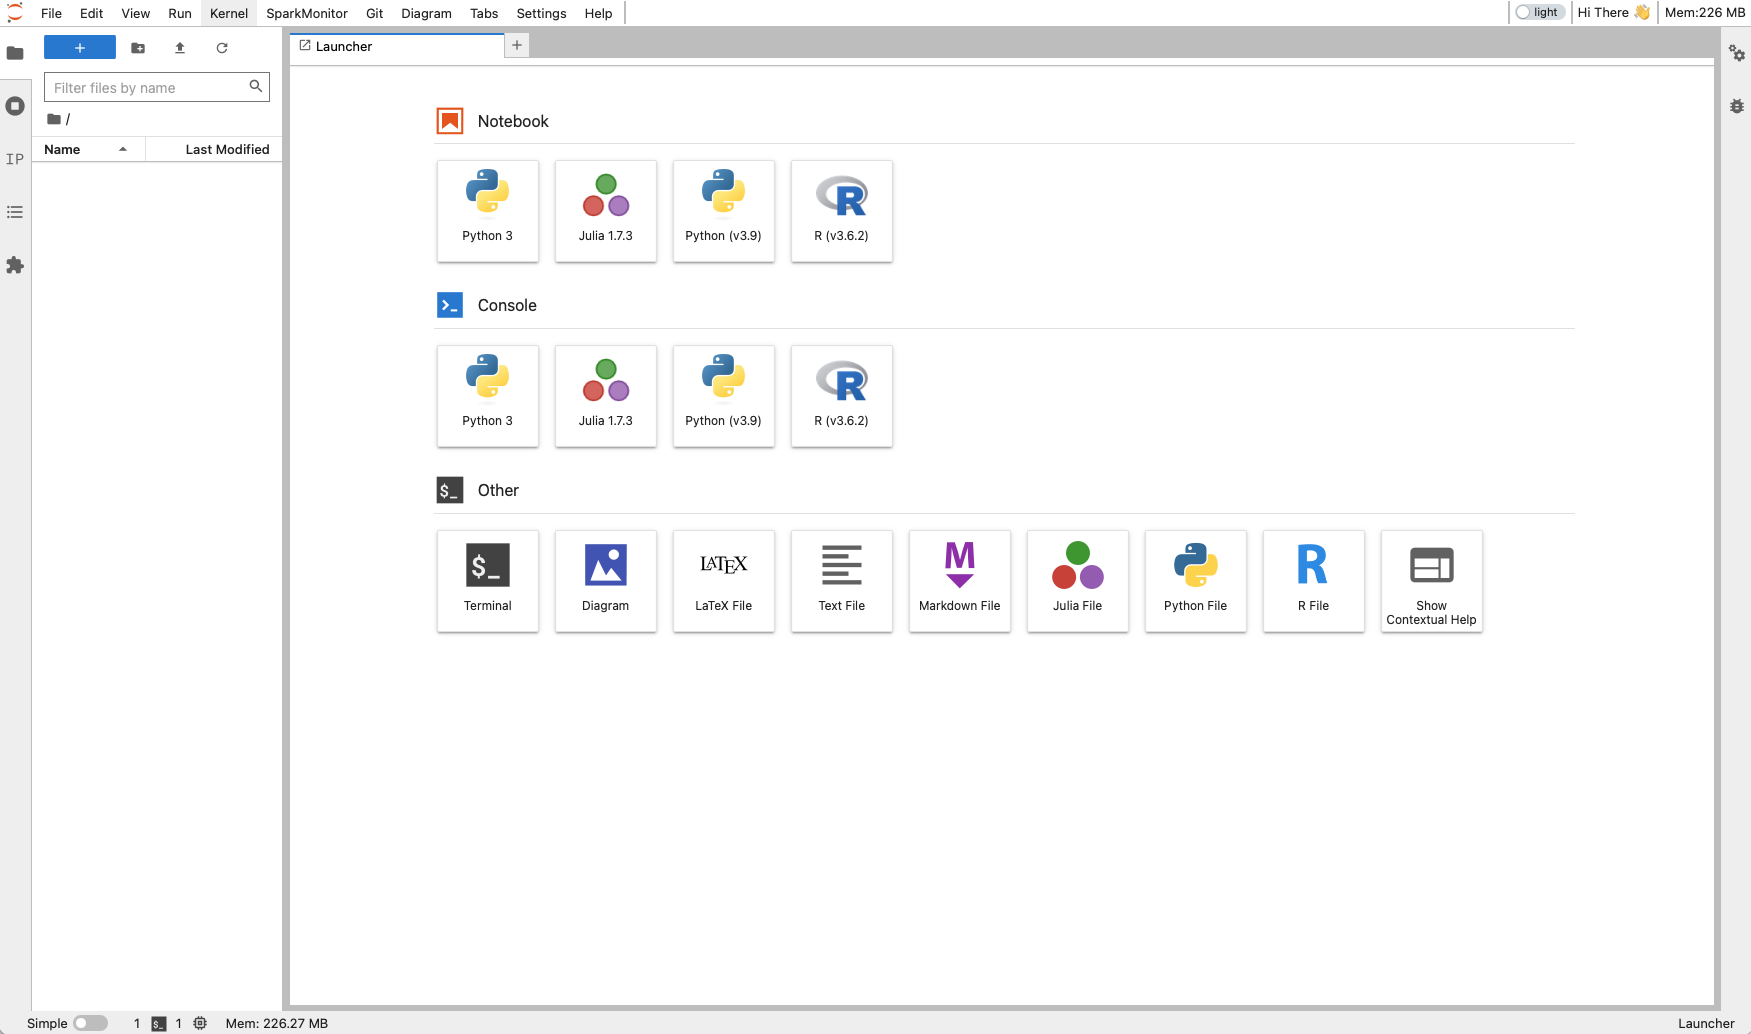
JupyterLab is a web-based integrated development environment for Jupyter notebooks, code, and data. JupyterLab is flexible: The user interface can be configured and arranged to support a wide range of workflows in data science, scientific computing, and machine learning.
Several programming language kernels are pre-loaded in the JupyterLab interface.
Initialization
For information on how to use the Initialization parameter, please refer to the Initialization: Bash Script, Initialization: Conda Packages, and Initialization: PyPI Packages section of the documentation. Additionally, supplementary arguments can be passed to the initialization script through the optional Extra options parameter.
Installing packages
Other than installing packages via the Initialization parameter, packages can be installed using the terminal interface available in all the starting modes.
Configure SSH Access
The app provides optional support for SSH access from an external client. An SSH public key must be uploaded using the corresponding panel in Resources section of the UCloud side menu.
By checking on Enable SSH server a random port is opened for connection. The connection command is shown in the job progress view page.
Run in Batch Mode
The parameter Batch processing is used to execute a Bash script in batch mode. Additionally, supplementary arguments can be provided through the optional Extra options parameter.
Note
The job is terminated after the script is executed, independently of the script exit status.
Manage Environments
Conda virtual environment
The default Conda environment at the startup is called base. The user can create a new environment via the JupyterLab terminal interface:
$ conda create --name myenv
This command will create a basic workspace with the default version of Python installed in the app container. A different version of Python can be specified as follows:
$ conda create --name myenv python="3.9"
By default, new environments are created in the folder: /opt/conda/envs/. The user can change the environment path to a new folder inside /work, so that all the installed packages are exported in the job output folder on UCloud, after the job is completed. An example is shown below:
$ conda create --prefix /work/myenv python="3.9"
Warning
After job completion, the user should move (not copy) myenv from the corresponding job folder to a new path inside a UCloud workspace.
To activate more environments one should first initialize the shell with the command:
$ eval "$(conda shell.bash hook)"
Tip
(base) ucloud:/work$
Then, the new environment can be activated as follows:
$ conda activate myenv
Tip
(myenv) ucloud:/work$
A complete documentation about how to manage Conda environments can be found here.
Hint
In case the installation of very recent packages via conda fails due to strict channel priority settings, run the command:
$ conda config --set channel_priority false
Python virtual environment
A lightweight virtual environment can also be set up using the venv module of Python. For example:
$ python -m venv /work/myenv
This command will create all the dependencies in the folder /work/myenv. The latter is activated as follows:
$ source /work/myenv/bin/activate
Tip
(myenv) ucloud:/work$
New modules are installed via pip, e.g.
$ pip install tensorflow
The default Python interpreter /opt/conda/bin/python is reset with the command:
$ deactivate
Add New Kernels
The user can add new kernels in the JupyterLab launcher via command line. These are some working examples:
$ conda create -y --name py39 python="3.9" ipykernel
$ conda env update -n py39 --file environment.yml
$ conda activate py39
$ python -m ipykernel install --user --name ipy39 --display-name "Python (v3.9)"
$ conda deactivate
$ conda create -y --name r362 -c r r-base="3.6.2" r-essentials="3.6.0"
$ conda env update -n r362 --file environment.yml
$ conda activate r362
$ R -e "IRkernel::installspec(name = 'ir362', displayname = 'R (v3.6.2)')"
$ conda deactivate
$ conda create -y --name j173 julia="1.7.3"
$ conda activate j173
$ ln -s /etc/ssl/certs/ca-certificates.crt /opt/conda/envs/j173/share/julia/cert.pem
$ julia -e 'import Pkg; Pkg.update(); Pkg.add("IJulia"); Pkg.build("IJulia")'
$ conda deactivate
Additional Python/R packages in the above examples are specified in the environment.yml file, which is structured as shown here.
The list of all the installed environments is given by the command:
$ conda env list
Tip
# conda environments:
#
base * /opt/conda
j173 /opt/conda/envs/j173
py39 /opt/conda/envs/py39
r362 /opt/conda/envs/r362
After the installation, it might be necessary to refresh the web page to visualize the new kernels in the launcher.
Hint
A new kernel and the corresponding virtual environment can also be created at startup by submitting a Bash script (*.sh) via the Initialization parameter. For instance:
#!/usr/bin/env bash

conda create -y -n tf2 python="3.9" cudatoolkit="11.2" cudnn="8.2" ipykernel
eval "$(conda shell.bash hook)"
conda activate tf2
pip install tensorflow_gpu=="2.5"
python -m ipykernel install --user --name tf2 --display-name "TF v2.5"
Submit a Spark Application
A local instance of Apache Spark is already installed in the app container, within the directory $SPARK_HOME. Spark can be used to quickly perform processing tasks on very large datasets.
The user can choose to submit Spark applications either in local mode or in cluster mode, depending of the size of the dataset.
Local deployment
For smaller/sampled datasets it is convenient to run Spark applications in local mode, that is using only the resources allocated to the JupyterLab app. To connect to the local Spark instance, the SparkContext should be defined as in the following example:
import os
from pyspark.conf import SparkConf
from pyspark.sql import SparkSession

os.mkdir('/work/spark_logs')

conf = SparkConf().setAll(
    [
        ("spark.master", "local[16]"),
        ("spark.eventLog.enabled", True),
        ("spark.eventLog.dir", "/work/spark_logs"),
        ("spark.history.fs.logDirectory", "/work/spark_logs"),
    ]
)

spark = SparkSession.builder.config(conf=conf).getOrCreate()
sc = spark.sparkContext
where it is assumed that the selected machine type has at least 16 cores.
Cluster deployment
Spark applications which require distributed computational resources can be submitted directly to a Spark standalone cluster, which allows to distribute data processing tasks across multiple nodes.
In this case, the JupyterLab app should be connected to a Spark cluster instance using the optional parameter Connect to other jobs, as shown in the following example:

where the Job entry is used to select the job ID of the Spark Cluster instance, created in advance. Besides, the Hostname parameter is employed to assign the URL of the master node to the SparkContext, created in the JupyterLab app. The default port on the master node is 7077.
An example of a Spark application deployed on a standalone cluster is shown in the code snippet below.
import os
from pyspark.conf import SparkConf
from pyspark.sql import SparkSession
from random import random
from operator import add

# Create a directory for Spark logs (if not already existing)
if not os.path.exists("/work/spark_logs"):
    os.mkdir("/work/spark_logs")

# Cluster and Node Configuration
MASTER_HOST = "spark://my-cluster:7077"
NODES = 3
CLUSTER_CORES_MAX = 63 * NODES  # Total number of cores: 189 cores
CLUSTER_MEMORY_MAX = 371 * NODES  # Total memory: 1113 GB

# Executor Configuration
EXECUTOR_CORES = 7  # Optimized cores per executor
EXECUTORS_PER_NODE = 63 // EXECUTOR_CORES  # 9 executors per node
EXECUTOR_MEMORY = int(371 / EXECUTORS_PER_NODE * 0.5)  # ~20 GB per executor

# Spark Configuration
conf = SparkConf().setAll([
    ("spark.master", MASTER_HOST),
    ("spark.cores.max", CLUSTER_CORES_MAX),
    ("spark.executor.cores", EXECUTOR_CORES),
    ("spark.executor.memory", f"{EXECUTOR_MEMORY}g"),
    ("spark.eventLog.enabled", True),
    ("spark.eventLog.dir", "/work/spark_logs"),
    ("spark.history.fs.logDirectory", "/work/spark_logs"),
    ("spark.deploy.mode", "cluster"),
    ("spark.sql.shuffle.partitions", str(EXECUTORS_PER_NODE * NODES * 3)),  # Optimize shuffle partitions
])

# Validation Check for Memory Allocation
CHECK = (CLUSTER_CORES_MAX / EXECUTOR_CORES) * (
    EXECUTOR_MEMORY + max(EXECUTOR_MEMORY * 0.10, 0.403)
)
assert int(CHECK) <= CLUSTER_MEMORY_MAX, "Executor memory larger than cluster total memory!"

# Initialize Spark Session
spark = SparkSession.builder.config(conf=conf).appName("PI Calc").getOrCreate()
sc = spark.sparkContext

# Adjusted Partitions for Workload
partitions = 3 * CLUSTER_CORES_MAX # 567 Optimized partitions for parallelism
points_per_partition = 10_000_000
n = points_per_partition * partitions # Total points for PI calculation

# Monte Carlo Simulation Function
def f(_):
    x = random()
    y = random()
    return 1 if x ** 2 + y ** 2 <= 1 else 0

# Calculate Pi Using Spark
count = sc.parallelize(range(1, n + 1), partitions).map(f).reduce(add)
print("Pi is roughly %f" % (4.0 * count / n))

# Stop Spark Context
sc.stop()
After submitting the application to the cluster, the Spark UI looks like in the following figure.
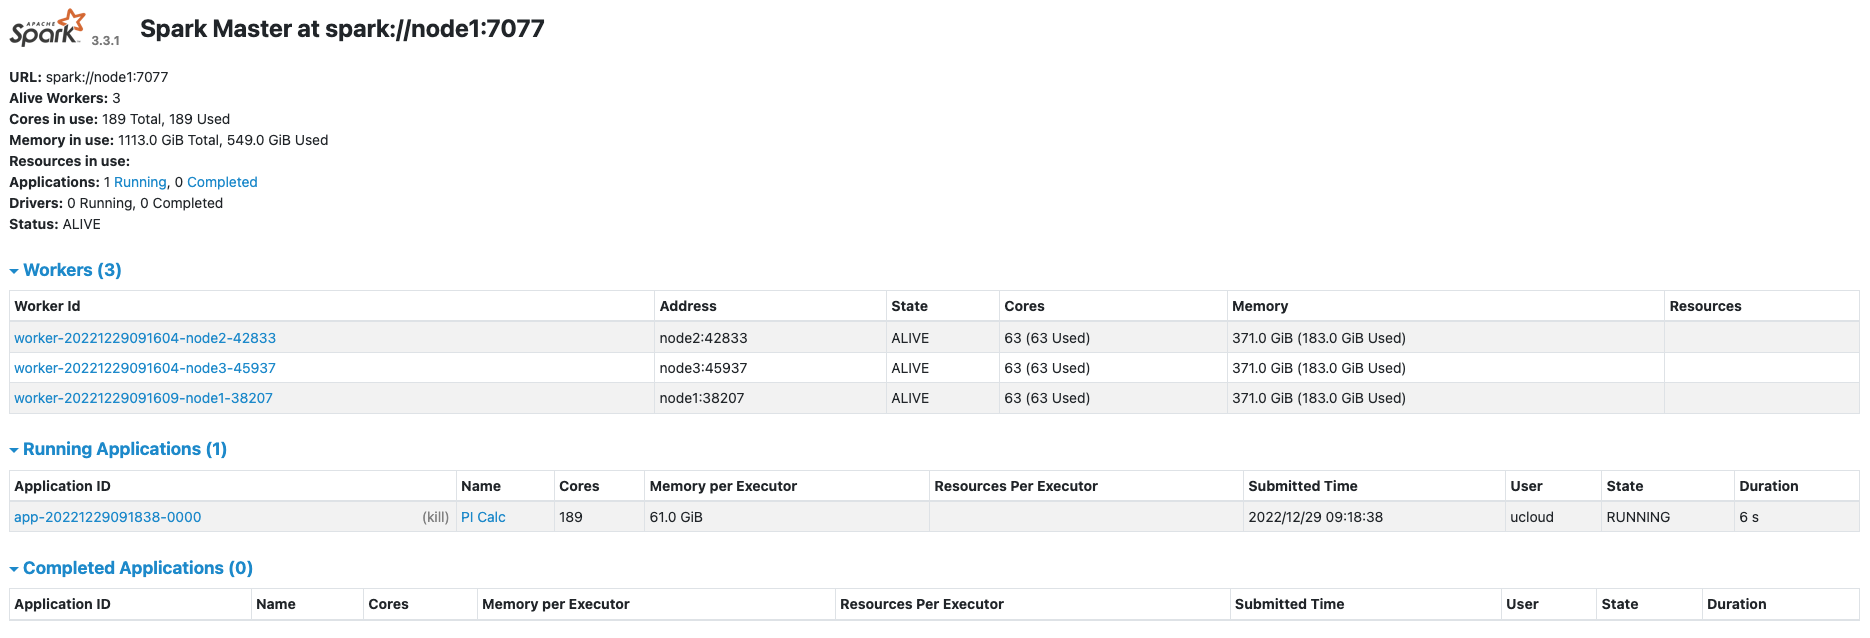
In this example the cluster consists of 3 worker nodes, one of which (node1) is also the master node.
Contents