Terminal


Operating System:

Terminal:


Shell:


Editor:


Package Manager:


Programming Language:


Database:


Job Scheduler:

Utility:


Extension:


Operating System:
Terminal:
Shell:
Editor:
Package Manager:

Programming Language:
Database:
Job Scheduler:
Utility:

Extension:

Operating System:
Terminal:
Shell:
Editor:
Package Manager:

Programming Language:
Database:
Job Scheduler:
Utility:
Extension:

Operating System:
Terminal:
Shell:
Editor:
Package Manager:

Programming Language:
Database:
Job Scheduler:
Utility:

Extension:

Operating System:
Terminal:
Shell:
Editor:
Package Manager:

Programming Language:
Database:
Job Scheduler:
Utility:
Extension:

Operating System:
Terminal:
Shell:
Editor:
Package Manager:

Programming Language:
Database:
Job Scheduler:
Utility:

Extension:

Operating System:
Terminal:
Shell:
Editor:
Package Manager:

Programming Language:
Database:
Job Scheduler:
Utility:
Extension:

Operating System:
Terminal:
Shell:
Editor:
Package Manager:

Programming Language:
Database:
Job Scheduler:
Utility:
Extension:

Operating System:
Terminal:
Shell:
Editor:
Package Manager:

Programming Language:
Database:
Job Scheduler:
Utility:

Extension:

Operating System:
Terminal:
Shell:
Editor:
Package Manager:

Programming Language:
Database:
Job Scheduler:
Utility:
Extension:

Operating System:
Terminal:
Shell:
Editor:
Package Manager:

Programming Language:
Database:
Job Scheduler:
Utility:

Extension:

Operating System:
Terminal:
Shell:
Editor:
Package Manager:

Programming Language:
Database:
Job Scheduler:
Utility:
Extension:

Operating System:
Terminal:
Shell:
Editor:
Package Manager:


Programming Language:
Database:
Job Scheduler:
Utility:

Extension:

Operating System:
Terminal:
Shell:
Editor:
Package Manager:

Programming Language:
Database:
Job Scheduler:
Utility:
Extension:

Operating System:
Terminal:
Shell:
Editor:
Package Manager:

Programming Language:
Database:
Job Scheduler:
Utility:

Extension:

Operating System:
Terminal:
Shell:
Editor:
Package Manager:

Programming Language:
Database:
Job Scheduler:
Utility:
Extension:


Operating System:
Terminal:
Shell:
Editor:
Package Manager:

Programming Language:
Database:
Job Scheduler:
Utility:
Extension:

Operating System:
Terminal:
Shell:
Editor:
Package Manager:
Programming Language:

Database:
Job Scheduler:
Utility:
Extension:

Operating System:
Terminal:
Shell:
Editor:
Package Manager:
Programming Language:
Database:
Job Scheduler:
Utility:
Extension:

Operating System:
Terminal:
Shell:
Editor:
Package Manager:
Programming Language:
Database:
Job Scheduler:
Utility:
Extension:


Operating System:
Terminal:
Shell:
Editor:
Package Manager:
Programming Language:
Database:
Job Scheduler:

Utility:

Extension:

Operating System:
Terminal:
Shell:
Editor:
Package Manager:
Programming Language:
Database:
Job Scheduler:
Utility:
Extension:

Operating System:
Terminal:
Shell:
Editor:
Package Manager:
Programming Language:
Database:
Job Scheduler:
Utility:
Extension:

Operating System:
Terminal:
Shell:
Editor:
Package Manager:
Programming Language:
Database:
Job Scheduler:
Utility:

Extension:

Operating System:
Terminal:
Shell:
Editor:
Package Manager:
Programming Language:
Database:
Job Scheduler:
Utility:
Extension:

Operating System:
Terminal:
Shell:
Editor:
Package Manager:
Programming Language:

Database:
Job Scheduler:
Utility:

Extension:

Operating System:

Terminal:


Shell:


Editor:


Package Manager:


Programming Language:


Database:


Job Scheduler:
Utility:
Extension:

Operating System:
Terminal:
Shell:
Editor:
Package Manager:
Programming Language:
Database:


Job Scheduler:
Utility:
Extension:

Operating System:
Terminal:
Shell:
Editor:
Package Manager:
Programming Language:
Database:
Job Scheduler:
Utility:
Extension:

Operating System:
Terminal:
Shell:
Editor:
Package Manager:
Programming Language:
Database:
Job Scheduler:

Utility:

Extension:

Operating System:
Terminal:
Shell:
Editor:
Package Manager:

Programming Language:
Database:


Job Scheduler:
Utility:
Extension:


Operating System:
Terminal:
Shell:
Editor:
Package Manager:
Programming Language:
Database:
Job Scheduler:

Utility:

Extension:

Operating System:
Terminal:
Shell:
Editor:
Package Manager:
Programming Language:
Database:
Job Scheduler:

Utility:

Extension:

Operating System:
Terminal:
Shell:
Editor:
Package Manager:

Programming Language:
Database:


Job Scheduler:
Utility:
Extension:

Operating System:

Terminal:

Shell:


Editor:


Package Manager:


Programming Language:


Database:
Job Scheduler:

Utility:

Extension:


Operating System:
Terminal:
Shell:
Editor:
Package Manager:
Programming Language:

Database:

Job Scheduler:

Utility:

Extension:
Operating System:

Terminal:

Shell:


Editor:


Package Manager:


Programming Language:


Utility:
Extension:


Operating System:

Terminal:
Shell:
Editor:
Package Manager:

Programming Language:
Utility:
Extension:
Operating System:
Terminal:
Shell:
Editor:
Package Manager:
Programming Language:
Utility:
Extension:
Operating System:

Terminal:
Shell:
Editor:
Package Manager:

Programming Language:
Utility:
Extension:
Operating System:
Terminal:
Shell:
Editor:
Package Manager:
Programming Language:
Utility:
Extension:
Operating System:

Terminal:
Shell:
Editor:
Package Manager:
Programming Language:
Utility:
Extension:
Operating System:
Terminal:
Shell:
Editor:
Package Manager:
Programming Language:
Utility:
Extension:
Operating System:

Terminal:
Shell:
Editor:
Package Manager:
Programming Language:
Utility:
Extension:
Operating System:
Terminal:
Shell:
Editor:
Package Manager:
Programming Language:
Utility:
Extension:
Operating System:

Terminal:
Shell:
Editor:
Package Manager:
Programming Language:
Utility:
Extension:
Operating System:

Terminal:
Shell:


Editor:

Package Manager:


Programming Language:

Utility:
Extension:
Operating System:
Terminal:
Shell:
Editor:
Package Manager:
Programming Language:
Utility:
Extension:
Operating System:
Terminal:
Shell:
Editor:
Package Manager:
Programming Language:
Utility:
Extension:
Operating System:

Terminal:
Shell:
Editor:
Package Manager:
Programming Language:
Utility:
Extension:
Operating System:
Terminal:
Shell:
Editor:
Package Manager:
Programming Language:
Utility:
Extension:
Operating System:

Terminal:
Shell:
Editor:
Package Manager:
Programming Language:
Utility:
Extension:
Operating System:
Terminal:
Shell:
Editor:
Package Manager:
Programming Language:
Utility:
Extension:
Operating System:

Terminal:
Shell:
Editor:
Package Manager:
Programming Language:
Utility:
Extension:
Operating System:
Terminal:
Shell:
Editor:
Package Manager:
Programming Language:
Utility:
Extension:
Operating System:

Terminal:
Shell:
Editor:
Package Manager:
Programming Language:
Utility:
Extension:
Operating System:
Terminal:
Shell:
Editor:
Package Manager:
Programming Language:
Utility:
Extension:
Operating System:

Terminal:
Shell:
Editor:
Package Manager:
Programming Language:
Utility:
Extension:
Operating System:
Terminal:
Shell:
Editor:
Package Manager:
Programming Language:
Utility:
Extension:
Operating System:
Terminal:
Shell:
Editor:
Package Manager:
Programming Language:
Utility:
Extension:
Operating System:

Terminal:
Shell:
Editor:
Package Manager:
Programming Language:
Utility:
Extension:
Operating System:
Terminal:
Shell:
Editor:
Package Manager:
Programming Language:
Utility:
Extension:
Operating System:
Terminal:
Shell:
Editor:
Package Manager:
Programming Language:
Utility:
Extension:
Operating System:
Terminal:
Shell:
Editor:
Package Manager:
Programming Language:
Utility:
Extension:
Operating System:

Terminal:
Shell:
Editor:
Package Manager:
Programming Language:
Utility:
Extension:
Operating System:
Terminal:
Shell:
Editor:
Package Manager:
Programming Language:
Utility:
Extension:
Operating System:

Terminal:
Shell:
Editor:
Package Manager:
Programming Language:
Utility:
Extension:
Operating System:
Terminal:
Shell:
Editor:
Package Manager:
Programming Language:
Utility:
Extension:
Operating System:

Terminal:
Shell:
Editor:
Package Manager:
Programming Language:
Utility:
Extension:
Operating System:
Terminal:
Shell:
Editor:
Package Manager:
Programming Language:
Utility:
Extension:
Operating System:
Terminal:
Shell:
Editor:
Package Manager:
Programming Language:
Utility:
Extension:
Operating System:

Terminal:
Shell:
Editor:
Package Manager:
Programming Language:
Utility:
Extension:
Operating System:

Terminal:

Shell:


Editor:

Package Manager:


Programming Language:


Utility:
Operating System:

Terminal:
Shell:


Editor:


Package Manager:


Programming Language:


Utility:
Operating System:

Terminal:
Shell:
Editor:
Package Manager:
Programming Language:

Utility:
Operating System:

Terminal:
Shell:


Editor:


Package Manager:


Programming Language:


Utility:
Operating System:
Terminal:
Shell:
Editor:
Package Manager:
Programming Language:
Utility:
Operating System:
Terminal:
Shell:
Editor:
Package Manager:
Programming Language:
Utility:
Operating System:
Terminal:
Shell:
Editor:
Package Manager:
Programming Language:
Utility:
Operating System:
Terminal:
Shell:
Editor:
Package Manager:
Programming Language:

Utility:
Operating System:

Terminal:
Shell:
Editor:
Package Manager:
Programming Language:

Utility:
Operating System:
Terminal:
Shell:
Editor:
Package Manager:
Programming Language:
Utility:
Operating System:
Terminal:
Shell:
Editor:
Package Manager:
Programming Language:
Utility:
Operating System:
Terminal:
Shell:
Editor:
Package Manager:
Programming Language:
Utility:
Operating System:
Terminal:
Shell:
Editor:
Package Manager:
Programming Language:
Utility:
Operating System:
Terminal:
Shell:
Editor:
Package Manager:
Programming Language:
Utility:
Operating System:

Terminal:
Shell:
Editor:
Package Manager:
Programming Language:
Utility:
Operating System:
Terminal:
Shell:
Editor:
Package Manager:
Programming Language:
Utility:
Operating System:
Terminal:
Shell:
Editor:
Package Manager:
Programming Language:
Utility:
Operating System:
Terminal:
Shell:
Editor:
Package Manager:
Programming Language:
Utility:
Operating System:
Terminal:
Shell:
Editor:
Package Manager:
Programming Language:
Utility:
Operating System:
Terminal:
Shell:
Editor:
Package Manager:
Programming Language:

Utility:
Operating System:

Terminal:
Shell:
Editor:
Package Manager:

Programming Language:


Utility:
Operating System:
Terminal:
Shell:
Editor:
Package Manager:
Programming Language:
Utility:
Operating System:
Terminal:
Shell:
Editor:
Package Manager:
Programming Language:
Utility:
Operating System:
Terminal:
Shell:
Editor:
Package Manager:
Programming Language:
Utility:
Operating System:
Terminal:
Shell:
Editor:
Package Manager:
Programming Language:
Utility:
Operating System:
Terminal:
Shell:
Editor:
Package Manager:
Programming Language:
Utility:
Operating System:

Terminal:
Shell:
Editor:
Package Manager:
Programming Language:
Utility:
Operating System:
Terminal:
Shell:
Editor:
Package Manager:
Programming Language:
Utility:
Operating System:

Terminal:

Shell:


Editor:


Package Manager:


Programming Language:


Utility:
Operating System:
Terminal:
Shell:
Editor:
Package Manager:
Programming Language:
Utility:
Operating System:
Terminal:
Shell:
Editor:
Package Manager:
Programming Language:
Utility:
Operating System:
Terminal:
Shell:
Editor:
Package Manager:
Programming Language:
Database:

Utility:
Operating System:

Terminal:
Shell:
Editor:
Package Manager:
Programming Language:
Utility:
Operating System:
Terminal:
Shell:
Editor:
Package Manager:
Programming Language:
Utility:
Operating System:
Terminal:
Shell:
Editor:
Package Manager:
Programming Language:
Utility:
Operating System:
Terminal:
Shell:
Editor:
Package Manager:
Programming Language:
Utility:
Operating System:
Terminal:
Shell:
Editor:
Package Manager:
Programming Language:
Utility:
Operating System:
Terminal:
Shell:
Editor:
Package Manager:
Programming Language:
Utility:
Web terminal interface based on the ttyd command-line tool. This interactive app can be used to install new software and to run scripts.
Basic Features
Install new software
The default user inside the application container is ucloud, which has also superuser account privileges.
Therefore, full read, write, and execute permissions are enabled using sudo in front of any command, without entering an administrator password.
Before installing new software, it is always recommended to update the system libraries. For example, to install the GCC compiler one should run the commands:
$ sudo yum update -y
$ sudo yum install -y gcc
for the AlmaLinux releases, and
$ sudo apt-get update -y
$ sudo apt-get install -y gcc
for the Debian/Ubuntu releases.
Initialization
For information on how to use the Initialization parameter, please refer to the Initialization: Bash Script section of the documentation. Additionally, supplementary arguments can be passed to the initialization script through the optional Extra options parameter.
Run a script in batch mode
The optional parameter Batch processing is used to run a Bash script (.sh) when the job starts.
Additionally, supplementary arguments can be provided through the optional Extra options parameter.
In this scenario, the job is terminated immediately after the program has been executed.
Configure SSH access
The app provides optional support for SSH access from an external client. An SSH public key must be uploaded using the corresponding panel in Resources section of the UCloud side menu.
By checking on Enable SSH server a random port is opened for connection. The connection command is shown in the job progress view page.
Attach a public IP
The app supports deployment with a static IP address.
Note
Public IPs are not currently supported with multiple nodes.
Change the default shell
Keyboard shortcuts
Restart the session :
Ctrl-dClear the screen :
Ctrl-lStop the currently running command :
Ctrl-cMove to the beginning of line :
Ctrl-aMove to the end of line :
Ctrl-eMove backward one character :
Ctrl-bMove forward one character :
Ctrl-fMove backward one word :
Esc-bMove forward one word :
Esc-fSwap the last two words :
Esc-tDelete one character before the cursor :
Ctrl-hDelete all characters after the cursor :
Ctrl-kDelete all characters before the cursor :
Ctrl-uDisplay the previous line in command history :
Ctrl-pReverse search :
Ctrl-rSwap the last two characters :
Ctrl-tDelete the words before the cursor :
Ctrl-wRetrieve last deleted item :
Ctrl-yStop the current command :
Ctrl-z
The shell type can be selected at the job startup by using the option Shell available in the app front-end page. By default the app starts a bash shell. The pre-configured shell types may depend on the Linux distribution.
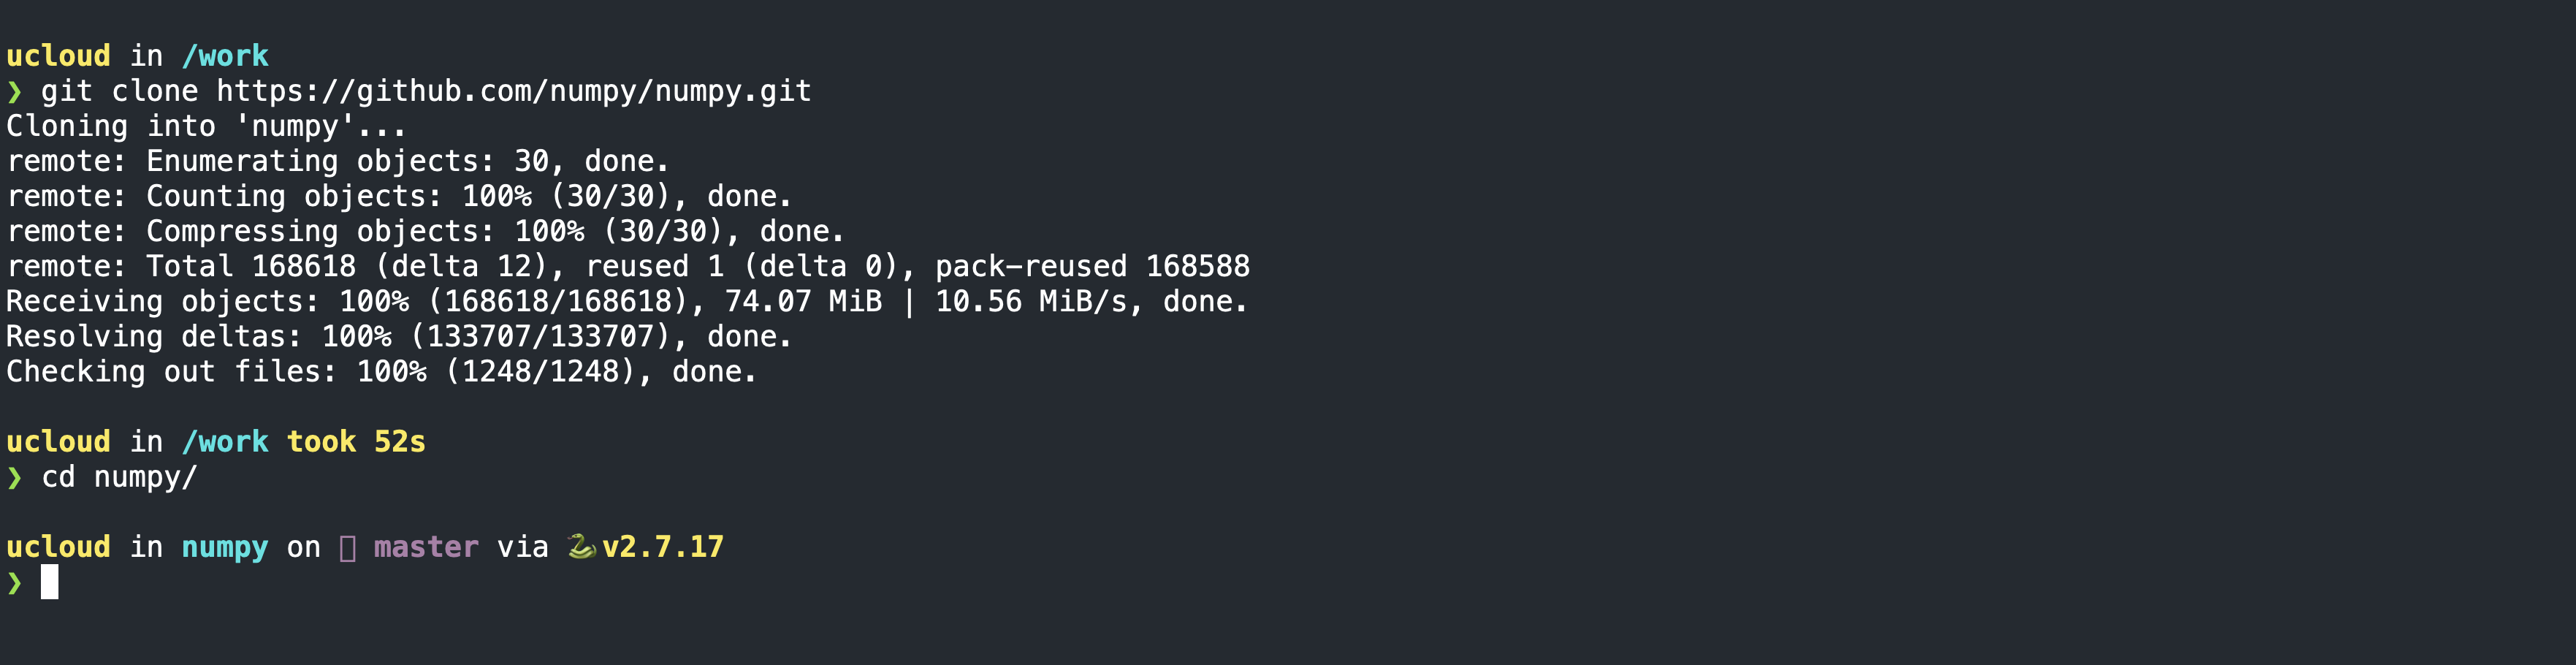
Once logged into the terminal window interface, the name of the working folder is displayed next to the default user. In case of a Git repository, the name of the current branch is highlighted, as shown below.
Advanced features of the default shell prompt are listed [here](https://starship.rs/config/).
Start a tmux session
Key bindings
List keyboard shortcuts :
Ctrl-a ?Rotate panels :
Ctrl-a oMove to left panel :
Ctrl-a horCtrl-a <Left>Move to lower panel :
Ctrl-a jorCtrl-a <Down>Move to upper panel :
Ctrl-a korCtrl-a <Up>Move to right panel :
Ctrl-a lorCtrl-a <Right>Move to last panel :
Ctrl-a ;Zoom selected panel :
Ctrl-a +Change panels arrangement :
Ctrl-a <Space>Horizontal split :
Ctrl-a |Vertical split :
Ctrl-a -Detach session :
Ctrl-a dCreate new window :
Ctrl-a cMove to next window :
Ctrl-a nMove to previous window :
Ctrl-a pClose panel/window :
Ctrl-a &orCtrl-dSelect window :
Ctrl-a <0-9>Synchronize panels :
Ctrl-a Shift-eOpen configuration file :
Ctrl-a eEnable vertical scrolling :
Ctrl-a [orCtrl-a PgUpEnable mouse support:
Ctrl-a mSwitch session :
Ctrl-a s
tmux is a terminal multiplexer, that is it allows to open multiple windows inside the same session. It makes easy to switch between multiple programs in one terminal window, detach them and reattach them to a different terminal.
A new tmux session is started with the command:
$ tmux new -s session_name
Alternatively, one can use the optional parameter Enable tmux, which will automatically start a new tmux session within the selected shell type.
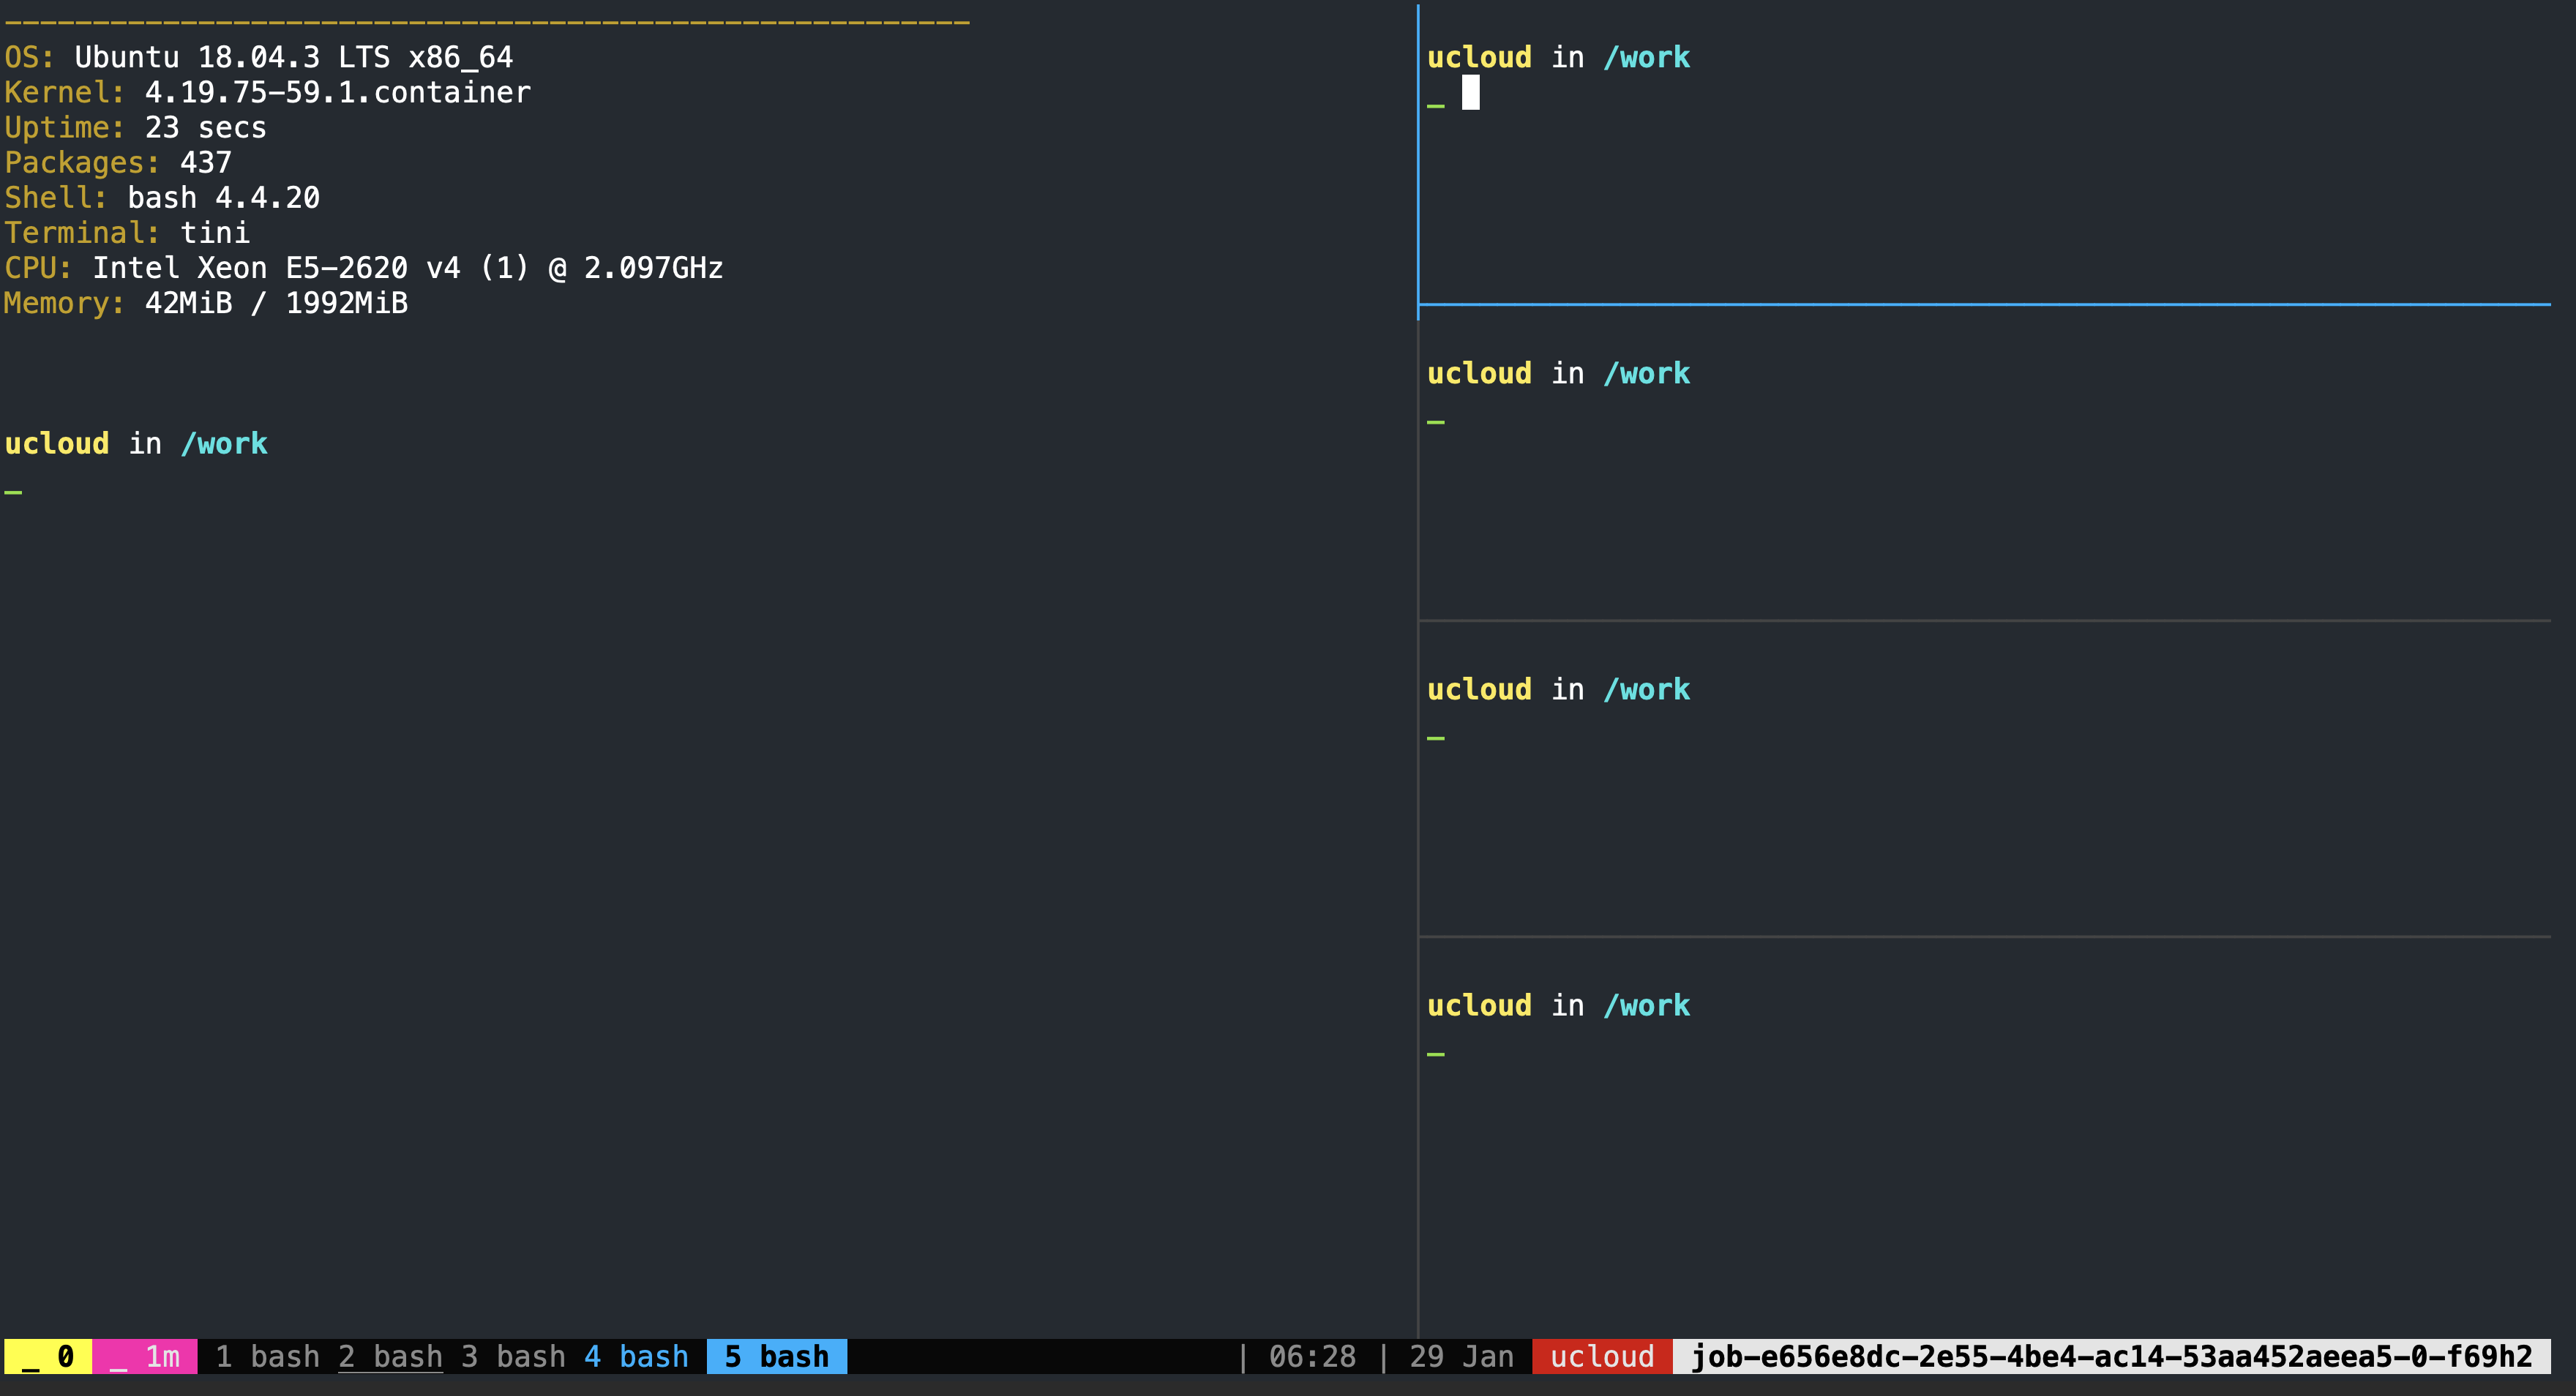
An example is shown in the figure below. In this case the current session contains five windows, with the active one divided into five panels. To move between different windows and panels, one should use the key bindings listed above.
The list of all the active tmux sessions is given by:
$ tmux list-sessions
An active tmux session can be attached to multiple browsers with the command:
$ tmux attach -t <session_name>
This is useful to resume a session previously running in another window. The current session can be detached using the key combination: Ctrl-a d . Alternatively, from a new browser window, run the command:
$ tmux detach-client -s <session_name>
Additional web interfaces
This optional parameter is used to publish extra web interfaces in addition to the main one. Each interface appears in the job output as App 1, App 2, …, with ports assigned sequentially. The published endpoints are listed in the job output logs.
This allows multiple independent interfaces to be exposed under the same job, for cases where an application offers several frontends or service endpoints.
Advanced Features
These features are available only in few releases of the Terminal app.
Environment modules
The Lmod environment module system is used to configure and load environment settings with modulefiles as well as manage multiple versions of the same software.
To see a list of available software modules run the command:
$ module avail
or
$ module spider
To load a module, use the command: module load <module_name>. The default version will automatically be loaded. To select a particular version, use instead: module load <module_name>/<module_version>.
The list of currently loaded modules is shown with the command:
$ module list
To unload a specific module, use the command: module unload <module_name>. This command will automatically unload all its dependencies as well.
To unload everything, use:
$ module purge
More commands can be read in the official documentation.
EasyBuild
EasyBuild is a software build and installation framework written in Python, which allows to deploy and manage many scientific applications and tools on HPC systems. The EasyBuild module is loaded by default when the terminal session starts:
$ module list
Tip
Currently Loaded Modules:
\1) EasyBuild/4.3.3
The dependencies and build parameters of each software release are specified in the corresponding EasyBuild easyconfig files.
To search for all available easyconfig files, use the option --search (or -S). For example:
$ eb -S '^Python-3.6.6-*'
Tip
CFGS1=/opt/easybuild/easyconfigs/p/Python
* $CFGS1/Python-3.6.6-foss-2018b.eb
* $CFGS1/Python-3.6.6-fosscuda-2018b.eb
* $CFGS1/Python-3.6.6-intel-2018b.eb
* $CFGS1/Python-3.6.6-iomkl-2018b.eb
Each file specifies the installation parameters for a compiler toolchain.
The eb command is used to install new software from the corresponding easyconfig file. To check all the software dependencies, use the option --dry-run (or -D). For example:
$ eb Python-3.10.4-GCCcore-11.3.0.eb -D
Tip
== temporary log file in case of crash /tmp/eb-9rE3Ix/easybuild-yWJqtE.log
Dry run: printing build status of easyconfigs and dependencies
CFGS=/opt/easybuild/easyconfigs
* [ ] $CFGS/m/M4/M4-1.4.19.eb (module: M4/1.4.19)
* [ ] $CFGS/p/pkgconf/pkgconf-1.8.0.eb (module: pkgconf/1.8.0)
* [ ] $CFGS/o/OpenSSL/OpenSSL-1.1.eb (module: OpenSSL/1.1)
* [ ] $CFGS/b/Bison/Bison-3.8.2.eb (module: Bison/3.8.2)
* [ ] $CFGS/p/Python/Python-3.10.4-GCCcore-11.3.0.eb (module: Python/3.10.4-GCCcore-11.3.0)
== Temporary log file(s) /tmp/eb-9rE3Ix/easybuild-yWJqtE.log* have been removed.
== Temporary directory /tmp/eb-9rE3Ix has been removed.
All the dependencies marked with [ ] will be installed recursively with the option --robot (or -r).
By default, new software is installed in $EASYBUILD_INSTALLPATH.
In order to export on UCloud new modules installed with EasyBuild, it is necessary to specify a different installation path within the default work tree. For example:
$ eb --installpath=/work/easybuild Python-3.10.4-GCCcore-11.3.0.eb -r
In this case the software and its dependencies will be installed in the folder /work/easybuild, which is saved in the job output folder. To load the software modules when submitting a new job, the user should select the easybuild folder using the optional parameter Modules path. This will update the default MODULEPATH environment variable within the shell configuration.
Alternatively, the user can mount it as any other folder and run the following command within a terminal session:
$ module use /work/easybuild/modules/all
For more advanced use of EasyBuild, check out the official documentation.
Create a Slurm cluster
Some releases of the Terminal app are configured for multi-node deployment. In this case the number of nodes is specified using the corresponding parameter in the app front-end page.
The Slurm workload manager is installed and configured in the app to allow for the job scheduling and resource distribution on multiple nodes. A Slurm cluster can be instantiated using the corresponding optional parameter. Alternatively, one can use the command:
$ init_slurm_cluster
The controller node is always node0, which is also used as a compute node. Therefore, Slurm can also be run on a single node. All additional nodes are named sequentially. For example, a cluster consisting of three full u1-standard nodes is configured as follows:
$ sinfo -N -l
Tip
NODELIST NODES PARTITION STATE CPUS S:C:T MEMORY
node0 1 CLOUD* idle 64 1:64:1 385024
node1 1 CLOUD* idle 64 1:64:1 385024
node2 1 CLOUD* idle 64 1:64:1 385024
Jobs can be submitted with either one of the following commands: srun, salloc or sbatch. For example:
$ sbatch my_script.sh
A minimal Slurm script is reported below.
#!/bin/bash
#SBATCH --nodes 1                 # number of nodes
#SBATCH --ntasks-per-node 1       # number of cores per node
#SBATCH --time 2:00:00            # max time (HH:MM:SS)

for i in {1..10000}; do
echo $RANDOM >> random.txt
done

sort random.txt
Note
A Slurm script can also be submitted in batch mode using the Batch processing optional parameter.
Important
Multi-node configurations on a Slurm cluster require reserving full nodes. If nodes are split across jobs, performance may degrade due to communication overhead. This is especially problematic for GPU jobs, since GPU devices may not be detected or mapped correctly unless the entire node is reserved.
More configuration options and tutorials can be found here.
Contents