Dictaphone
This utility allows users to record audio (interviews, memos, etc.) using the microphone on their device. The application can also be accessed from devices with small screens, like mobile phones (both Android and iOS). In addition, it is also possible to transcribe recordings. This feature uses the Whisper large language model from OpenAI and WhisperX for speaker diarization.


Operating System:

Terminal:


Shell:


Editor:


Package Manager:


Programming Language:


Database:


Utility:


Extension:


Operating System:
Terminal:
Shell:
Editor:
Package Manager:


Programming Language:

Database:

Utility:
Extension:
Whisper:

WhisperX:


Operating System:
Terminal:
Shell:
Editor:
Package Manager:


Programming Language:

Database:

Utility:

Extension:
Whisper:
WhisperX:

Recording Audio
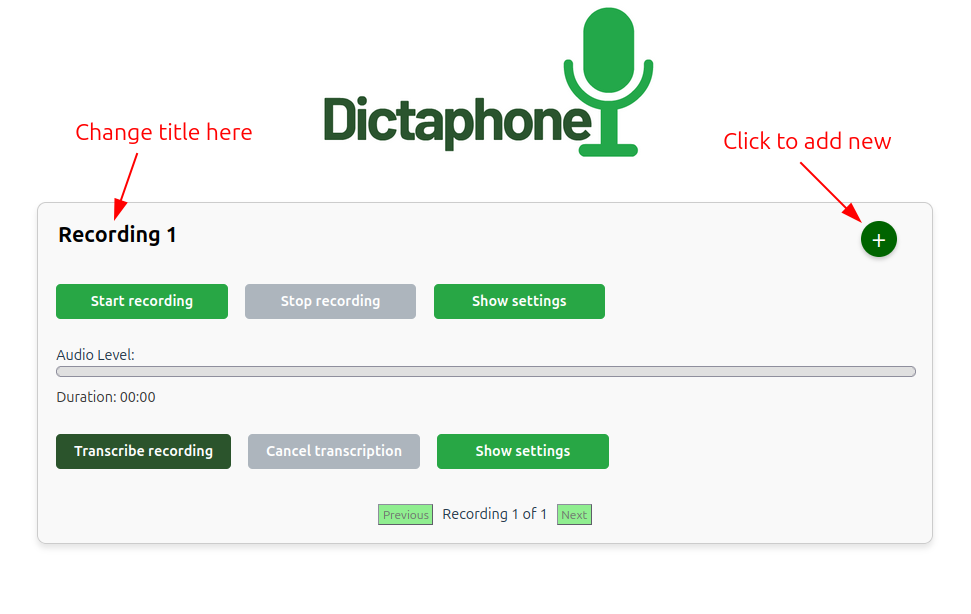
The figure below shows the user interface for the Dictaphone application. The recording title can be changed as needed. This title is used for the folder name for output files.
Settings
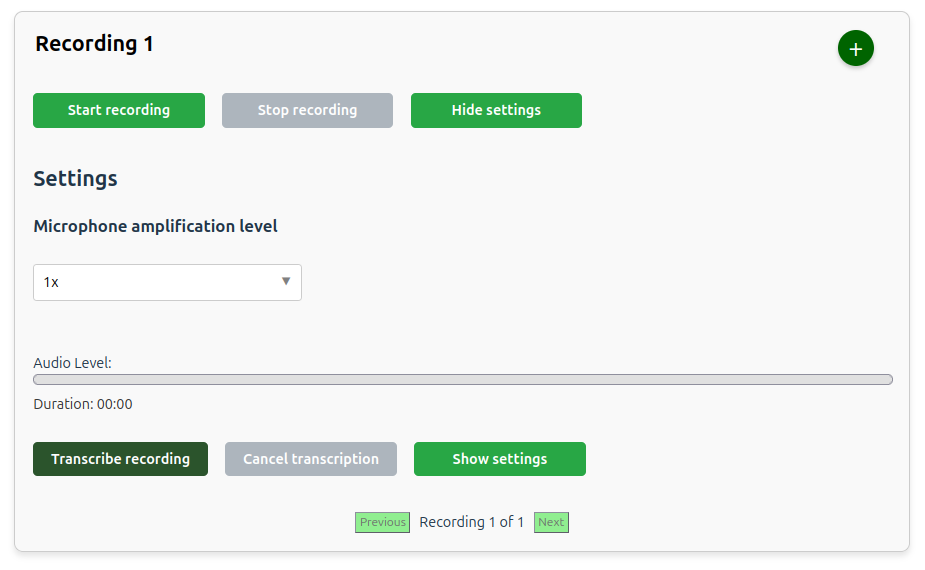
The Show settings button can be used to change the Microphone amplification level, and boost the signal if the recording audio is too low. The microphone amplification level default is 1x which means no amplification.
The Test microphone button opens an interface for testing the microphone at various amplification levels without persisting data to UCloud.
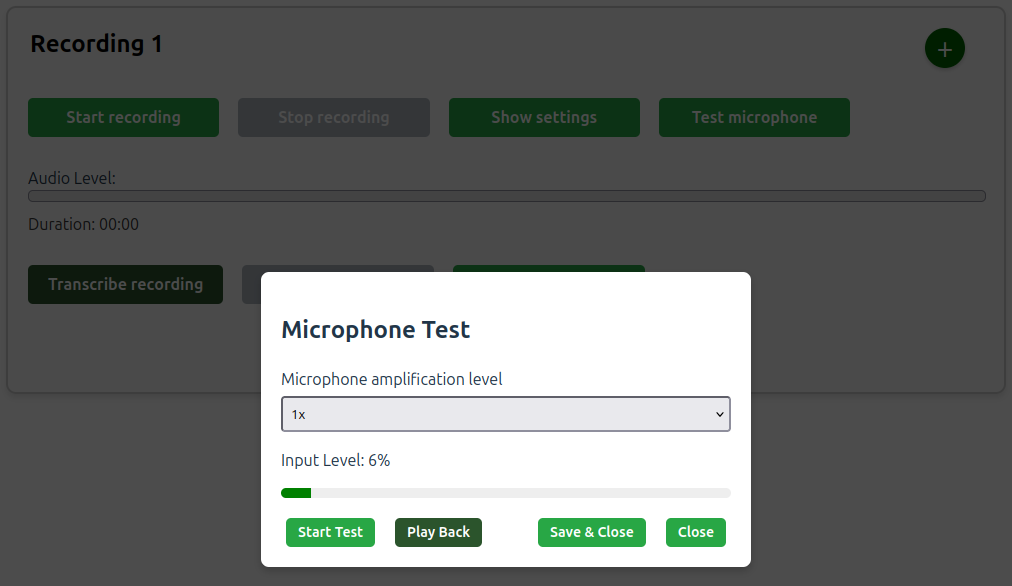
Note
The amplification level will affect the transcription quality. It is advisable to test different levels to find the optimal setting for your microphone.
Navigation Menu
Open the navigation menu to quickly navigate, rename, or delete recordings.
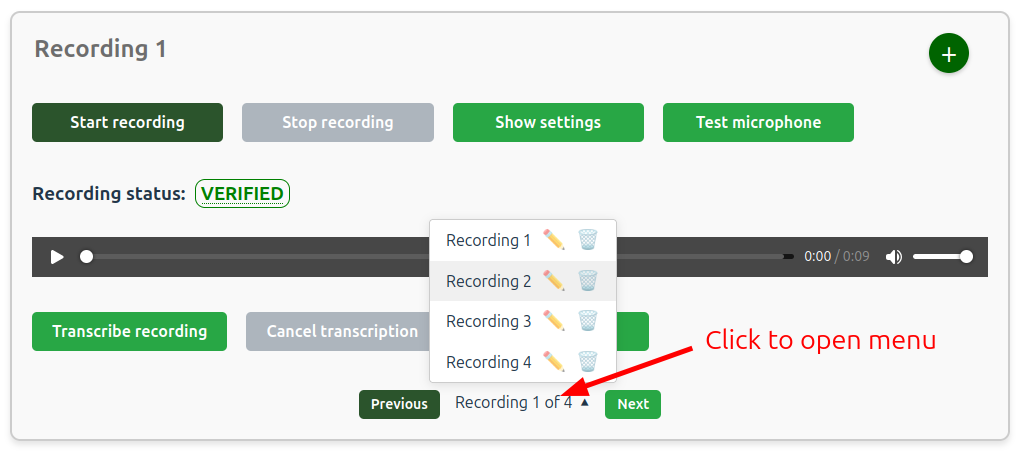
Note
When you use the delete function, data is permanently deleted and the operation cannot be undone.
Transcriptions
To start a transcription of the recorded audio click the Transcribe recording button like shown below.
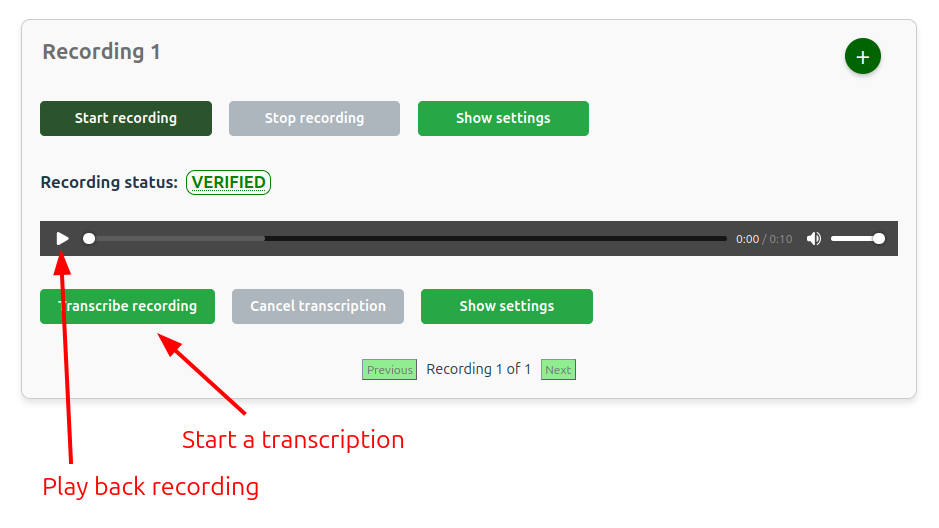
The transcribed files will be available for download using the UI or in the Job folder (see the data management section).
Settings
Transcription settings, as for example the Whisper model and language to be used for the transcription, can be accessed by clicking on the Show settings button below the recording section.
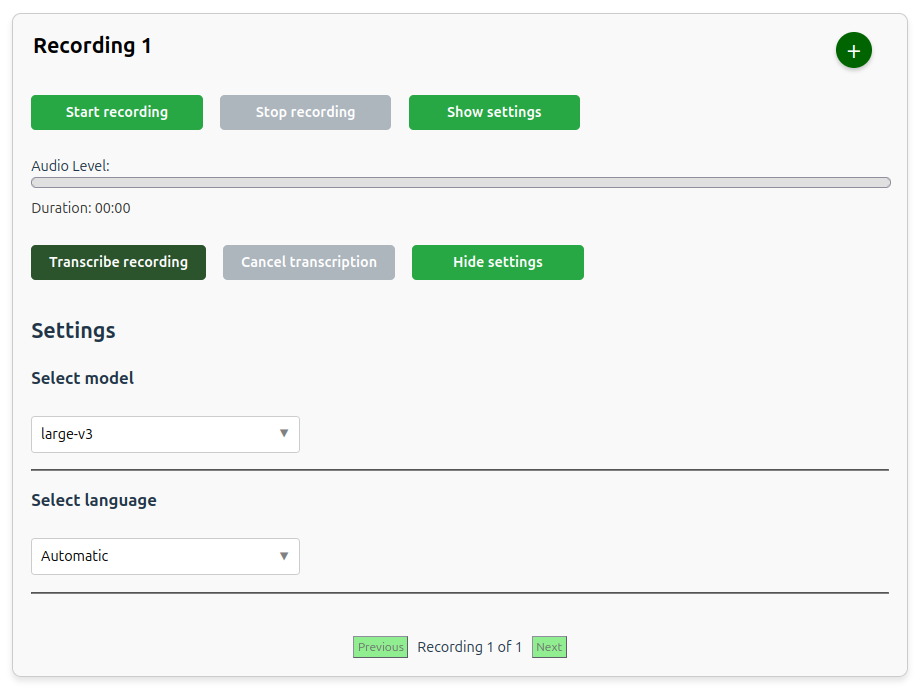
By default, the model choice (given enough memory) is large-v3 and the language choice is Automatic. The available models depends on the amount of memory in the machine or GPU(s).
Model name |
Required Memory |
Parameters |
|---|---|---|
base |
~1 GB |
74 M |
small |
~2 GB |
244 M |
medium |
~5 GB |
769 M |
large-v3 |
~10 GB |
1550 M |
large-v3-turbo |
~6 GB |
809 M |
Note
The above table shows the minimum requirements for running the whisper models. The memory requirements will increase when processing large audio files, so it will often be necessary to use a machine with additional memory.
Using a smaller model will speed up the transcription at the cost of lower accuracy.
Data Management
The data from the recordings are saved in the RECORDINGS folder.
By default, the RECORDINGS folder is created in the /work directory and accessible on UCloud in the Jobs folder.
A specific folder on UCloud can be selected by using the parameter Select folders to use , when starting the job.
If a RECORDINGS folder from a previous job run is selected then data from this directory will be loaded when the app starts.
Here is an example of the created folder structure after completing a recording and a transcription.
RECORDINGS
├── 1_Recording_1
│   ├── TRANSCRIPTIONS
│   │   └── transcription files...
│   └── Recording_1.wav
│   └── completion_log.txt
Every time a new recording process is started (by adding and starting a new recording) a new folder is created, by default 1_Recording_1, 2_Recording_2, and so on.
The completion_log.txt file will be written during verification.
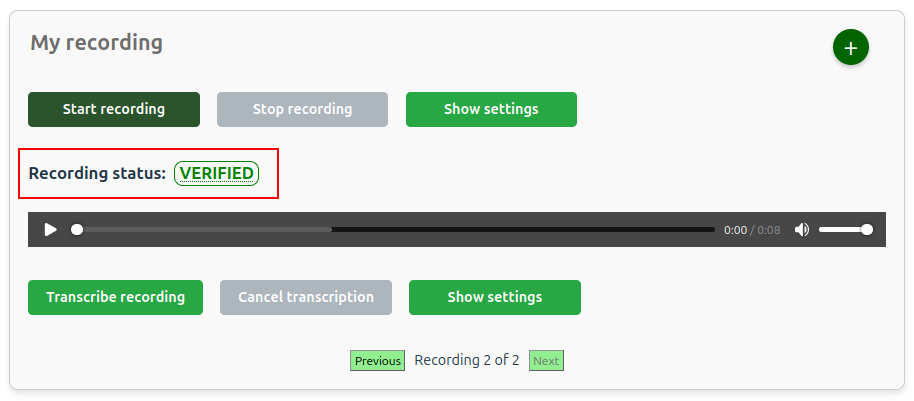
Verification of recorded data
When the Stop recording button is clicked a verification process is started. The server will check for missing data packages and request missing data from the client. After verifying the uploaded data a log file is written, which includes the recording ID, the verification status and a timestamp.
Under normal circumstances the verification status will be VERIFIED, but in case of client disconnection, server disconnection or loss of data packets the status may be different. The possible statuses are:
VERIFIED:
This is the normal verification status.INTERRUPTED, VERIFIED:
If the client disconnects during recording, e.g. if the user closes the browser window during recording, then the server will check that there is no missing data up until that point.INTERRUPTED:
If the server is unexpectedly stopped during recording then an error message will be shown instantly in the user interface. The recorded data can still be found on the server, but since the server was shut down the verification process will not be completed.DATA LOSS:
This verification status means that the server detected missing data, which could not be acquired from the client during the verification process. In practice this is extremely unlikely, since the application is designed to use request/resend of missing data both during recording and in the verification process.
Working with sensitive data
When working with sensitive data it is recommended to select a folder when starting the app as shown in the screenshot below. It is also a good idea to adjust the Hours setting depending on the duration of the planned recording session.
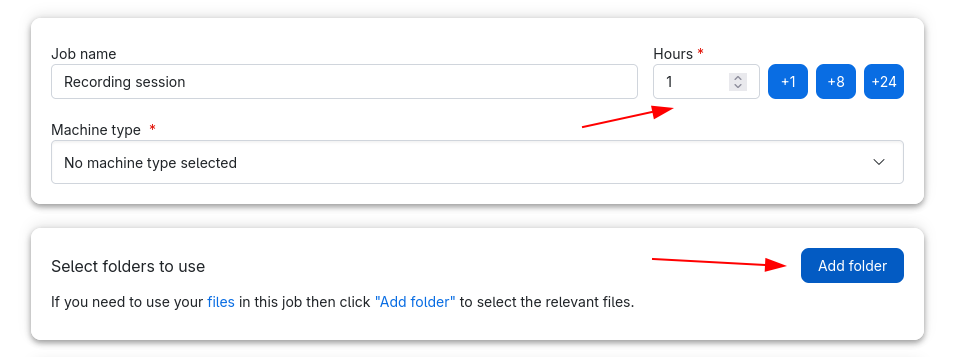
Note
Before starting the job this folder should be created in a safe location and marked as sensitive.
Optimizing use of GPU resources
GPUs are a valuable resource, so it is a good idea to plan when they are needed by the application. The recording feature and the transcription feature of the dictaphone application have very different resource requirements.
Here are a few recommendations:
If the use case is to make transcriptions as you go, e.g. on consecutive recordings, then the application needs a powerful machine (GPU).
If the use case is to make one long recording and no transcriptions, then a small machine is fine.
In case of a combination of the two - one long recording followed by a transcription - then it would be best to select a smaller machine without GPUs to perform only the recording. When the recording is done, start a new app (transcriber or dictaphone), select the folder containing the recordings and a more powerful machine.
Starting the Dictaphone from a mobile device
This section highlights a few tips for improving the user experience when starting the application from the UCloud interface.
When selecting the UCloud project workspace and machine type use one of the following options:
Tilt the mobile screen on the side.
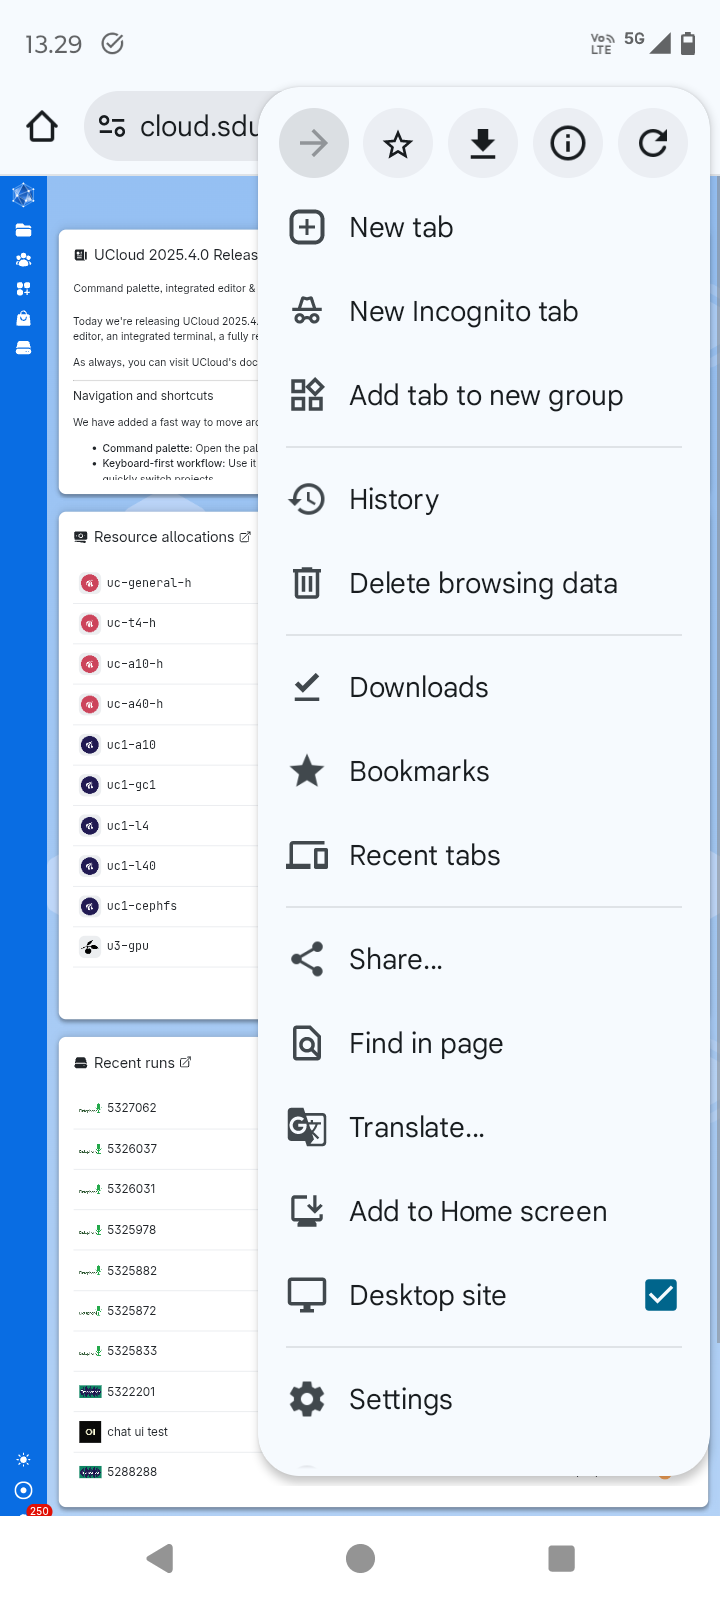
Use the Desktop site setting in Chrome (or equivalent) for the UCloud main site (see figure below).
Contents