Manage Files and Folders
If a file or a folder is selected, various options are displayed at the top of the screen, as shown in the figure below.

These options include: Open with..., Download, Share, Rename, and Move to trash. A detailed list of available options can be revealed by right-clicking on the file/folder name and opening the context menu.
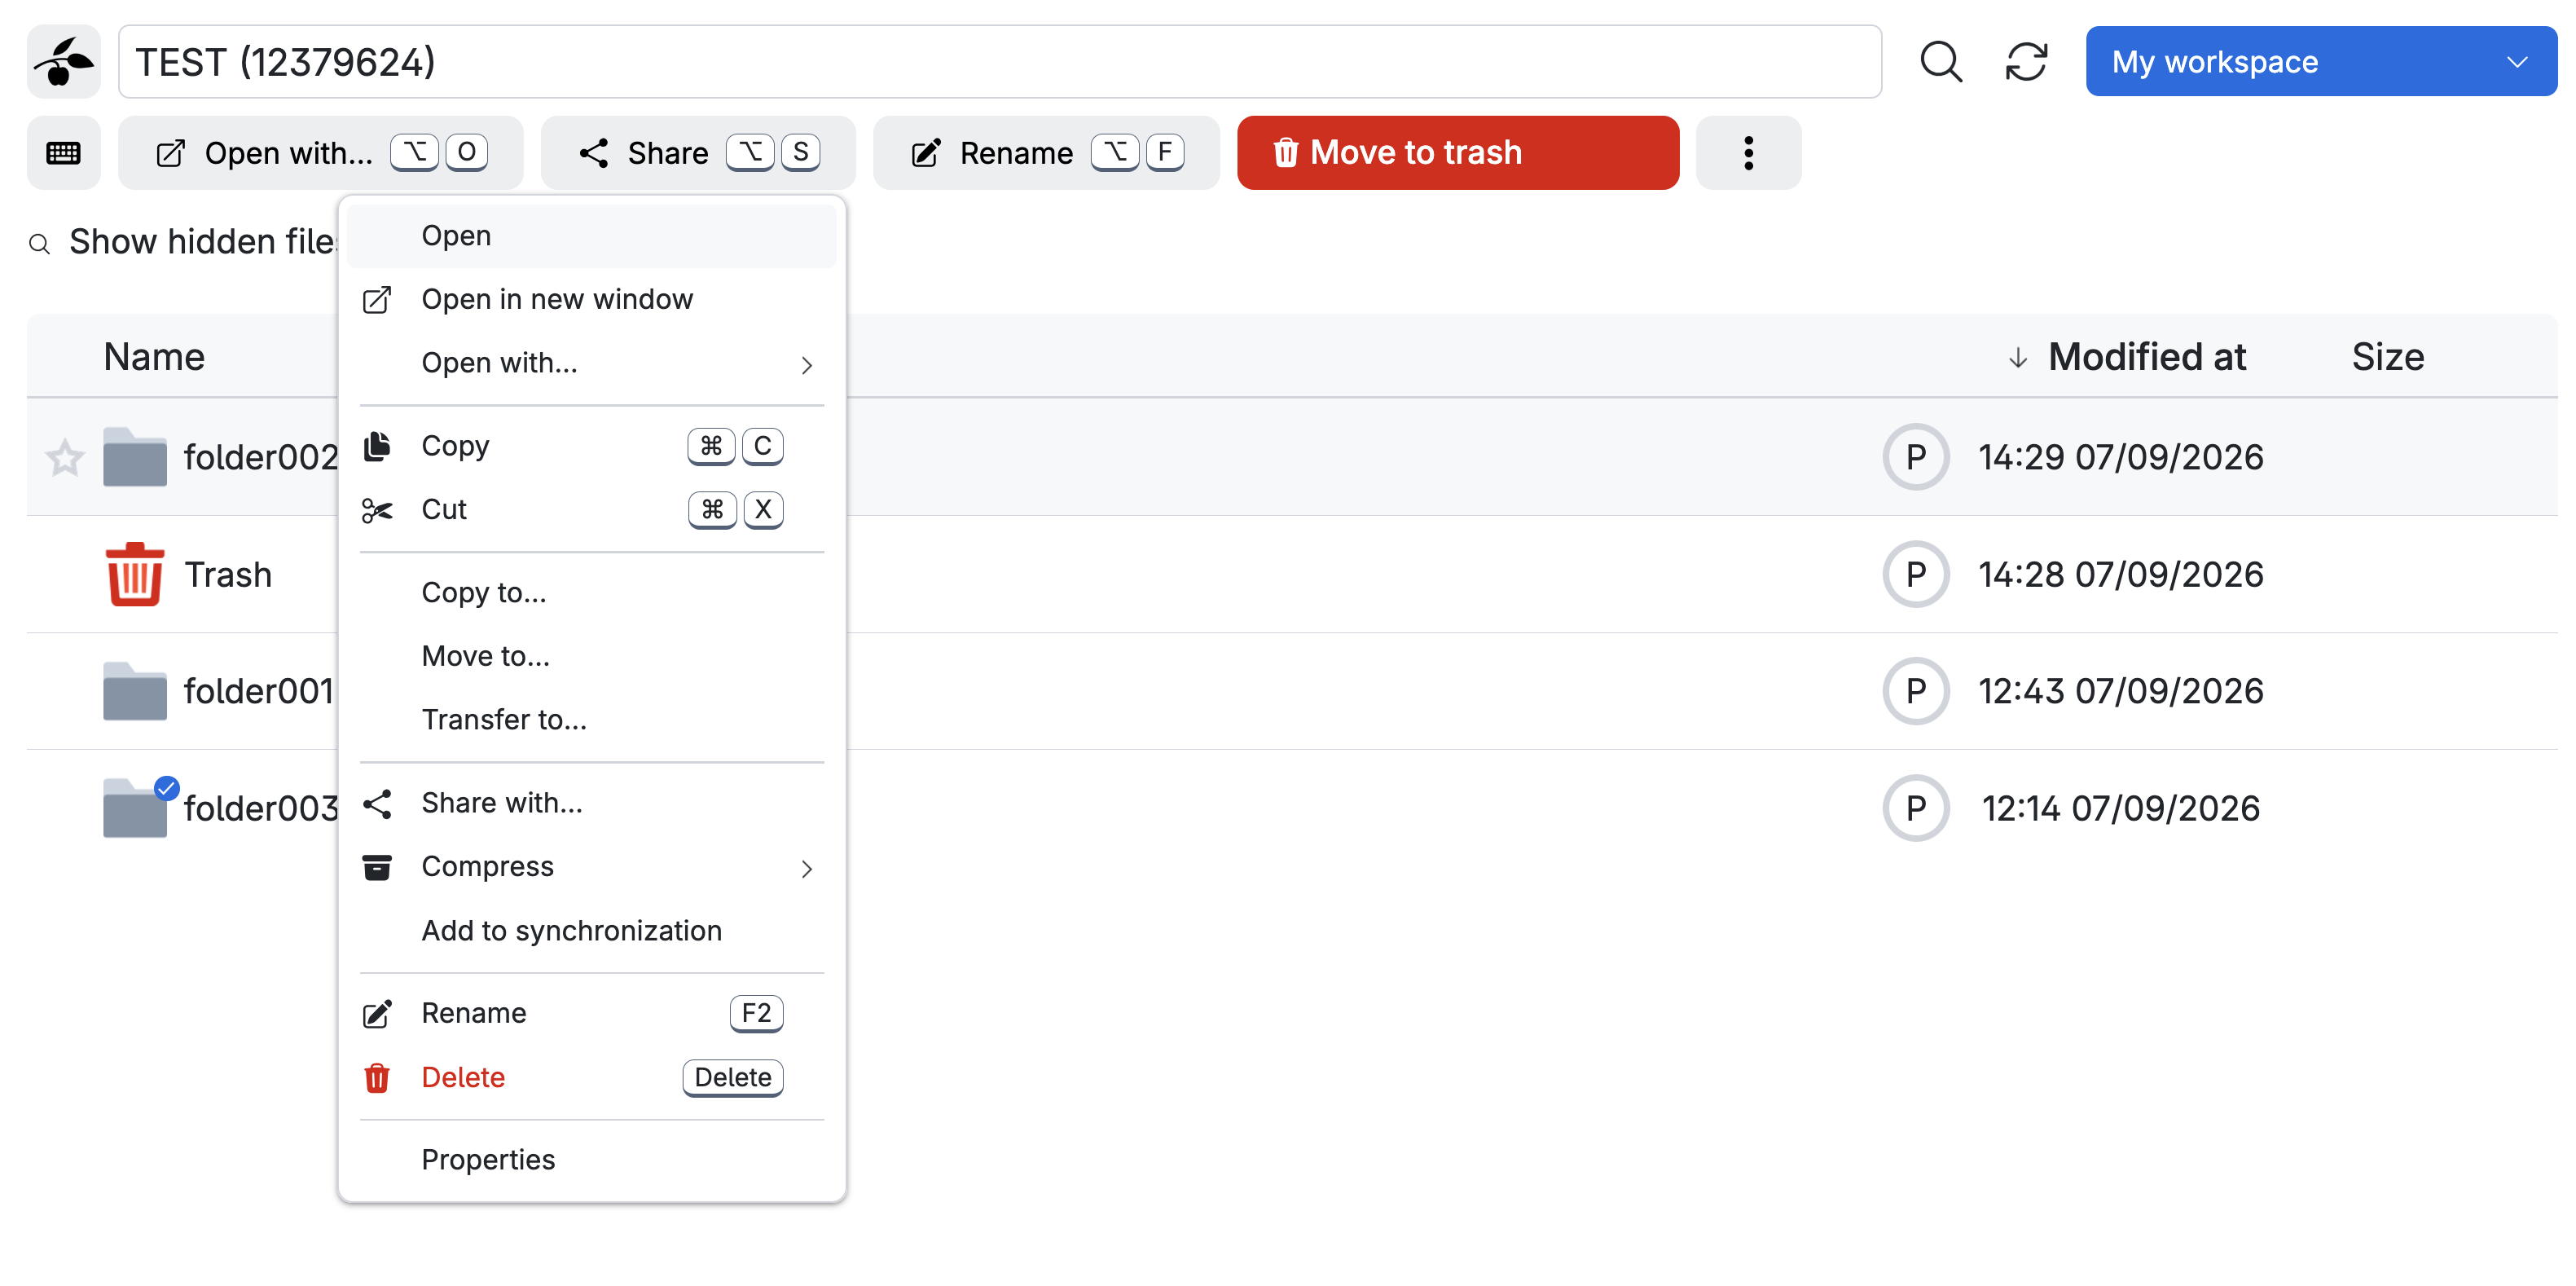
Some of these operations may also be applied to multiple files/folders simultaneously, selected by pressing and holding the left mouse button on the corresponding items.
Note
The list of available options may vary depending on several factors such as the active project, the number of selected items, custom permissions assigned to the item, and whether the selected item is a file or a folder.
Open with...
Select the file or folder and choose this option from the context menu. You can then open the file or folder in the Editor, or click Application to open the Launch with menu.
For instance, in the case of a Python file, the resulting dialog box will appear similar to the one below.
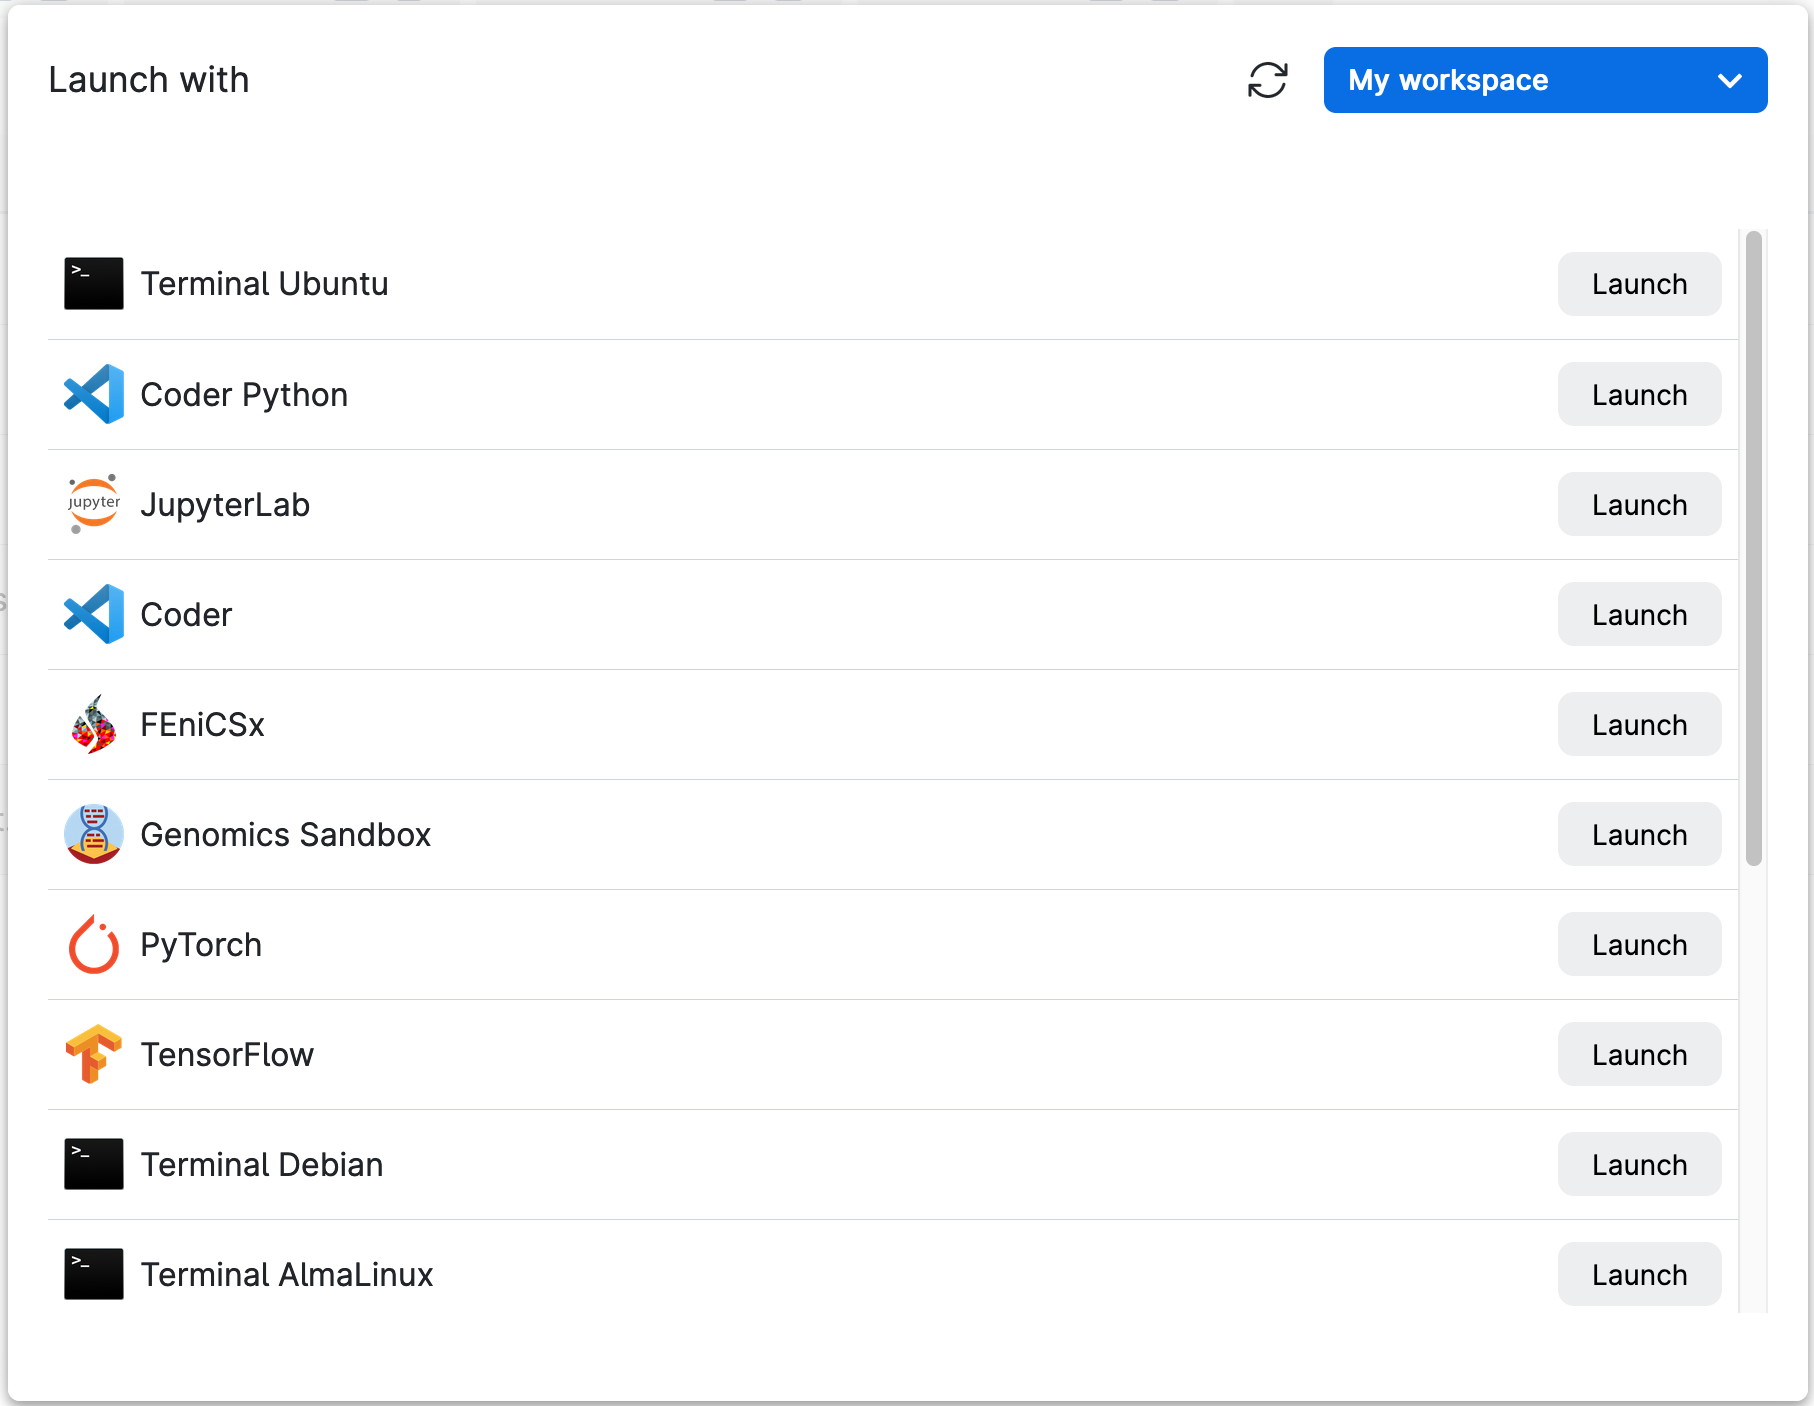
In addition, the Open with... button at the top of the page serves as a shortcut to the Launch with option.
Note
After selecting the Service provider and Machine type, the system submits the job with the default application parameters.
Download
To download a file, users can simply click Download. Folders cannot be downloaded directly and must first be compressed using the Archiver app.
Copy to... and Move to...
Files can be copied or moved either within the default personal project (My workspace) or within any project that the user is a member of.
To begin, select the file or folder, right-click to open the context menu, and choose the option. The destination path can be specified in the dialog box that appears:
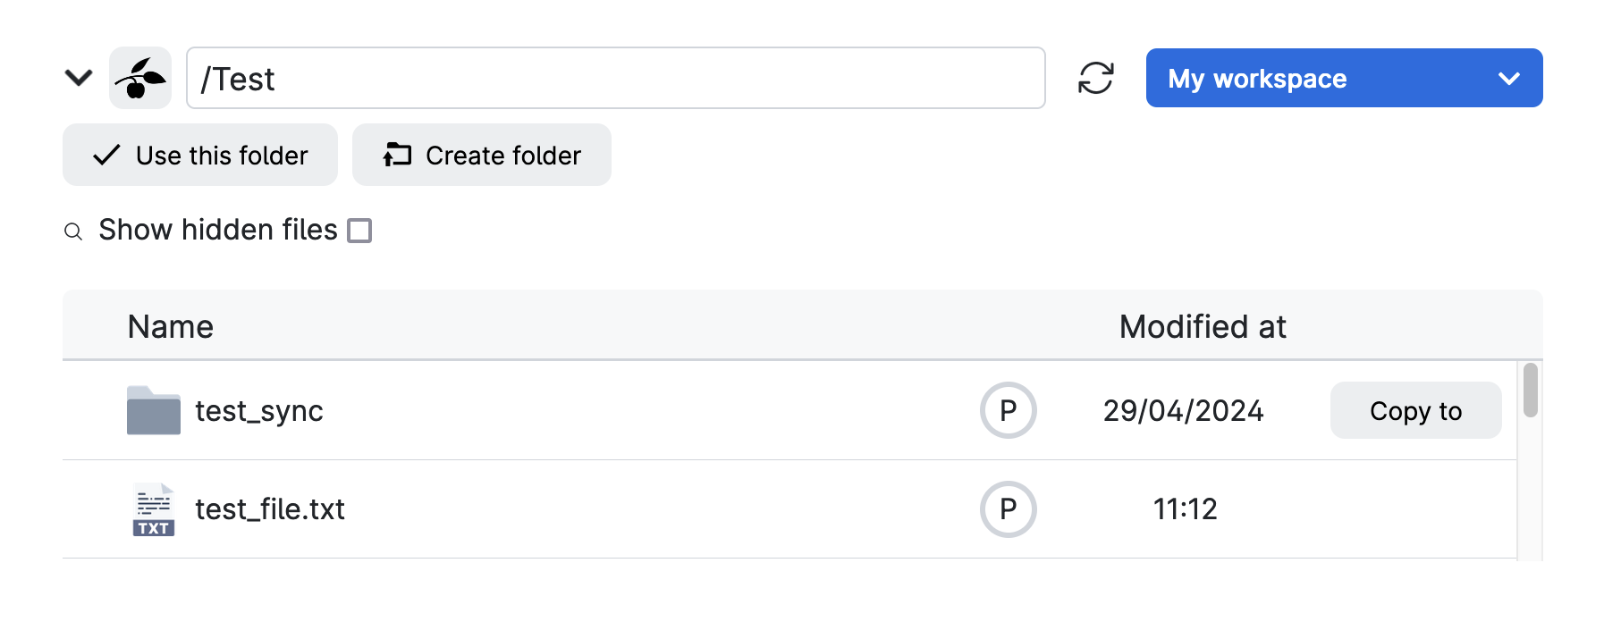
Different projects can be selected from the menu located on the left side of the dialog box. For each project space, different drives can be accessed by double-clicking on the corresponding item.
Within the same dialog box, new files and folders can be created if necessary. Files and folders can also be copied or moved between folders by dragging the selected items with the mouse.
Note
The file management operations described are only available within drives belonging to the same provider.
Transfer to...
It is also possible to transfer files and folders to drives in a different provider. To initiate the transfer, click Transfer to... from the context menu. The user must then select the desired destination.
Note
Cross-provider transfers are performed as copy operations, transferring the selected files from one provider to the chosen target location in another.
Rename
Users can rename files or folders by selecting this option.
Compress and Uncompress
To compress a folder, right-click it and select Compress from the context menu. Several archive formats are available.
Conversely, right-clicking an archive displays the "Uncompress" option in the context menu, for extracting the files.
The compression and uncompression progresses are visible by clicking on the
symbol, at the bottom of the side menu.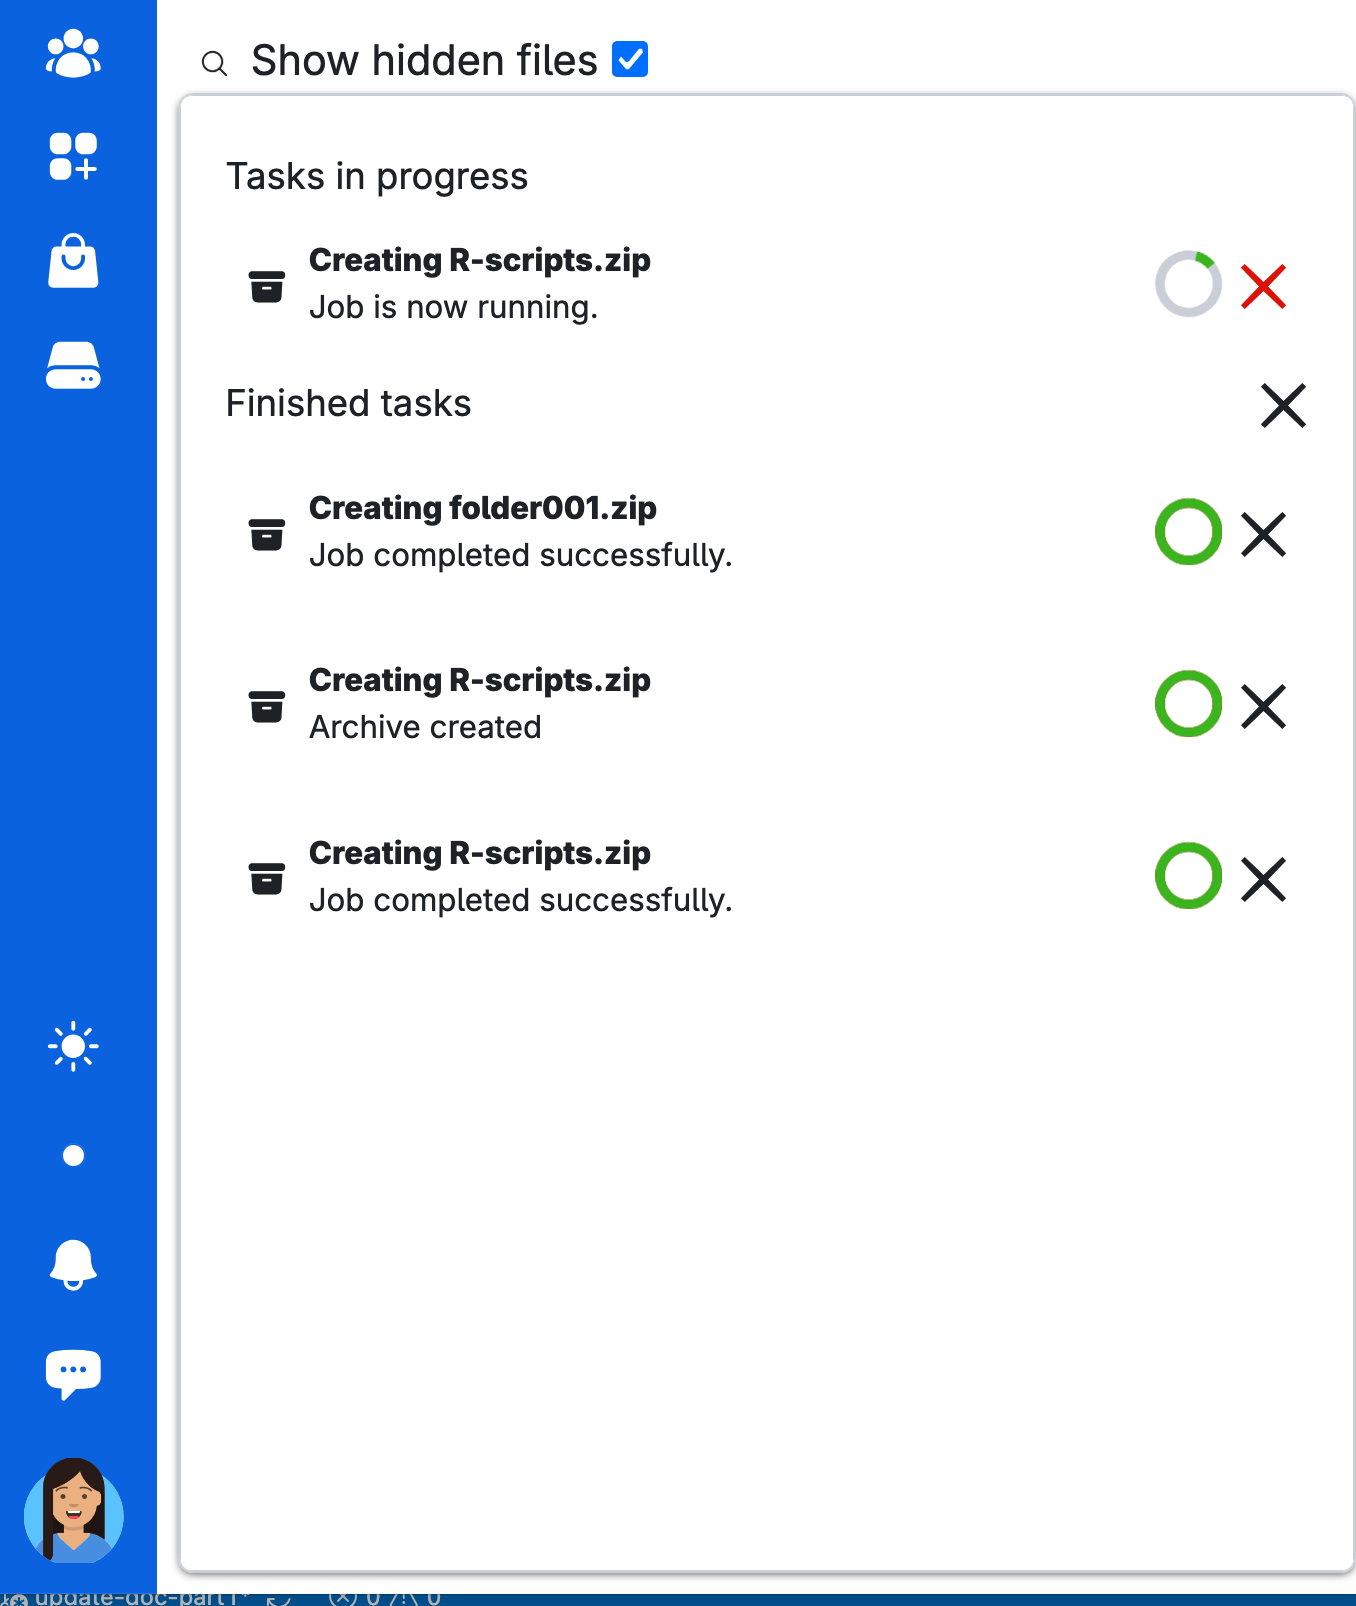
From the same window the task can be stopped.
Properties
The Properties option displays the metadata associated with the selected file or folder, which includes e.g., date of creation and sensitivity level.
Move to Trash
When files are deleted, they are not actually removed from the platform. To permanently delete them, users should navigate to the Trash folder. Here, users will have the option to empty the folder, thereby permanently deleting files and folders.
It is recommended to empty the Trash folder periodically to prevent unnecessary consumption of storage resources.
Danger
Deleted drives are permanently removed, and cannot be restored from the Trash folder.
Go to Parent Folder
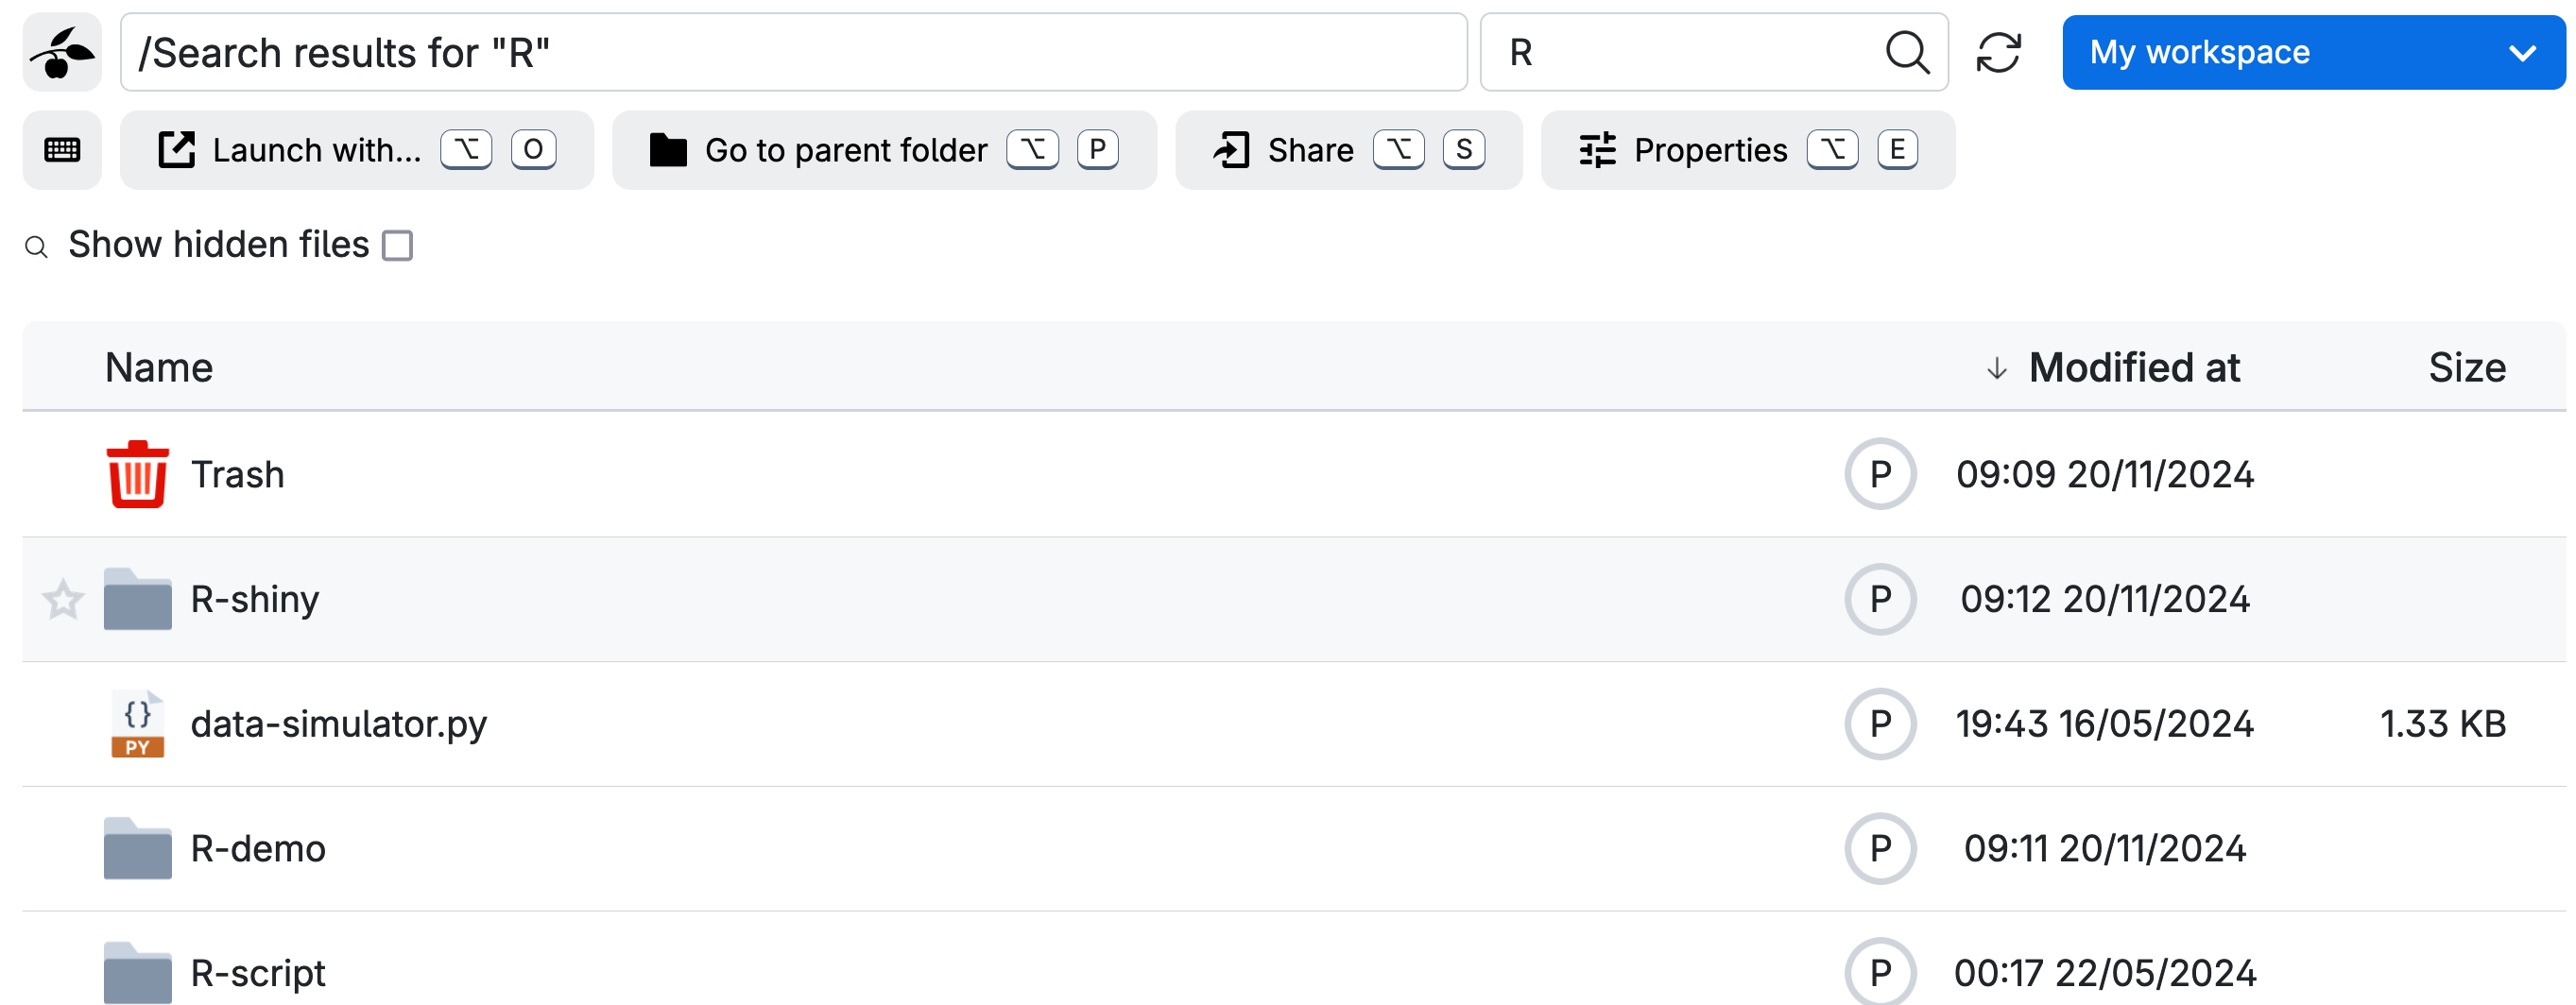
By clicking the Go to parent folder button it is possible to access the parent folder of a file or folder.
The functionality is activated for the files/folders listed when using the search button () as shown in the following example:
Change Sensitivity
To specify the sensitivity level of a selected file or folder, click on the capital letter on the right side of the name.
UCloud operates with four levels of file classification:
Inherit: Files inherit the classification of the parent folder.
Private (P): Files freely available to external parties without requiring confidentiality agreements (default level).
Confidential (C): Information important to the core business/project; high availability and high integrity are critical, regardless of the level of confidentiality required.
Sensitive (S): Data related to an individual, such as a customer, a citizen, a patient or an employee.
When a new file is uploaded to UCloud, it automatically inherits the sensitivity level of the current folder, unless otherwise specified.
Note
The sensitivity level serves as a label to alert users when they are handling sensitive data. Changing the sensitivity level does not alter the properties of files or folders, nor does it affect the associated management options on UCloud.
Preview and Edit a File
Double-clicking a file name opens a file preview.
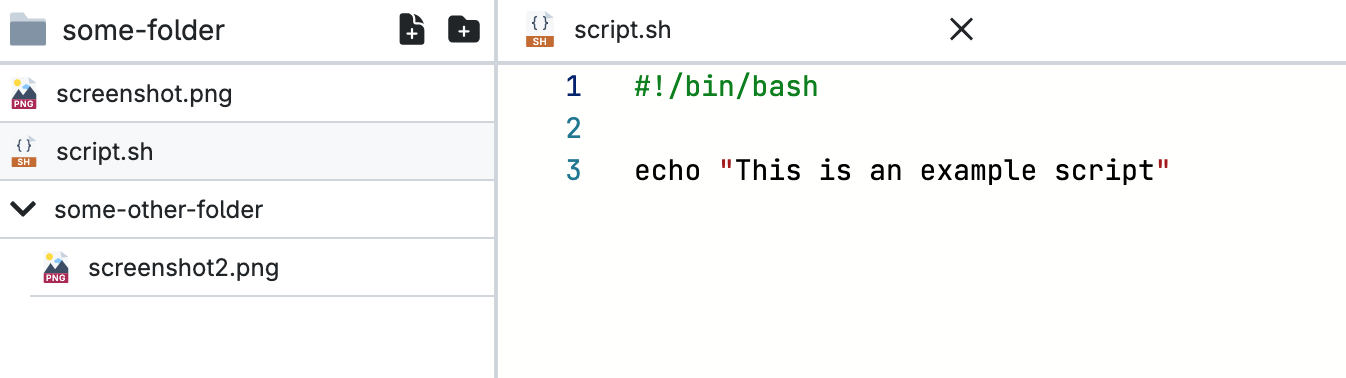
In the top-left corner of the preview window, the parent folder of the file is displayed. Hovering the mouse over the parent folder reveals the file’s absolute path. Below this, all files in the current folder and its subfolders are listed. Each item in the list can be previewed by double-clicking it.
By default, the preview is read-only. Editing can be enabled by pressing any alphanumeric key on the keyboard. A pop-up then appears, prompting confirmation to switch into edit mode.
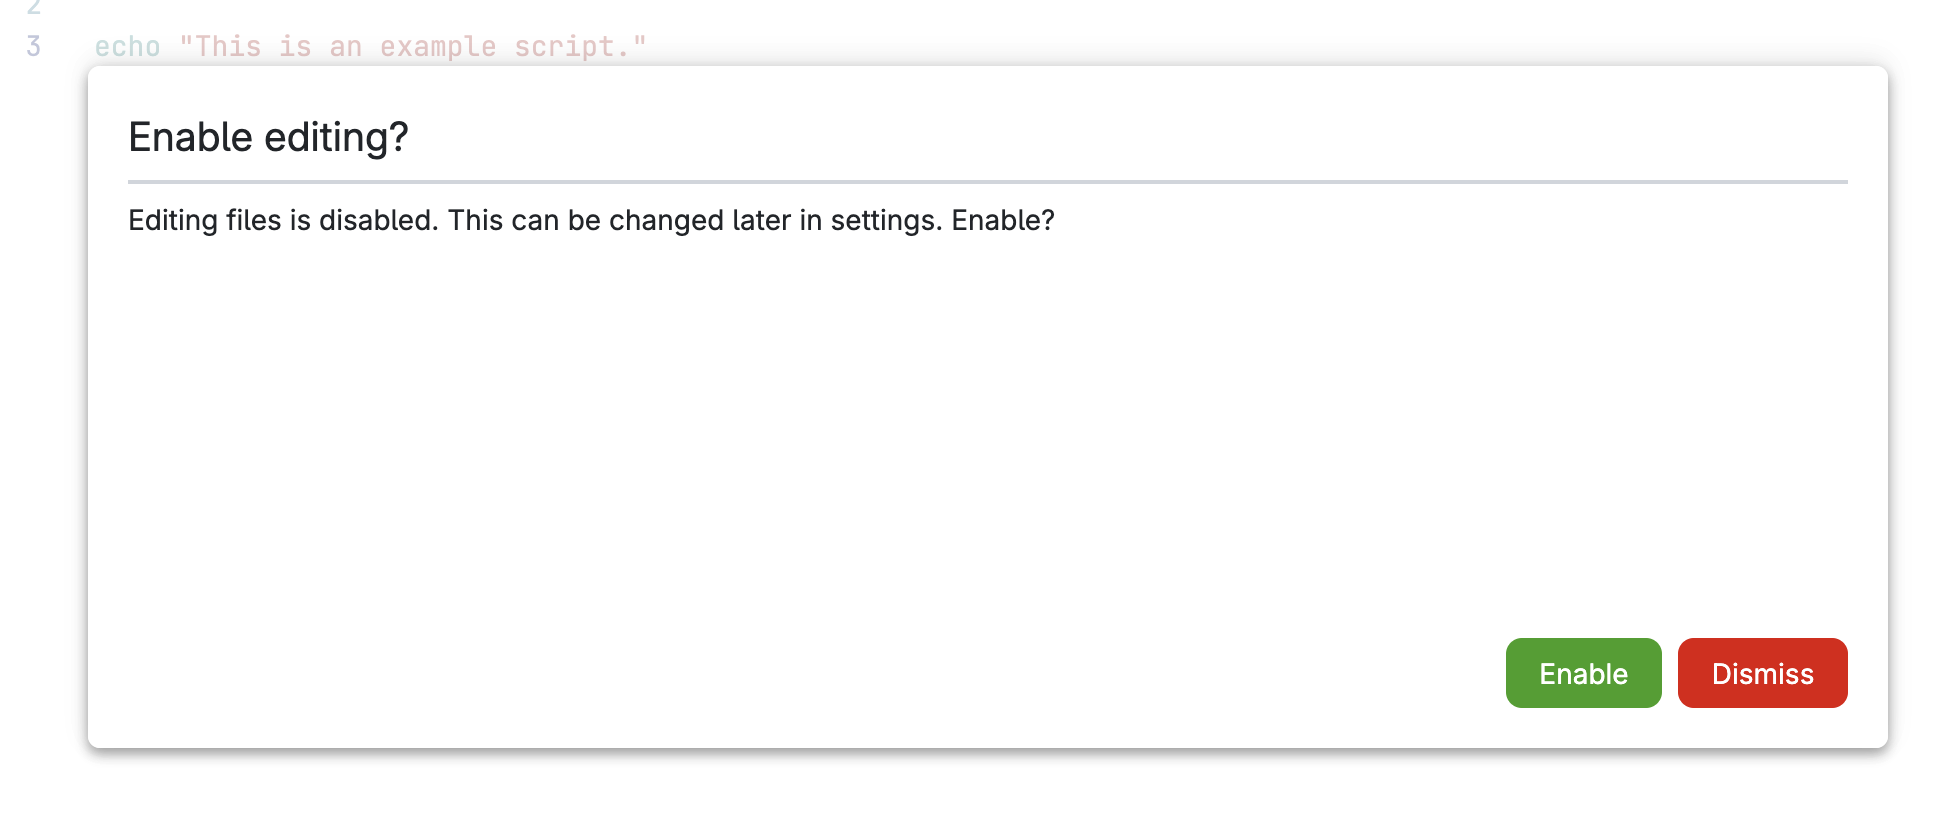
Alternatively, the user can click the button to open the preview settings. From here, it's possible Allow file editing, to enable Vim mode, change some font settings, etc.
Changes to a file can be saved using standard keyboard shortcuts such as Ctrl+S or Cmd+S.
The sidebar can be resized or hidden using the button.
Syntax highlighting
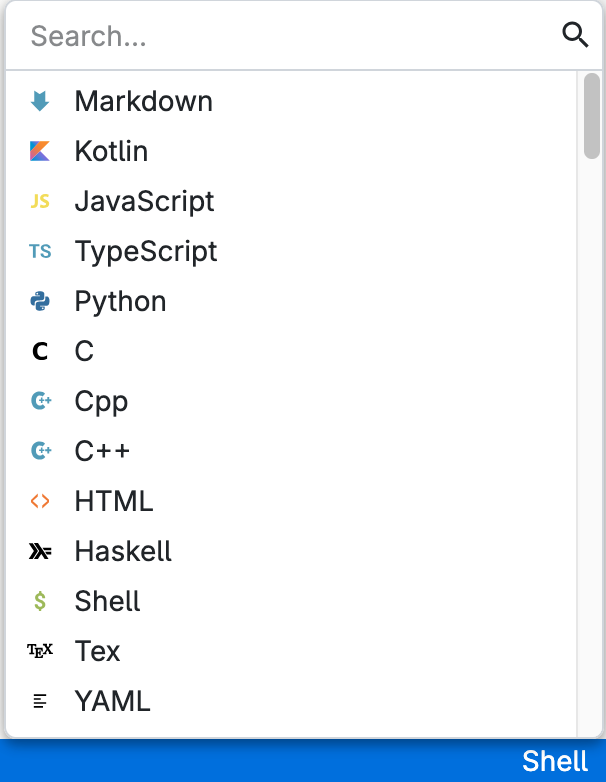
The file preview supports syntax highlighting and auto-completion for many programming languages. The language is inferred from the file extension but can be overridden by selecting a different option from the programming language selector, in the bottom-right corner of the preview window.
Integrated terminal
Integrated terminal sessions can be opened directly from the file preview window by clicking the corresponding button .
In the terminal session that opens, the parent drive of the previewed file(s) is mounted to /work.
Contents