Create Projects
To create a new project, users should fill in a grant application form, which is accessible directly from the Resource allocations panel by clicking on
Alternatively, users can navigate to the Project section of the navigation menu, select Apply for resources, and follow the provided instructions.
The application form requires users to enter the project name, detail the resources needed for each product, and provide a concise description and rationale for the project, following the standard template provided.
Member Roles
Users can hold various roles within a project, each represented by a unique icon. There are three types of membership within a UCloud project, which are briefly outlined below.
Principal investigator
When a project is created in UCloud, a principal investigator (PI) is automatically designated. The PI is the user who initiated the project.
Important
The PI role is indefinite and cannot be removed. It can only be transferred to another member of the project. Each project can have only one PI.
Even if a user's research institution does not provide explicit guidelines regarding the PI role and associated security responsibilities, the PI of a UCloud project must undertake the following management tasks:
Add or remove members.
Create groups within the project.
Change members' role and file permissions.
Restrict access to specific software licenses.
Create subprojects within the main project.
Manage and cancel jobs initiated by other project members.
Apply for additional project resources.
Additionally, the PI is responsible for these administrative tasks:
Manage UCloud credits allocated to the project.
Oversee the storage quotas for the project on UCloud.
Ensure the project's data management plan is up to date and valid.
Confirm the accuracy and adequacy of the project's risk assessment.
Handle consent management for the project.
Moreover, the PI is encouraged to adhere to these security best practices:
Monitor member behavior according to the UCloud terms of service.
Confirm the proper classification of project assets.
Define and manage the access control list (ACL) for each resource accessible to members.
Ensure all members are knowledgeable about GDPR regulations.
Verify that members are aware of and comply with cybersecurity policies set by the research institution administrating the project.
Administrator
A member of the project who has the same privileges and tasks as the PI and effectively acts on behalf of the PI.
Note
A UCloud project may have none or multiple administrators, depending on the project's needs and structure.
Default member
This role refers to a member of a group who is authorized to utilize project resources and access folders that have been made available by the project's administrators, such as the PI and any other designated administrators.
File Management
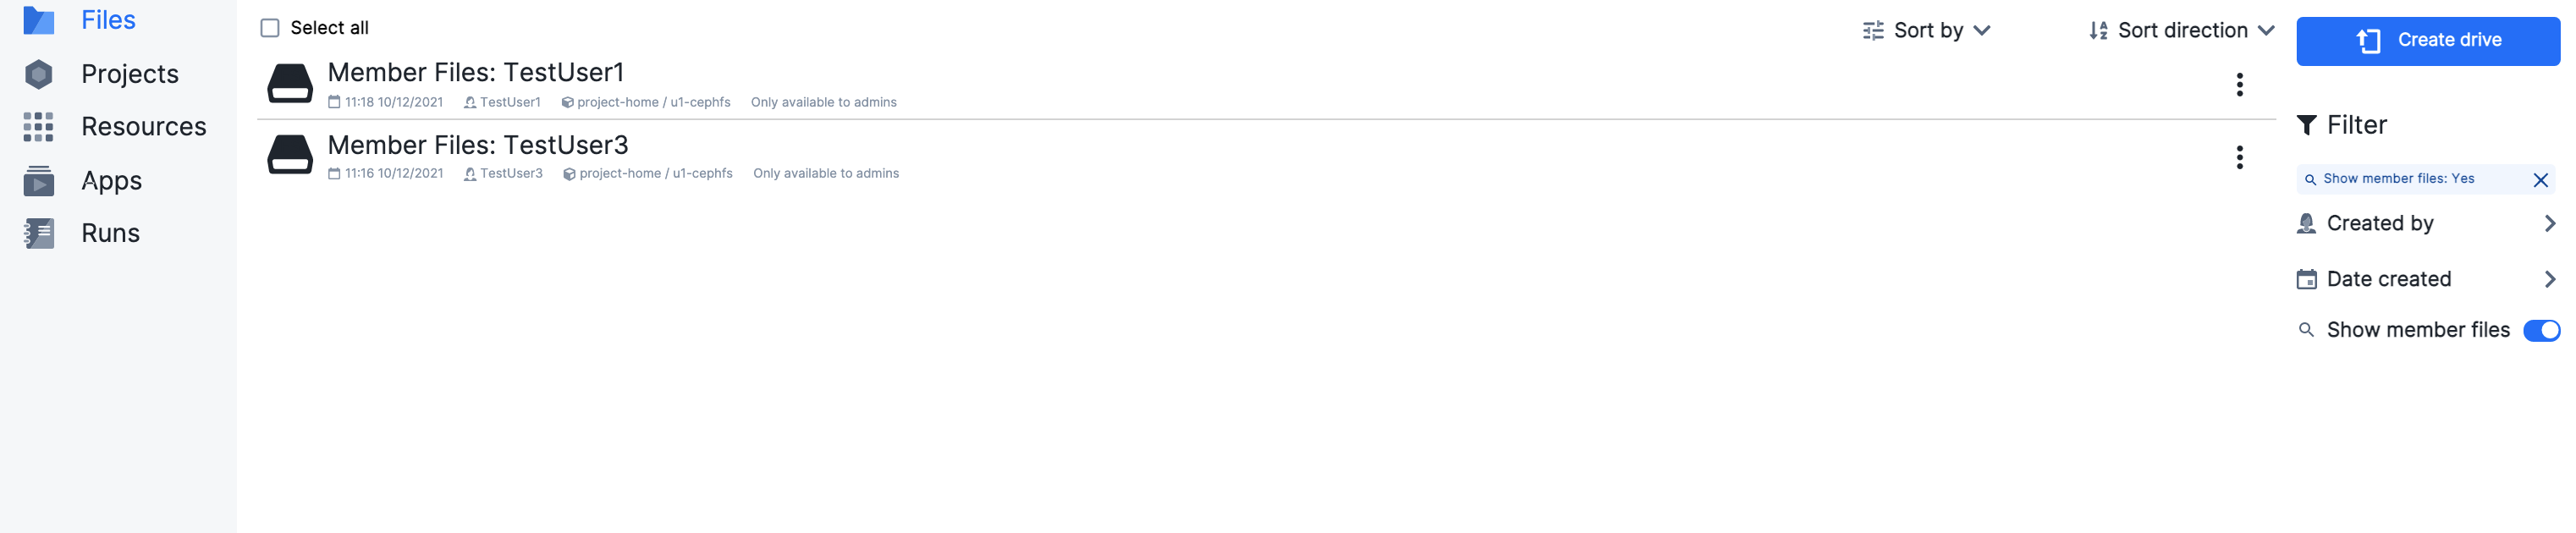
When a project is created, a drive named Members' Files: username (where username represents the user's account name ) is automatically added. This drive collects the personal folders of the user within the project.
All project members' drives are visible only to the PI and project administrators by selecting View member files at the top-left side of the drives page.
Important
When users leave a project, they will no longer have access to any files within the project.
Create new drives
Whenever a new drive is created within a project, initially, only the PI and project administrators can access it. They have the authority to modify the drive's permissions and grant access to selected groups of users.
Import files
Users can copy and move files between projects, as long as they are part of a project group that has write permission on the target folder. For more details on permissions, see here. By default, every project member can add files to their designated project personal folder, that is Members' Files: username.
License Management
Project administrators can request access to a specific software license by submitting a grant application, similar to the process for any other product available on UCloud.
To use a specific software license, it must first be activated. This can be done from the Licenses section, which is accessible through Resources , in the navigation menu.

By clicking on
the following dialog box will open:
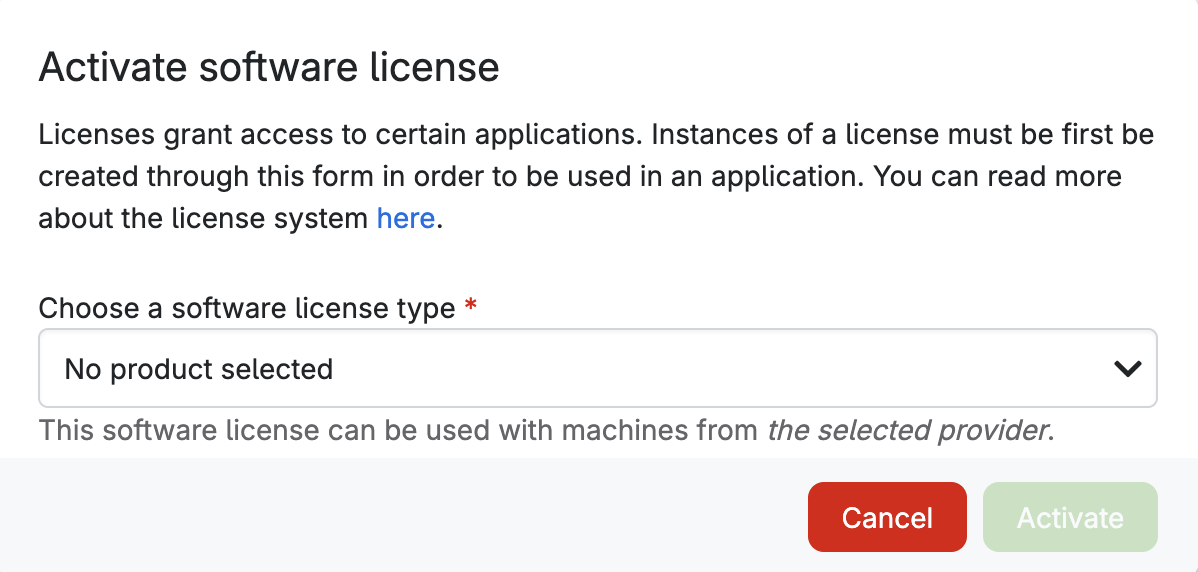
From here, the user can choose which type of license to activate from the drop-down menu.
Once activated, administrators can grant permission to various project groups by selecting the license name and clicking on Permissions at the top of the page. This allows them to manage access and assign the license to specific groups within the project.
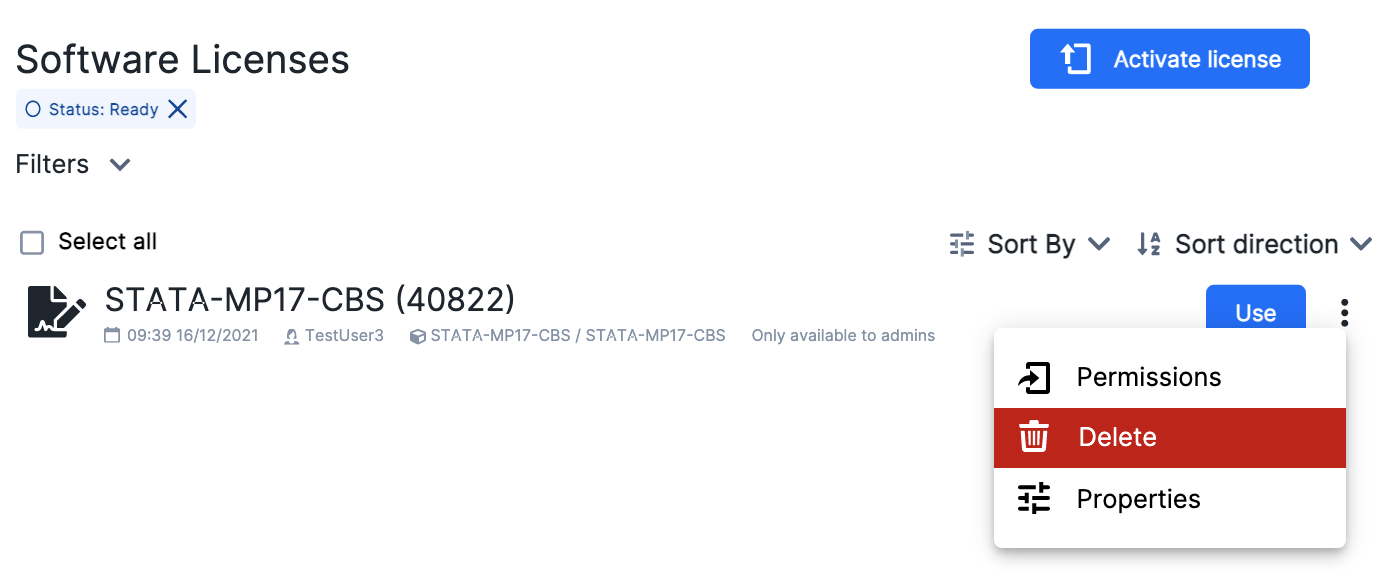
Conversely, by clicking on
the software license will be deactivated, making it unavailable for use by any member of the project. However, project administrators have the option to reactivate the license at any time by following the activation procedure described above.
Contents