Manage Projects
Project management encompasses various operations, such as adding members to a project or allocating resources to the project and its sub-projects. These actions can be performed by selecting the Project section in the navigation menu, as outlined below. Full control over these operations is granted only to the PI and projet administrators.
Members
From this panel, it is possible to add new members and create groups.
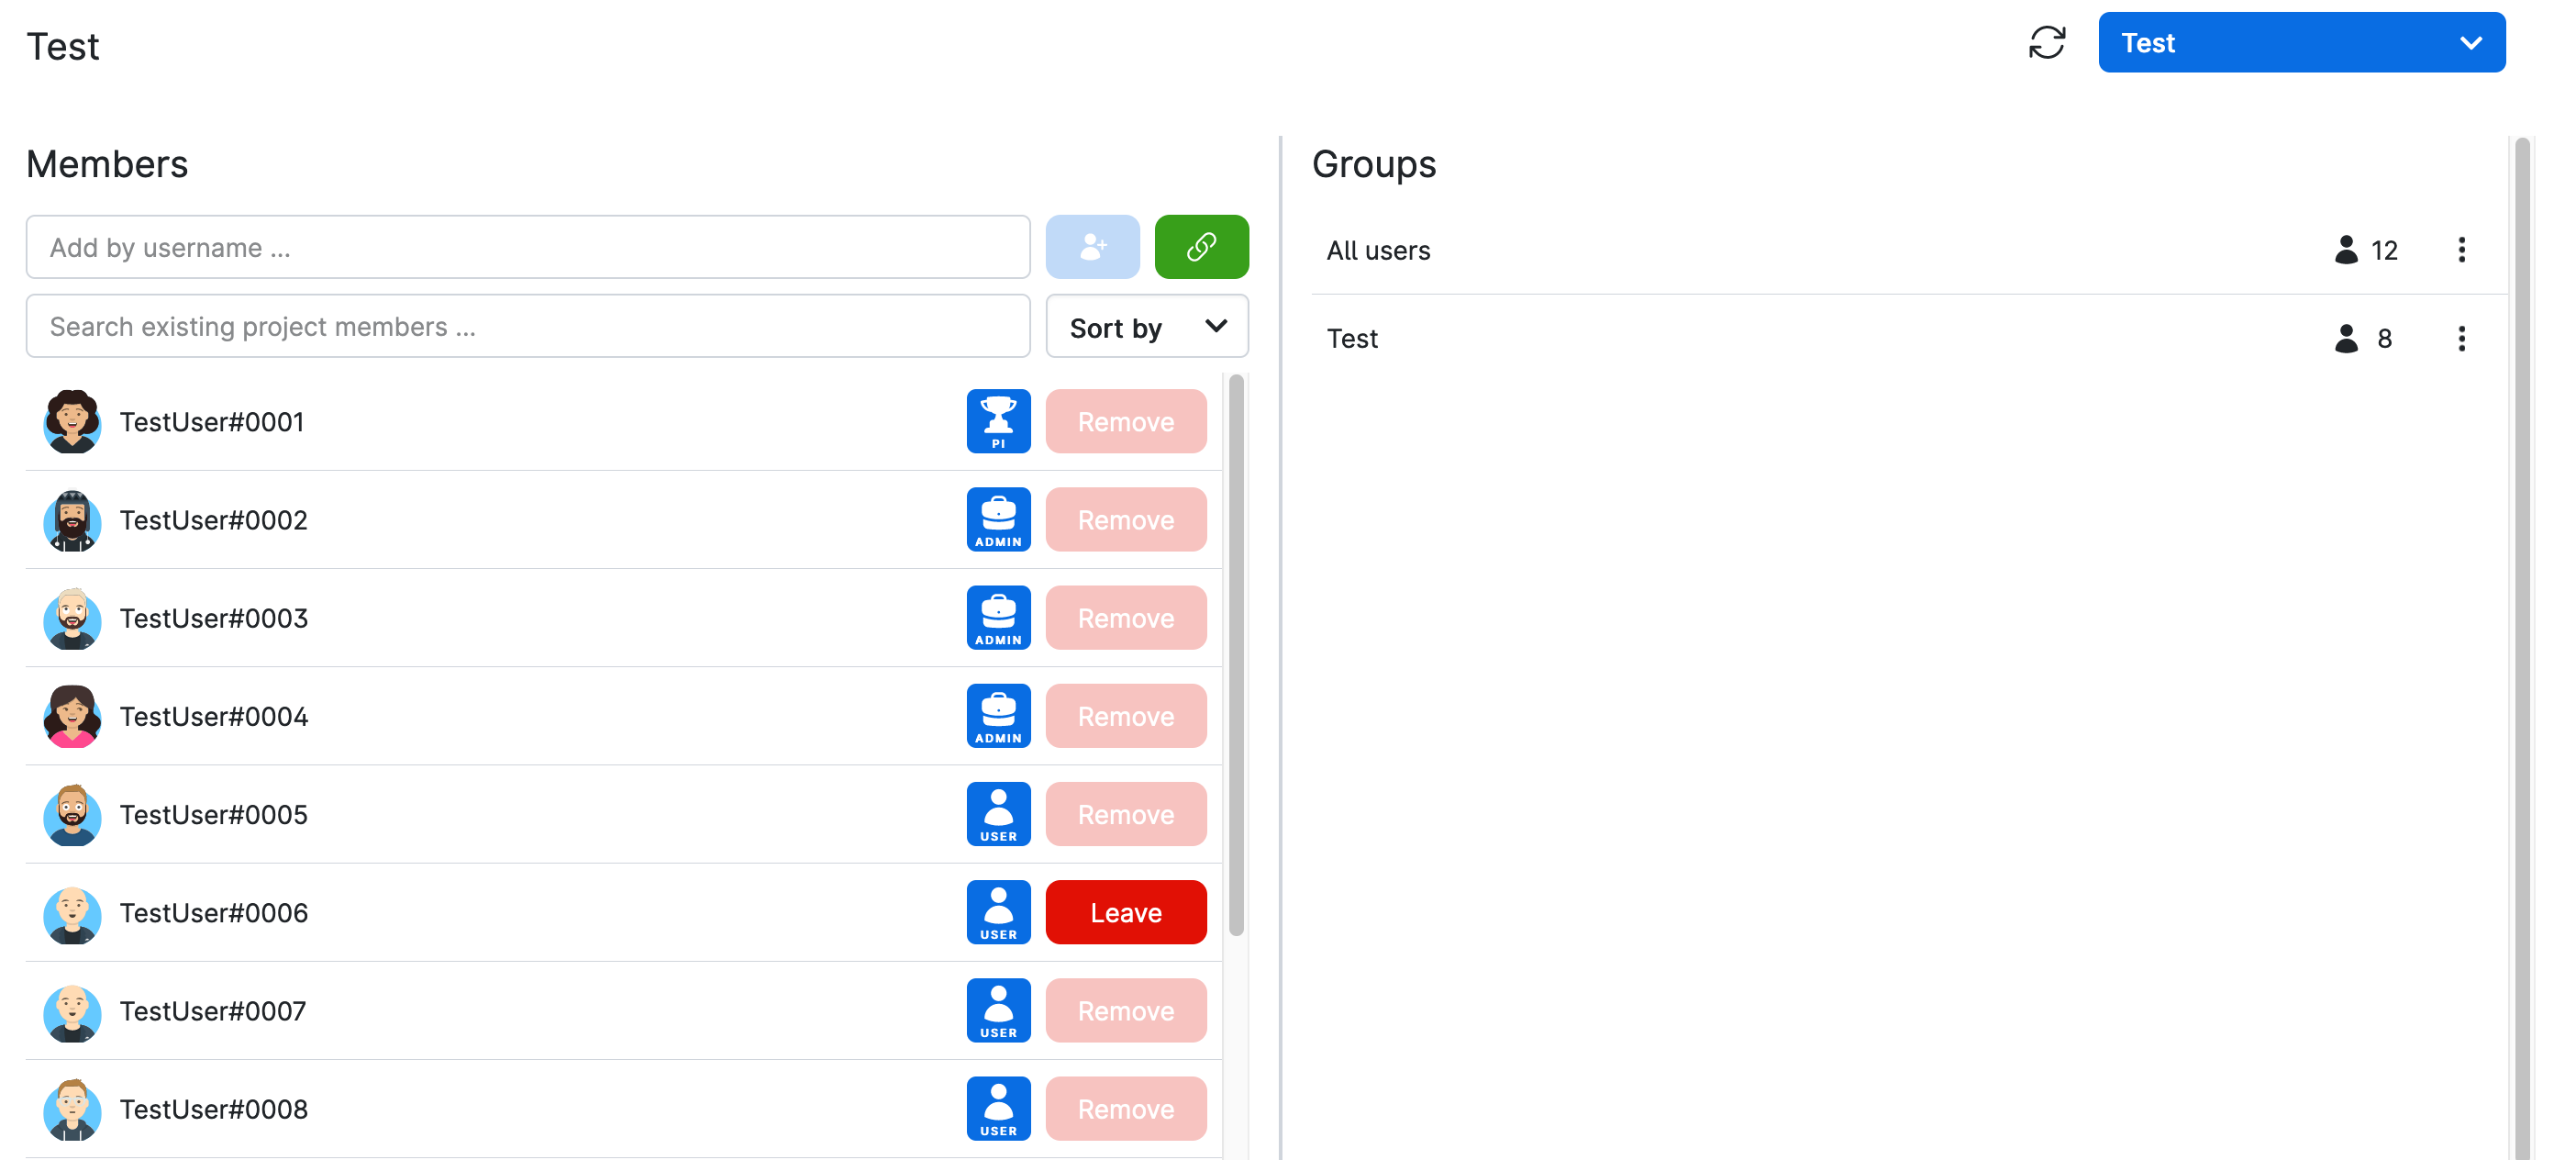
The PI and project administrators can invite project members by clicking
which will open a pop-up window:
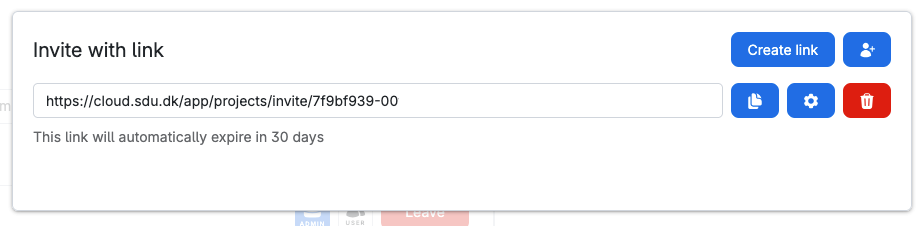
The pop-up provides an invitation link to share with project collaborators. Additional links can be created by clicking
From the same window, by clicking
the PI/administrator can modify the settings of the link. It is, for example, possible to make the link shorter- or longer-lived than the default 30 days, specify the role for users joining via this link.
A link can be deleted (and thereby invalidated) by clicking
Alternatively, it is possible to invite users by their username by clicking
and entering the invitees UCloud username.
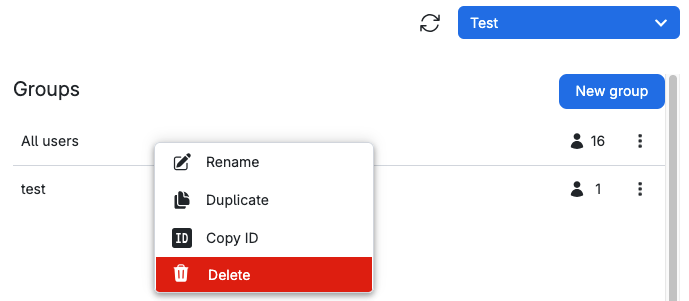
The PI and project administrators have the authority to modify the roles of other members within the project. Additionally, groups can be duplicated by selecting Duplicate from the menu located on the right side of the group name. This allows for the easy replication of group settings and permissions within the project.
Project Settings
From this page admins can modify project settings as for example allow subprojects to rename, add a project description and customize the templates accessible from the subprojects application grants. From the same page it is possible also to add a project logo and leave a project.
Leave a project
When a member leaves a project, they lose access to all files and compute resources associated with that project. However, their files within the project are not deleted. The PI and project administrators retain access to the files stored in the personal folders of former members, ensuring that important data is preserved and can still be managed by the project team.
Note
If the PI needs to depart from the project, transferring the PI role to another member is mandatory. Only the PI has the authority to perform this role transfer.
Allocations
The resource allocations are categorized into several groups: Compute, Storage, Public IP and Application license. Clicking on each resource category reveals its corresponding product name.
The PI and project administrators can access the allocation ID by clicking on the respective product name. For instance, by clicking on Compute
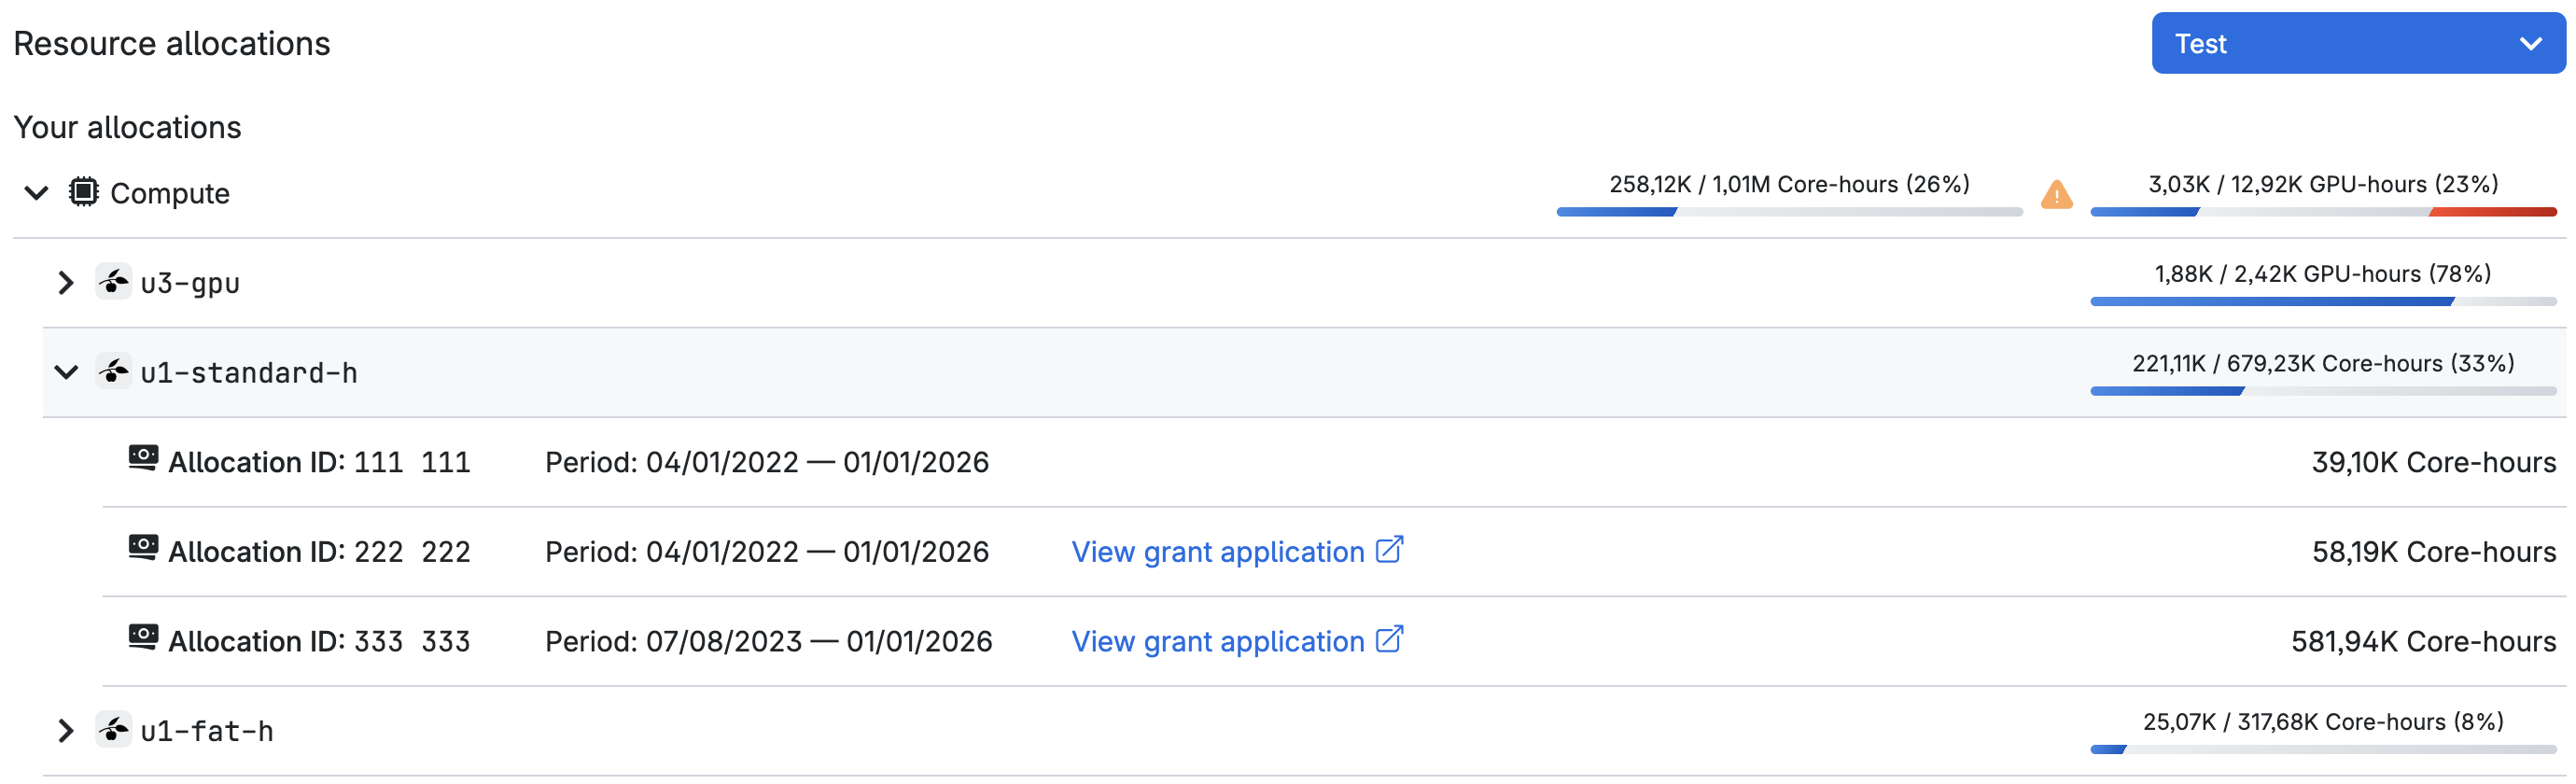
Each allocation is characterized by an expiration date. Expired allocations are marked with a red icon ![]() and are no longer available to the user.
and are no longer available to the user.
The total resource product usage, which encompass all the valid allocations, can be viewed on the right side of the product type. The fraction of overallocated resources is displayed in red.
From this page, the PI and project administrators can create new sub-projects using the
button. They can also manage sub-projects resources and access sub-projects grant applications. Furthermore, by clicking on a specific sub-project resource and product, they can edit sub-projects allocations.

New allocations can be granted to sub-projects using the ![]() button.
button.
The existing sub-projects are listed at the bottom of the page, accessible from the Project section of the navigation menu. Storage and compute resources are displayed as (used) / (initial) balance.
The PI of each sub-project is indicated to the left of the sub-project name.
Overallocation
Resource overallocation is permitted and feasible on UCloud to promote efficient and comprehensive resource utilization. However, this can result in subprojects not being able to fully utilize their allocated resources.
To alert users to this potential issue, UCloud distinguishes between the current balance and the usable balance:
The current balance for a sub-project represents the balance in relation to the total amount of resources allocated from the parent project.
The usable balance considers possible overallocation of resources from the parent project. If the available resources in the parent project are insufficient to cover the full current balance in the sub-project, the usable balance will be adjusted accordingly. Therefore, the usable balance may be smaller than (but never exceed) the current balance.
In case of overallocation, the icon is present in the Resource allocations panel of the central dashboard, indicating the overallocated resource.
Furthermore, in instances of overallocation, the usable balance is highlighted on the job submission page.
For example, for compute resources, the page will report:

Sub-projects
Sub-projects can be accessed from the navigation menu, selecting Project and clicking on Sub-projects. For details user can refer to the Allocations section.
The list of sub-projects can be filtered and ordered by clicking
which will open a pop-up window:
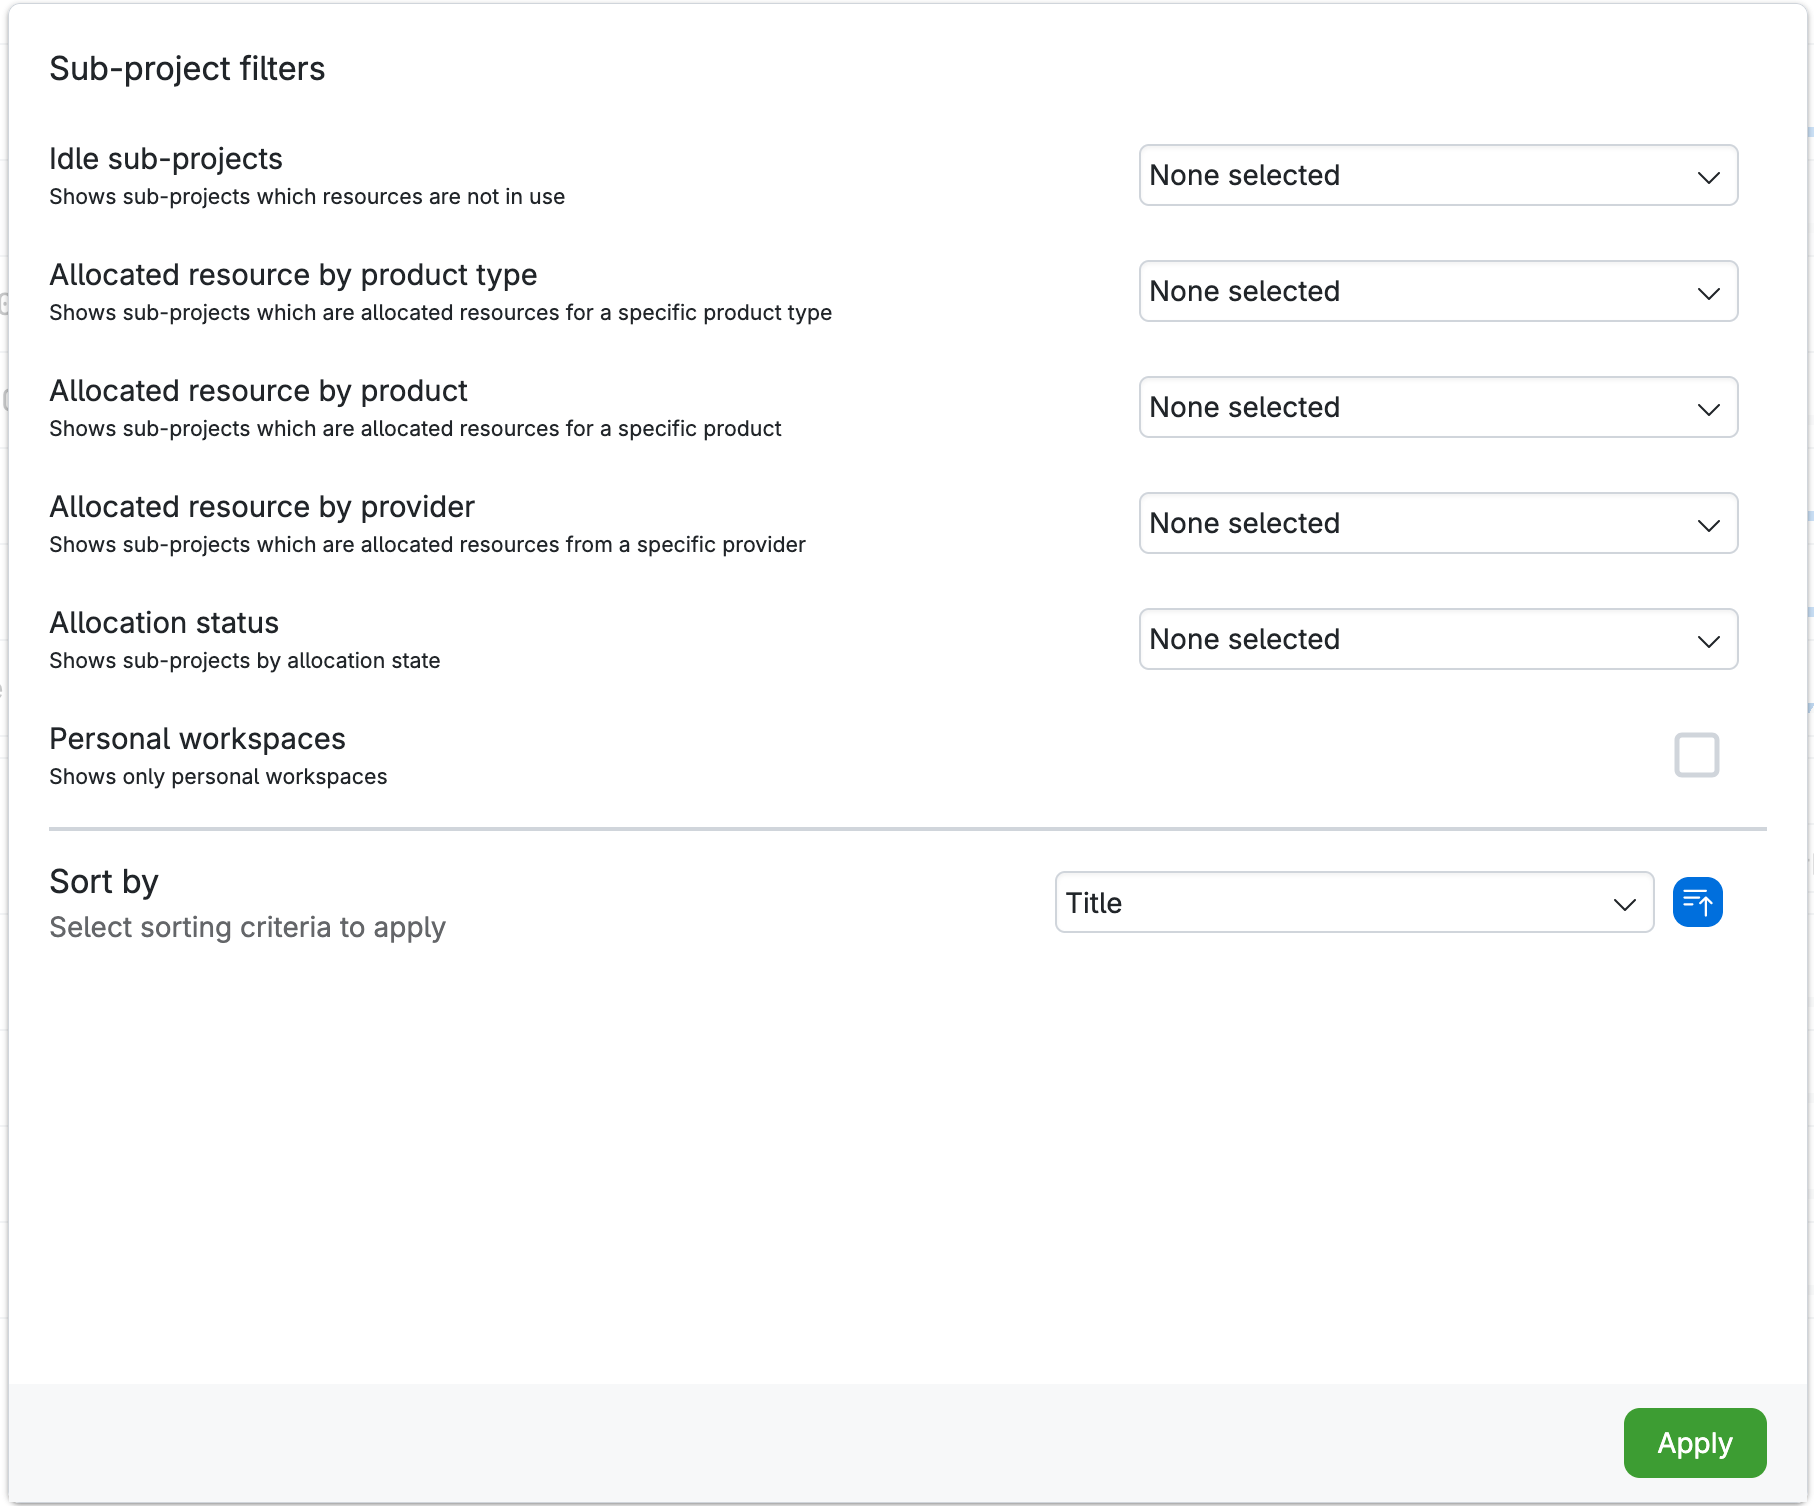
The user can apply one or more of the available filters. It is for possible to show sub-projects that
have not consumed resources for a given number of months,
have allocated resources for a specific product type,
have allocated resources for a specific product,
have allocated resources from a specific provider,
have allocations in a specific state (e.g., Active allocations, Expired allocations etc.).
In addition, it is possible to only show personal workspaces (My workspace).
The user can also choose to order the (filtered or unfiltered) list of sub-projects in ascending or descending order by e.g., PI, project age etc. The list is ordered by sub-project titles per default.
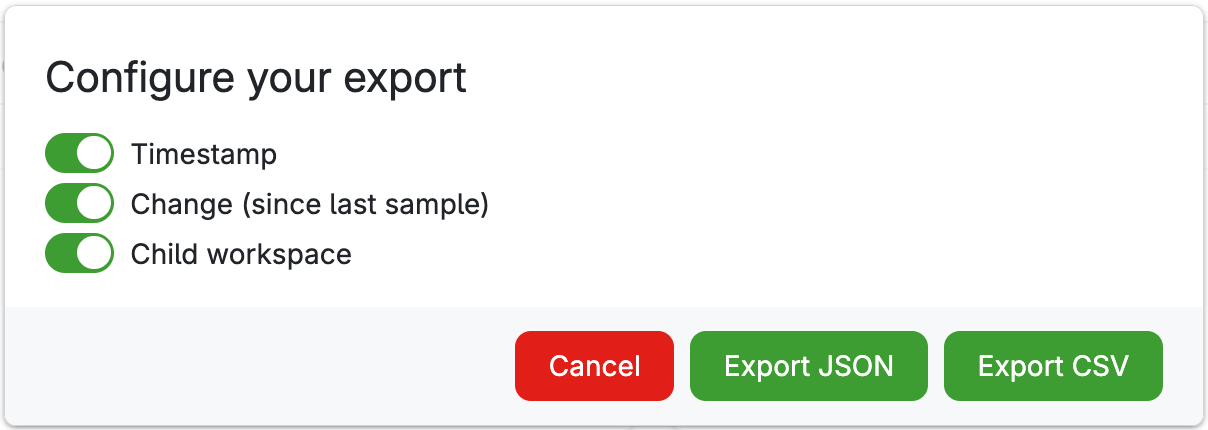
Exporting sub-project data
If a project has sub-projects, users can export data from these by clicking on
This will open a pop-up window where the user can choose what data to export (Usage, Quota etc.) and whether to export it in JSON or CSV format.

Note
The export functionality is limited to immediate sub-projects with direct allocations. It does not support data from sub-sub projects.
Usage
This panel provides information on resource usage, allowing users to filter data based on usage periods and/or product types.
Users can export the usage data by clicking the
button which will open a pop-up window:
The data can be exported in JSON or CSV format.
Users can also export data for all product types in a single JSON file by clicking the
button.
Grant Applications
It displays the status of outgoing and incoming sub-project grant applications.
The project PI/administrators can export received grant applications in JSON or CSV format by clicking the buttons
and
respectively.
Managing the Project Selector
Users can customize the sorting and layout of the project selector dropdown.
Starring projects
Projects can be starred.
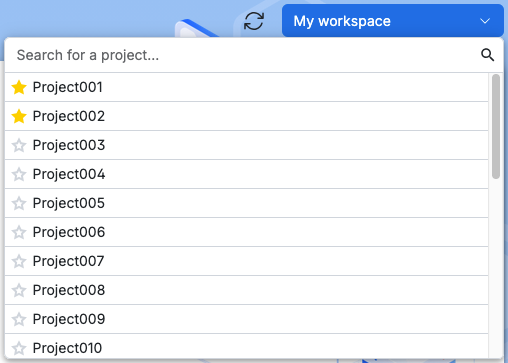
Starred projects will appear at the top of the project list. My workspace is always starred.
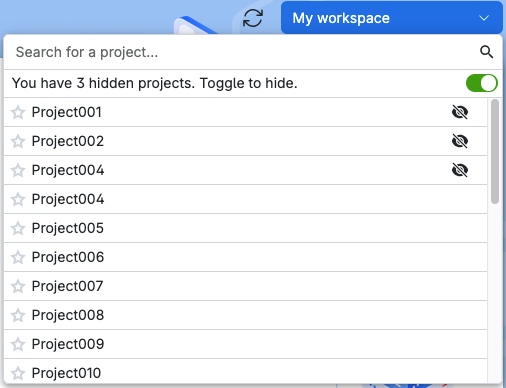
Hiding projects
Projects can also be hidden from the overview, which is particularly helpful for managing inactive or completed projects.
To hide a project, click the icon that appears upon hovering over a project name in the dropdown.
The picture below shows an example where three projects are hidden:
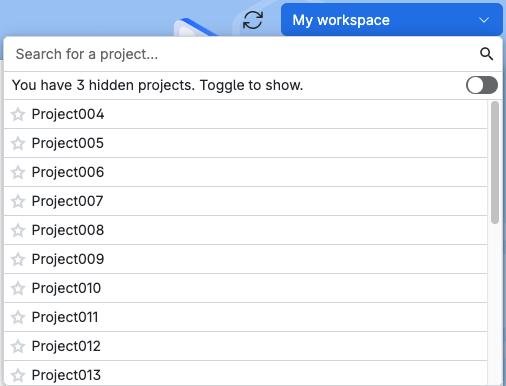
A toggle at the top of the menu provides access to hidden projects. The option appears only when projects have been hidden from the view.
Contents